Drive Belt Tensioner: Testing and Inspection
Drive Belt Auto-tensioner Inspection
Special Tools Required
- Belt tension release tool Snap-on YA9317 or equivalent, commercially available
1. Turn the ignition switch to ON (II), and make sure the A/C switch is OFF, then turn the ignition switch to LOCK (0).
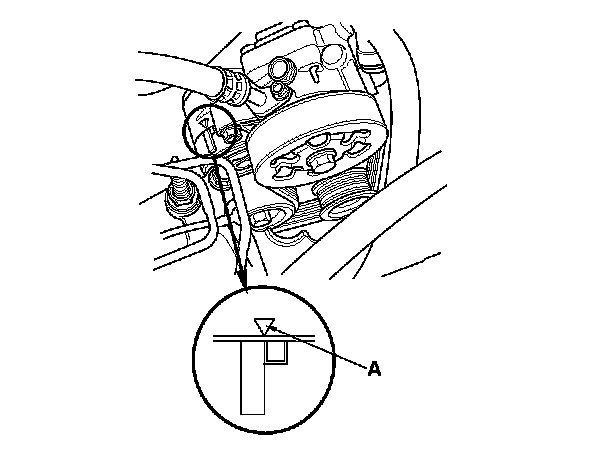
2. Check the position of the auto-tensioner indicator (A). Start the engine, then check the position again with the engine idling. If the position of the indicator moves or fluctuates, replace the auto-tensioner. Service and Repair
3. Check for abnormal noise from the tensioner pulley. If you hear abnormal noise, replace the tensioner pulley. Service and Repair
4. Remove the drive belt. Service and Repair
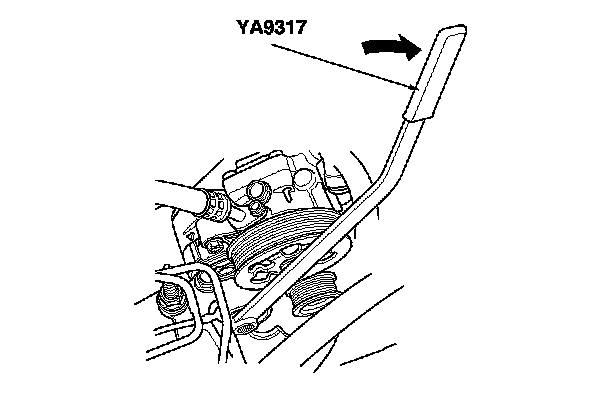
5. Move the auto-tensioner within its limit with the belt tension release tool in the direction shown. Check that the tensioner moves smoothly and without any abnormal noise. If the tensioner does not move smoothly or you hear abnormal noise, replace the auto-tensioner. Service and Repair
6. Remove the auto-tensioner. Service and Repair
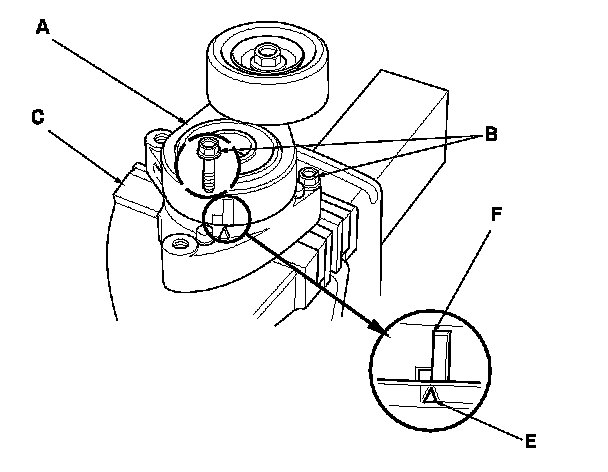
7. Clamp the auto-tensioner (A) by using two 8 mm bolts (B), and a vise (C) as shown. Do not clamp the auto-tensioner itself.
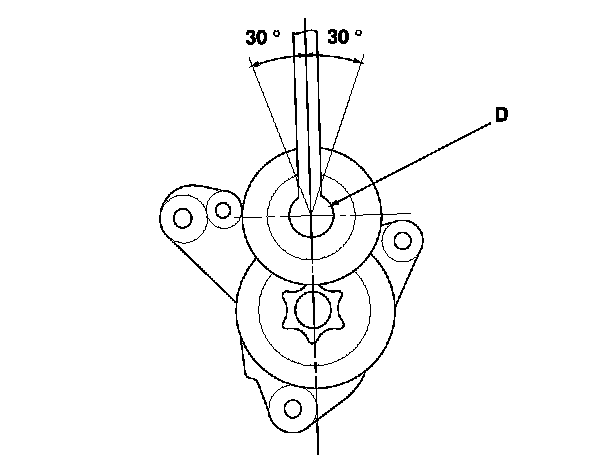
8. Set the torque wrench (D) in the pulley bolt, and align it as shown.
9. Align the auto-tensioner indicator (E) on the tensioner base with Max. belt position mark (F) on the tensioner arm by using the torque wrench, and measure the torque. If the torque value is out of specification, replace the auto-tensioner. Service and Repair
NOTE: If the auto-tensioner indicator exceeds the Max. belt position mark, recheck the torque.
Auto-tensioner Spring Torque
32.5-39.7 N-m (3.31-4.05 kgf-m, 23.9-29.3 lbf-ft)