Safing Sensor: Service and Repair
Rear Safing Sensor ReplacementRemoval
1. Disconnect the negative cable from the battery, and wait at least 3 minutes before beginning work.
2. Disconnect both side curtain airbag 2P connectors.
3. Remove the third row seat.
4. Disconnect the right side wire harness 2P connector from the rear safing sensor.
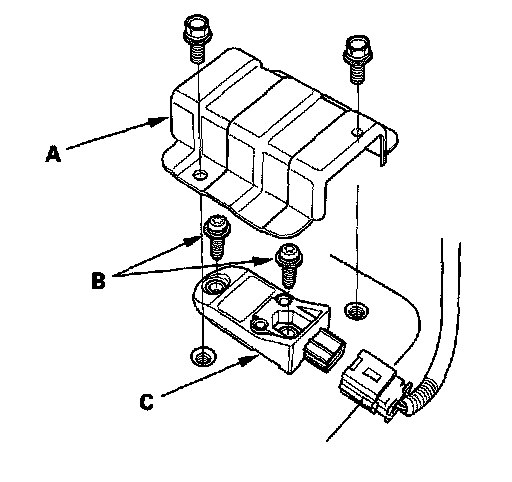
5. Remove the cover (A), and using a TORX T30 bit, remove the TORX bolts (B), then remove the rear safing sensor (C).
Installation
1. Install the new rear safing sensor (A) with TORX bolts (B) then connect the right side wire harness 2P connector (C) to the rear safing sensor.
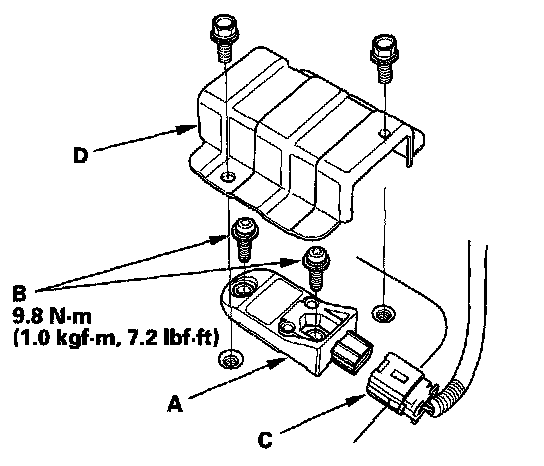
2. Reinstall the cover (D)
3. Reconnect the negative cable to the battery.
4. Install all removed parts.
5. After installing the rear safing sensor, confirm proper system operation Turn the ignition switch ON (II) the SRS indicator should come on for about 6 seconds and then go off.