Clutch Slave Cylinder: Service and Repair
Slave Cylinder ReplacementNOTE: Use fender covers to avoid damaging painted surfaces. Do not spill brake fluid on the vehicle; it may damage the paint; if brake fluid does contact the paint, wash it off immediately with water.
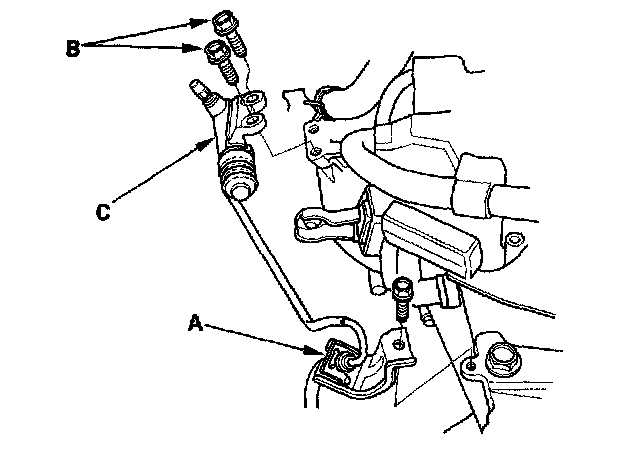
1. Remove the clutch line bracket (A), the mounting bolt (B) and the slave cylinder (C).
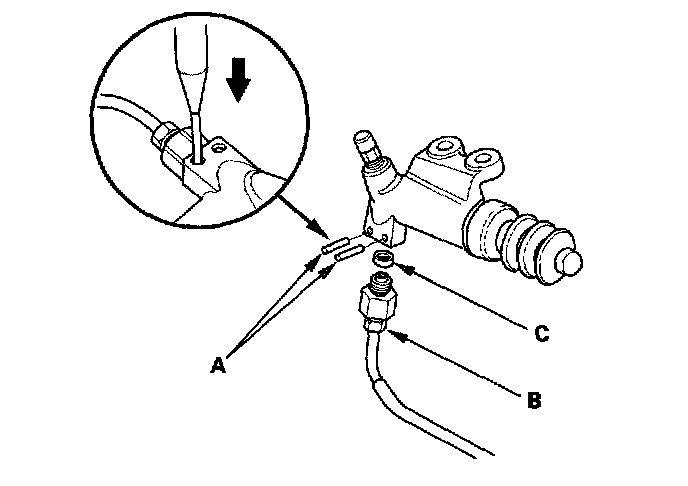
2. Remove the roll pins (A). Disconnect the clutch line (B), and remove the O-ring (C). Plug the end of the clutch line with a shop towel to prevent brake fluid from coming out.
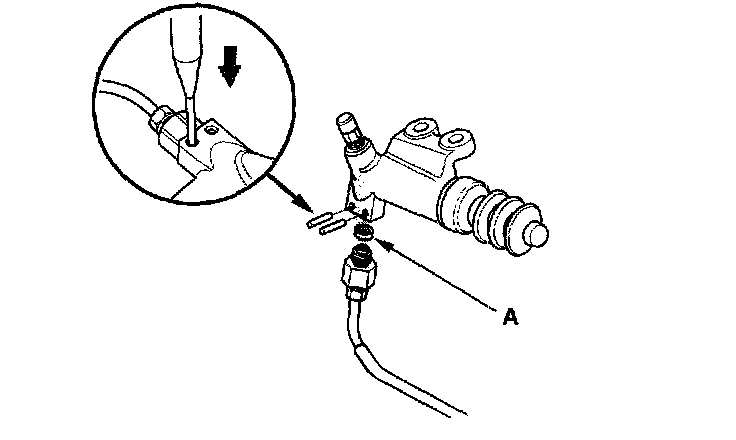
3. Install the slave cylinder in the reverse order of removal. Install the new O-ring (A).
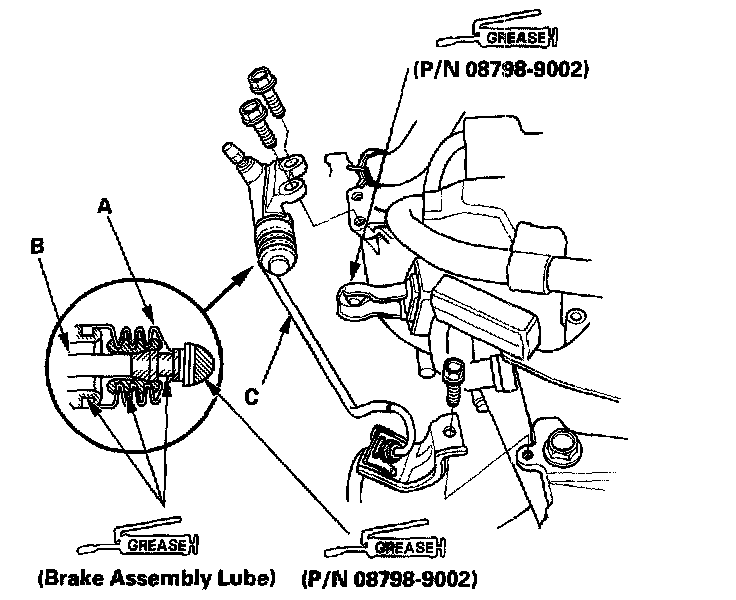
4. Pull the boot (A) back, end apply grease to the boot and slave cylinder rod (B). Reinstall the boot.
5. Apply super high temp urea grease (P/N 08798-9002) to the tip of the slave cylinder pushrod and the release fork. Tighten the slave cylinder mounting bolts to 22 Nm (2.2 kgf-m, 16 ft. lbs.).
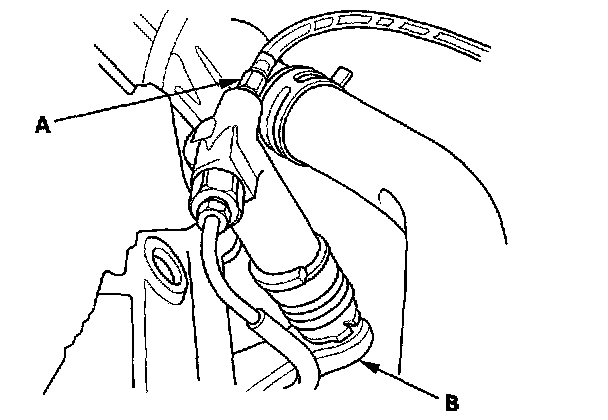
6. Bleed the clutch hydraulic system.
^ Attach a hose to the bleeder screw (A), and suspend the hose in a container of brake fluid.
^ Make sure there is an adequate supply of fluid in the clutch master cylinder, then slowly pump the clutch pedal until no more bubbles appear at the bleeder hose.
^ It may be necessary to limit the movement of the release fork (B) with a block of wood to remove all the air from the system.
^ Tighten the bleeder screw to 8 Nm (0.8 kgf-m, 5.8 ft. lbs.); do not overtighten it.
^ Refill the clutch master cylinder with fluid when done.
^ Use only Honda DOT3 or 4 Brake Fluid from an unopened container.
^ Confirm clutch operation and check for leaking fluid.
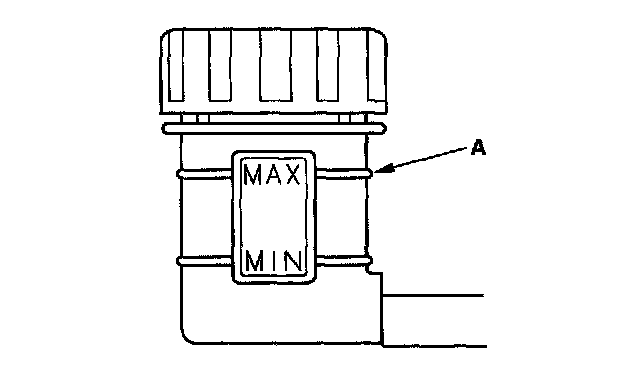
7. Make sure the fluid level in the reservoir is at the MAX (upper) level line (A).