Rear Brake Shoes: Installation
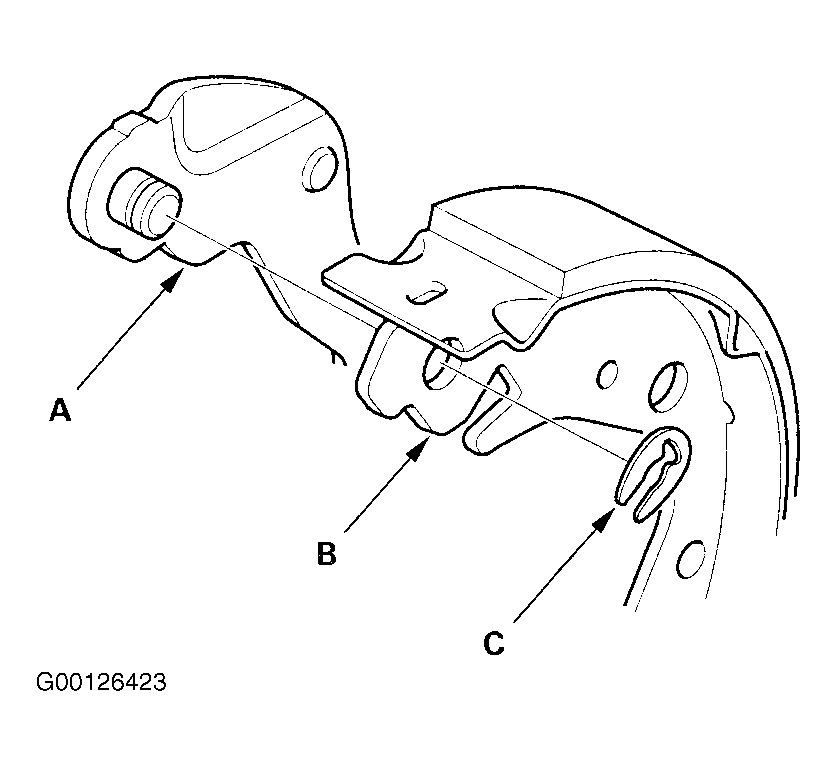
- Install the parking brake lever (A) on the rear brake shoe (B), and secure it with a new U-clip (C). Pinch the U-clip securely to prevent it from coming off. See Fig 1
.
 Courtesy of AMERICAN HONDA MOTOR CO., INC.
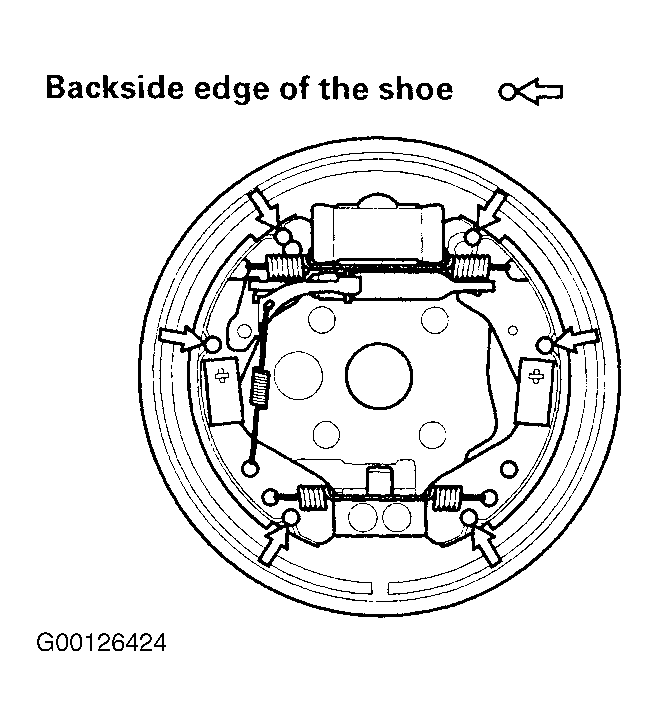
- Apply Molykote to the backside edges of the brake shoes as shown. Wipe off any excess. Do not get grease on the brake linings. See Fig 2
.
 Courtesy of AMERICAN HONDA MOTOR CO., INC.
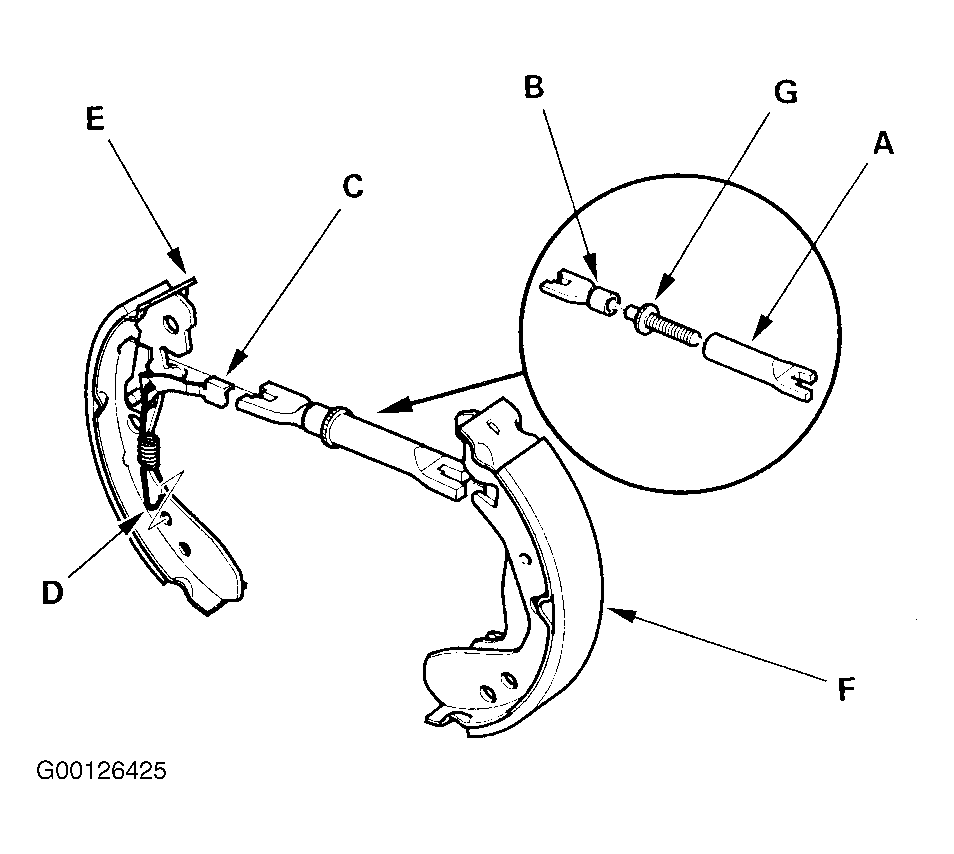
- Install the self-adjuster (C) and self-adjuster spring (D) on the front side brake shoe (E). See Fig 3
.
 Courtesy of AMERICAN HONDA MOTOR CO., INC.
- Connect the parking brake cable to the rear side brake shoe (F), and assemble the brake shoes with the clevis (A), adjuster bolt (G), and clevis (B). See Fig 3
.
- Install the shoes on the backing plate, fitting the top of the brake shoes on the wheel cylinder pistons and the bottom of the brake shoes on the locating plate.
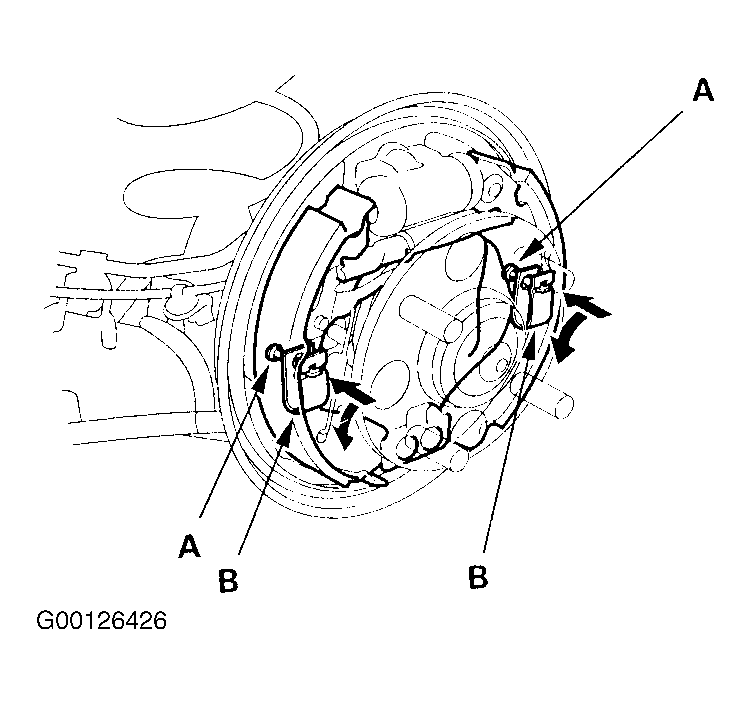
- Install the tensions pins (A), and secure them with the retainer springs by turning them while pushing each retainer spring (B). See Fig 4
.
 Courtesy of AMERICAN HONDA MOTOR CO., INC.
- Install the upper return spring (A) and lower return spring (B). See Fig 5
.
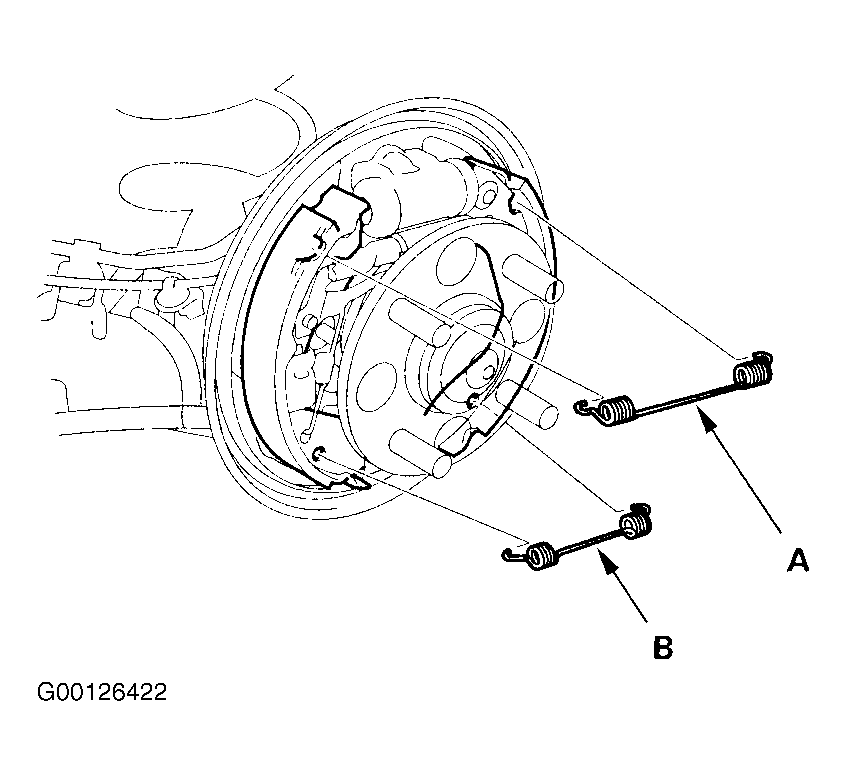 Courtesy of AMERICAN HONDA MOTOR CO., INC.
- Install the brake drum.
- Install the rear wheels.
- If the wheel cylinder has been removed, bleed the brake system. See BLEEDING
.
- Press the brake pedal several times to set the self-adjusting brake.
- Adjust the parking brake. See PARKING BRAKE
.
- Install fender skirt. See Figure
.