Rear Brake Drum: Removal
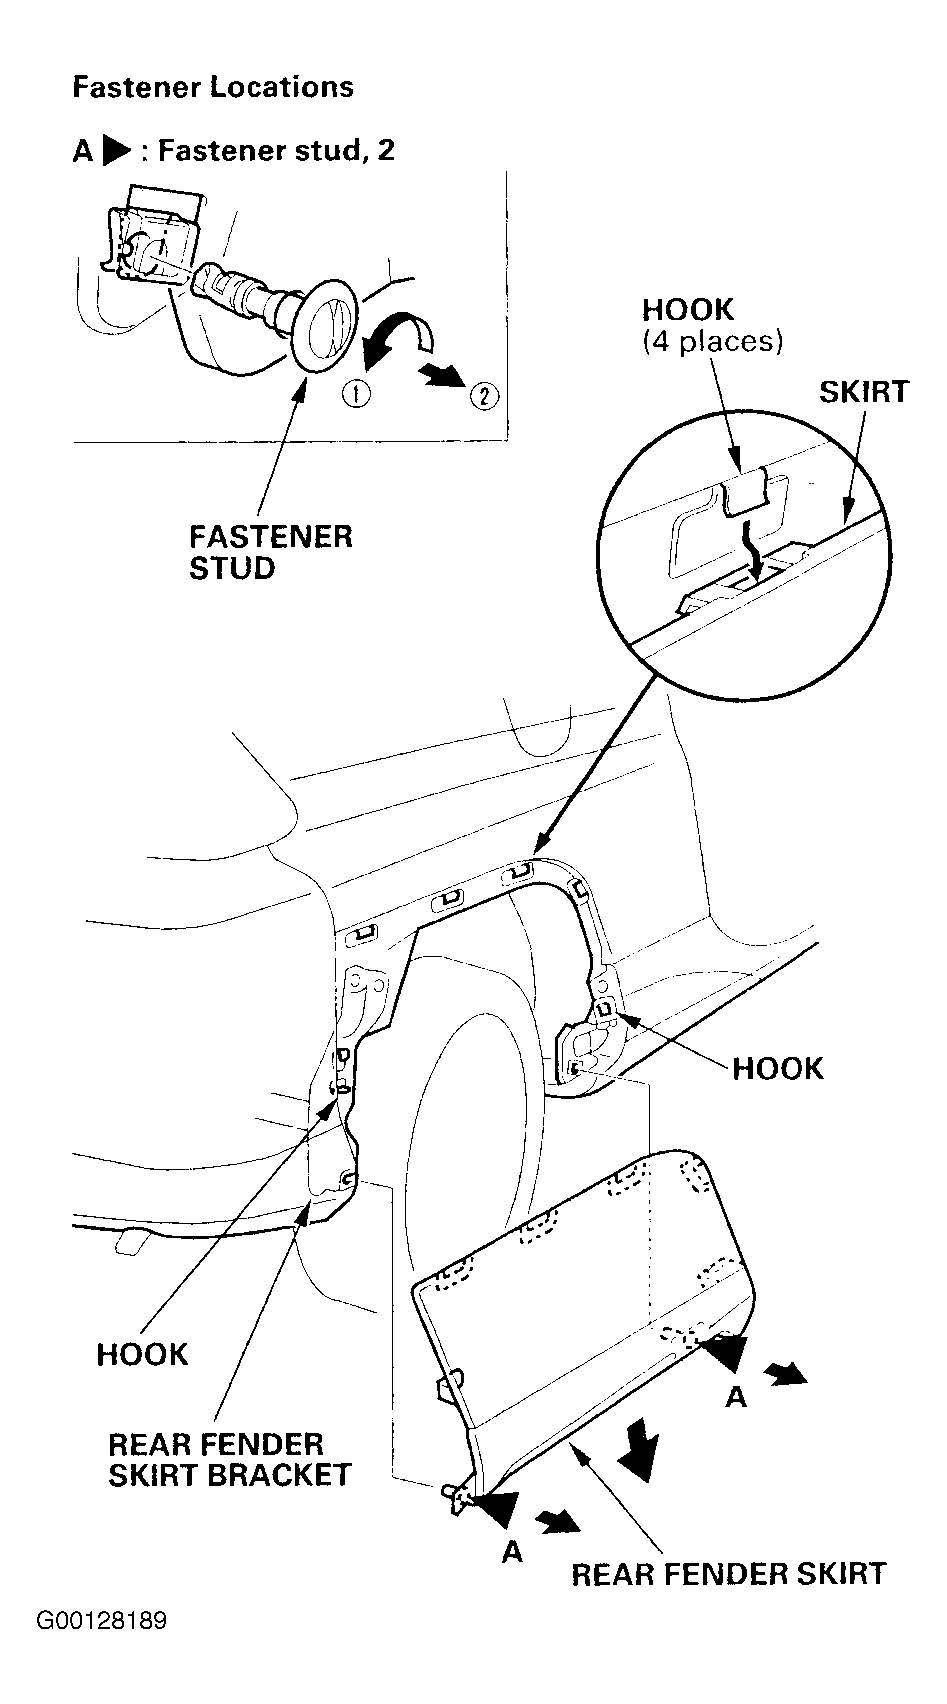
- Raise the rear of the vehicle, and make sure it is securely supported. Remove the fender skirts. See Fig 1
.
 Courtesy of AMERICAN HONDA MOTOR CO., INC.
- Release the parking brake, and remove the rear brake drum.
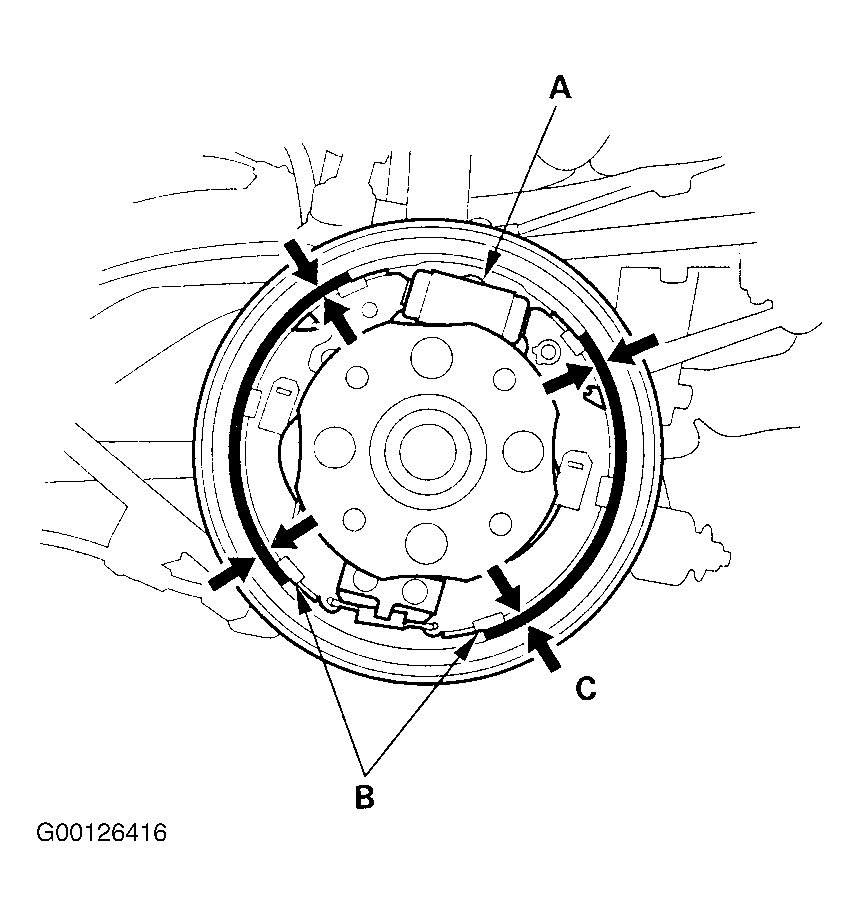
- Check the wheel cylinder (A) for leakage. See Fig 2
.
 Courtesy of AMERICAN HONDA MOTOR CO., INC.
- Check the brake linings (B) for cracking, glazing, wear, and contamination. See Fig 2
.
- Measure the brake lining thickness (C). Measurement does not include brake shoe thickness. See DRUM BRAKE SPECIFICATIONS
table.
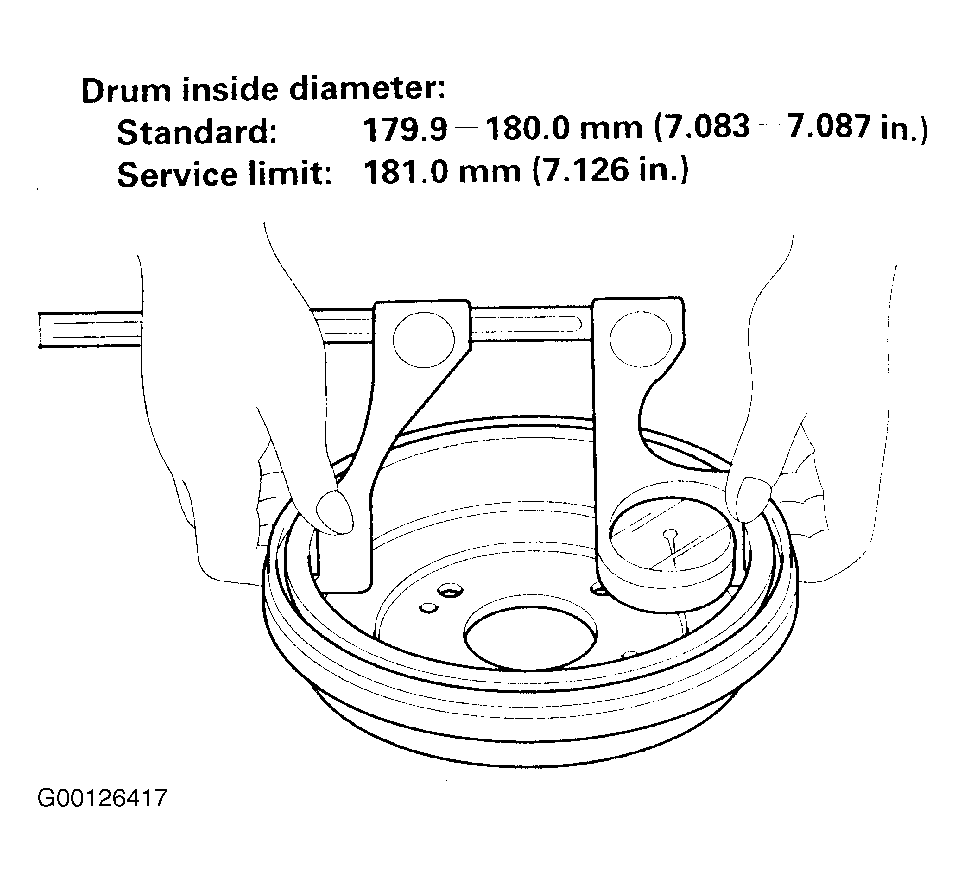
- Measure the inside diameter of the brake drum with inside vernier calipers. See Fig 3
.
 Courtesy of AMERICAN HONDA MOTOR CO., INC.
- If the inside diameter of the brake drum is beyond the service limit, replace the brake drum. See DRUM BRAKE SPECIFICATIONS
table.
- Check the brake drum for scoring, grooves, cracks, and corrosion.