A/T Gear Position Switch Test
- Turn ignition off. Remove center console. Disconnect gear position switch 14-pin connector. Check continuity between specified switch terminals and switch position. See Fig 1
. Go to next step.
- Move shift lever back and forth without pushing shift lever at each switch position and check for continuity within the range of free play of shift lever. Check for each shift lever position. If continuity exists within the range of free play for each shift lever position, switch is okay. If continuity does not exist within the range of free play for any shift lever position, go to next step.
- Move shift lever to Park position. Loosen gear position switch mounting nuts. Slide switch in the direction of "D" or "D4", within .079" (.1896 mm). Continuity should be present between switch terminals No. 1 and 7 in the free play range of shift lever. See Fig 1
. Adjust as necessary and recheck continuity between switch terminals No. 1 and 7. If adjustment is not possible, go to next step.
- Check for damage in shift lever detent or bracket. Replace as necessary. If no damage is found, replace gear position switch. Adjust switch and attempt to start engine with shift lever in "N" (Neutral) and "P" (Park) positions. Engine should start. Ensure gear position indicator on instrument panel is operating properly. If indicator is not working properly, perform A/T GEAR POSITION INDICATOR INPUT TEST
under SYSTEM TESTS.
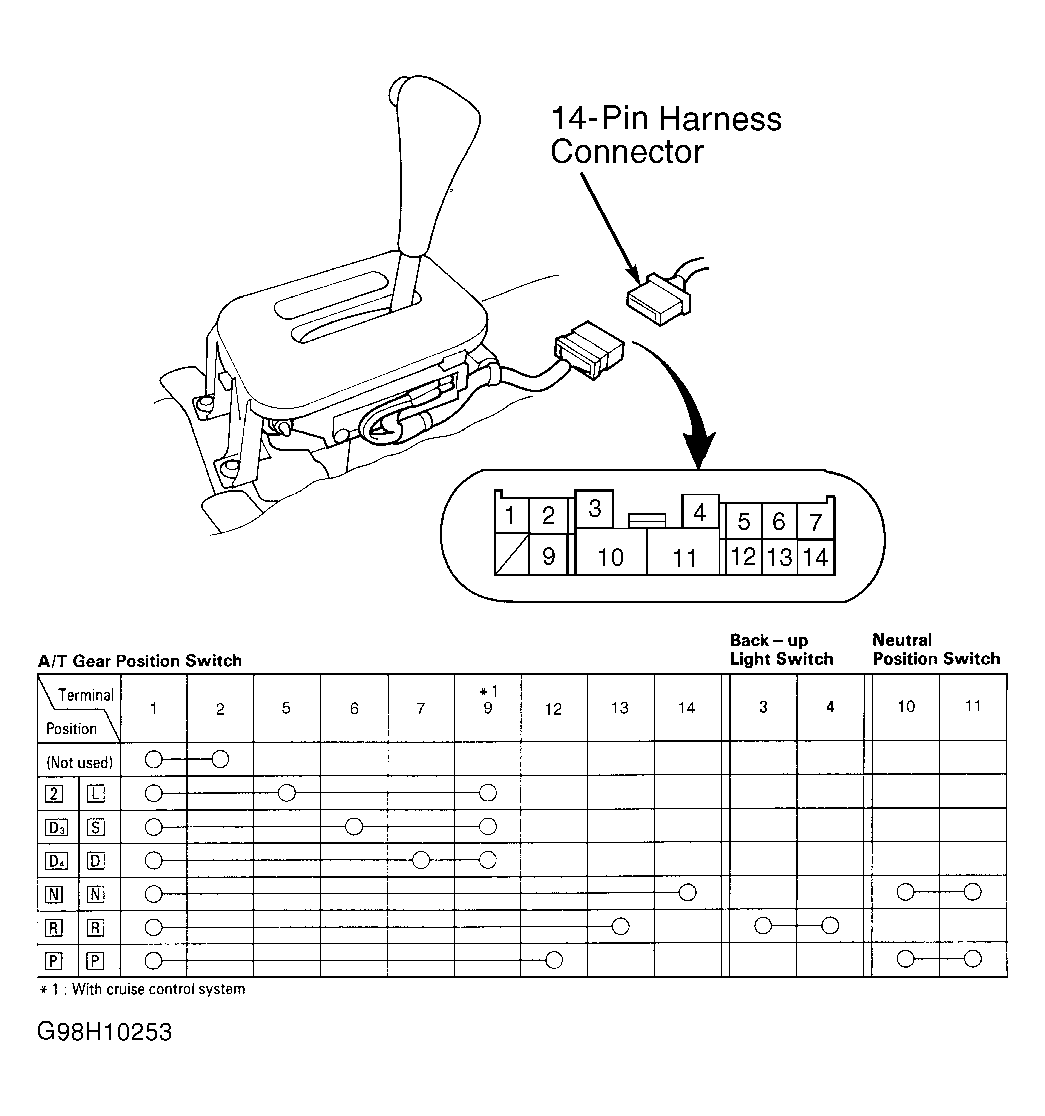 Courtesy of AMERICAN HONDA MOTOR CO., INC.