Clutch Coil: Installation
- To install, reverse removal procedure. Align lug on clutch coil with hole in front housing of compressor. Install snap ring with chamfered side facing out. Connect clutch coil lead to compressor housing. Install felt ring and shim(s). See Fig 1.
- Position pulley squarely over coil. Ensure compressor boss and inside area of pulley bearing are clean and free of foreign material. Using Pulley Installer (09991-06010), press pulley onto compressor boss. Install pulley snap ring.
- Install clutch plate. Using feeler gauge, ensure air gap between clutch plate and pulley is 0.012-0.020" (0.30-0.50 mm). If air gap is incorrect, add or remove shim(s) as necessary. Hold clutch plate and tighten NEW compressor shaft bolt to 10 ft. lbs. (13 N.m).
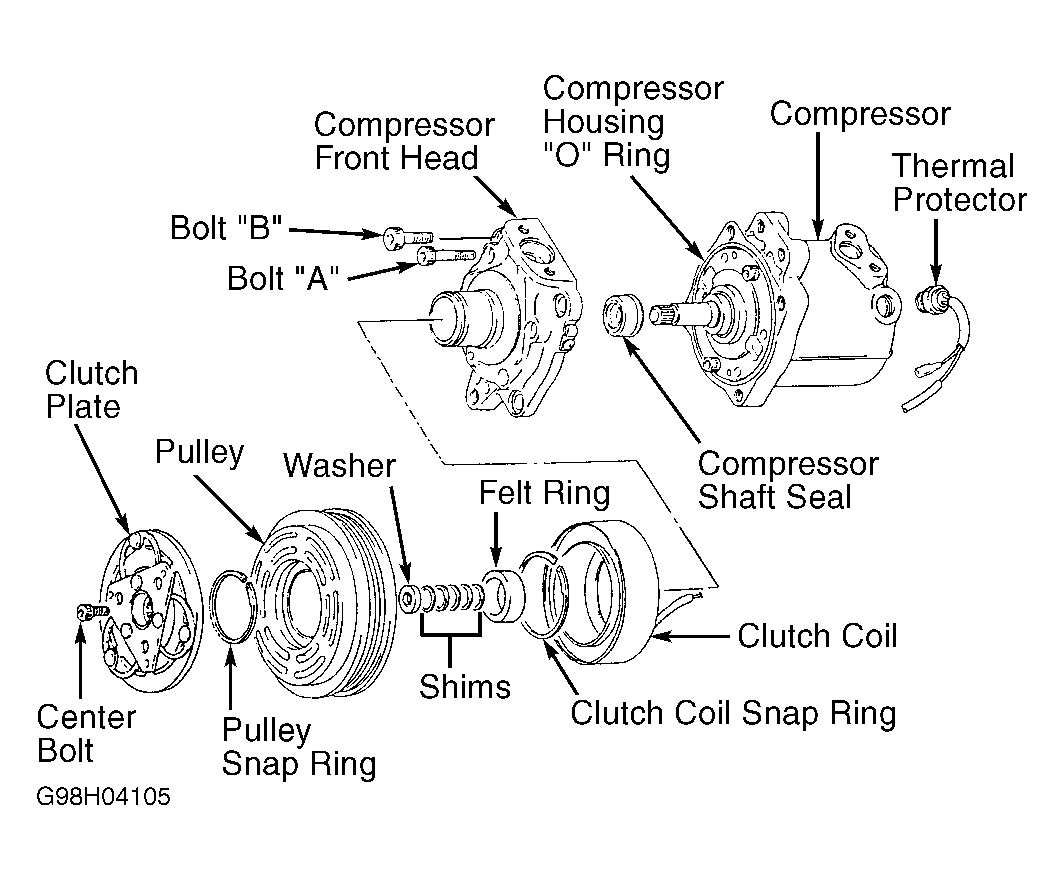 Courtesy of © TOYOTA, LICENSE AGREEMENT TMS1002