Disassembly & Inspection
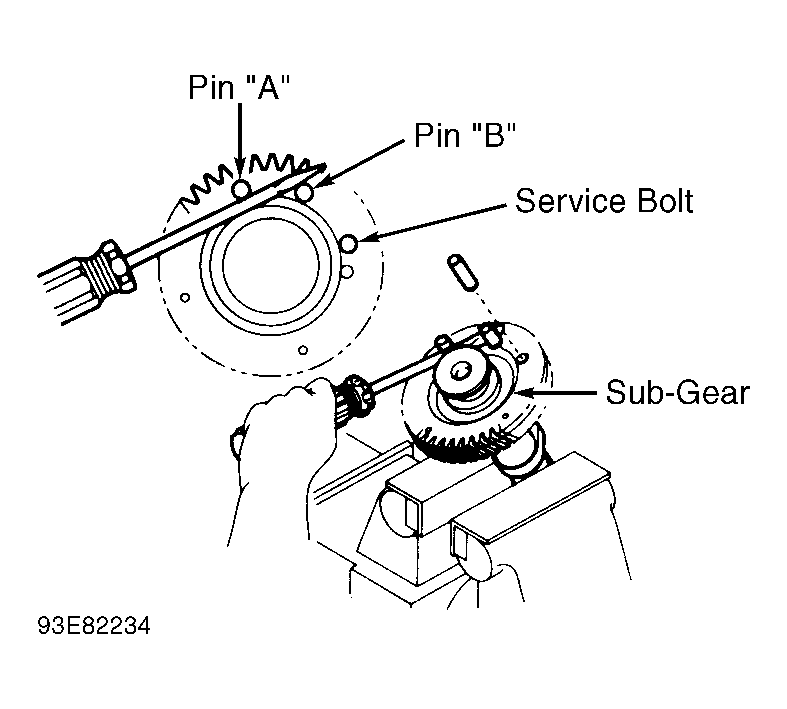
- To disassemble intake camshaft, insert pins "A" and "B" in sub-gear holes. See Fig 1
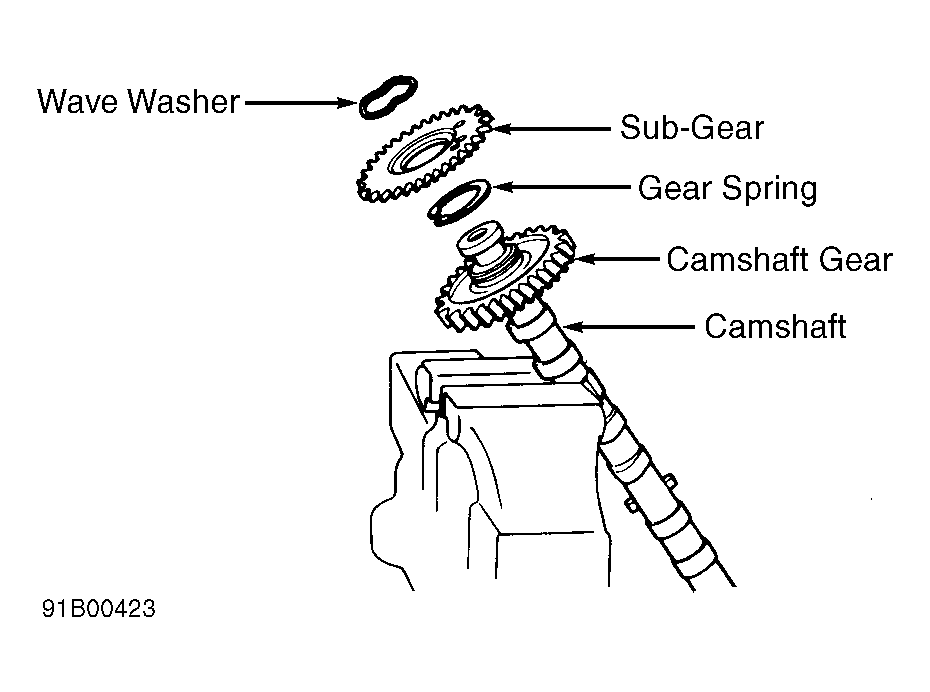
. Using screwdriver, rotate sub-gear clockwise and remove service bolt. Remove pins. Remove snap ring, wave washer, sub-gear and gear spring. See Fig 2
.
- Inspect components for damage. Measure camshaft journal diameter, lobe height and journal runout. Replace camshaft if measurements are not within specification. See CAMSHAFT
table under ENGINE SPECIFICATIONS.
- Install camshaft in cylinder head without sub-gear. Using Plastigage, check camshaft oil clearance. Tighten camshaft bearing cap bolts to specification when checking oil clearance. See TORQUE SPECIFICATIONS
. Replace camshaft and/or cylinder head if oil clearance is not within specification. See CAMSHAFT
table under ENGINE SPECIFICATIONS.
- Check camshaft end play with camshaft bearing cap bolts tightened to specification. Replace camshaft and/or cylinder head if end play is not within specification. See CAMSHAFT
table under ENGINE SPECIFICATIONS.
- Use a dial indicator to check gear backlash between camshaft gears. Replace both camshafts if backlash exceeds specification. See CAMSHAFT
table under ENGINE SPECIFICATIONS.
- Measure distance between ends of gear spring. Replace gear spring if distance is not .669-.693" (17.0-17.6 mm).
 Courtesy of GENERAL MOTORS CORP.
 Courtesy of GENERAL MOTORS CORP.