Valve Body Assembly - On-Vehicle R & I: Installation
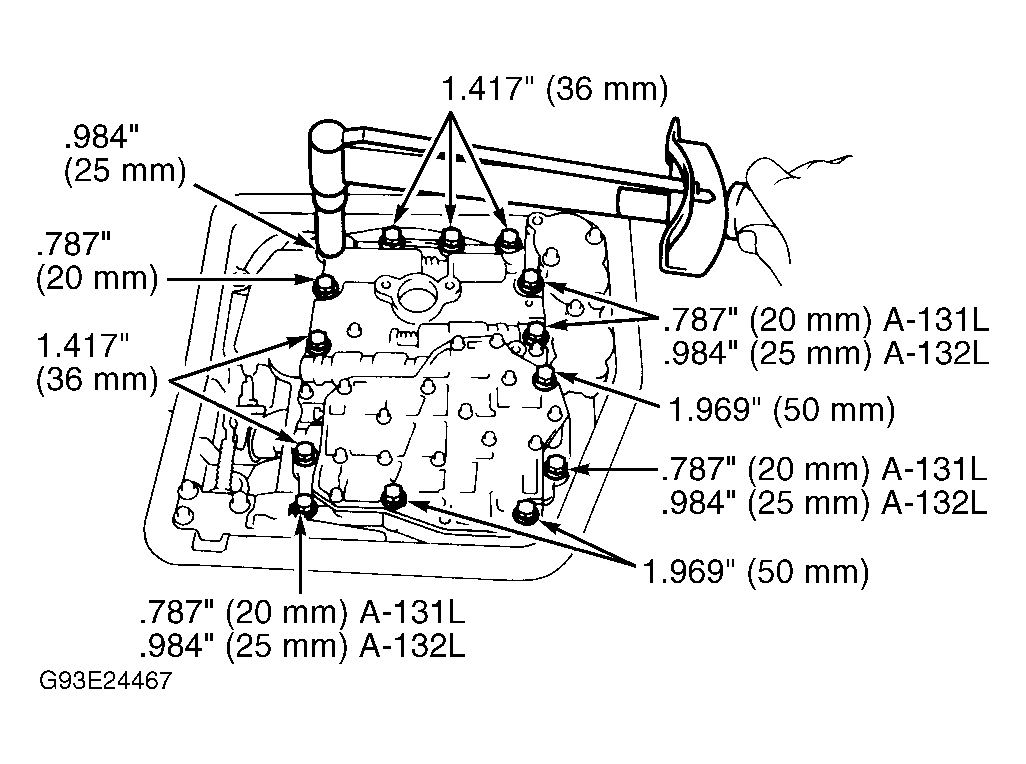
- Install governor apply gasket. Install governor oil strainer. Hold valve body cam downward. Install throttle cable in slot. Install control valve assembly. Ensure kickdown switch wire is not under valve assembly. Install control valve assembly bolts finger tight. Ensure bolts are installed correctly. See Fig 2. Tighten bolts to 89 INCH lbs. (10 N.m).
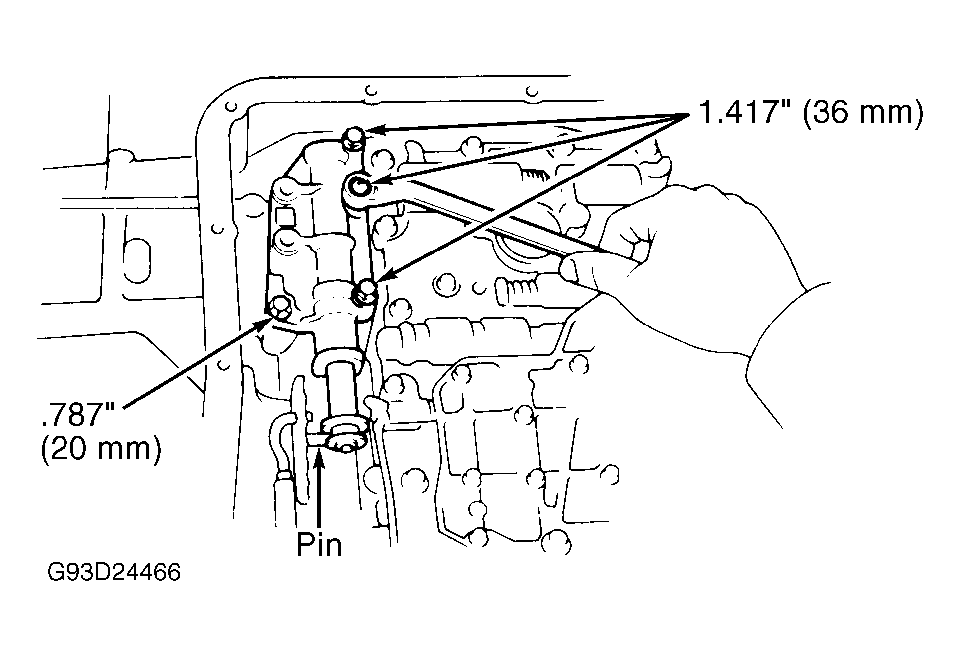
- Align manual valve with pin on manual shift lever. Install manual valve body. Install manual valve body bolts and tighten to 89 INCH lbs. (10 N.m). Install detent spring and tighten bolts to 89 INCH lbs. (10 N.m). Ensure manual valve lever contacts center of roller on detent spring. Using a plastic hammer, tap oil tubes into place. Install oil tube bracket. Tighten bolts to 89 INCH lbs. (10 N.m).
- Install oil strainer. Tighten bolts to 89 INCH lbs. (10 N.m). Install magnets in oil pan. Ensure magnets do not interfere with oil tubes. Install oil pan and gasket. Tighten bolts to 43 INCH lbs. (4.9 N.m). Fill transaxle with fluid.
 Courtesy of © TOYOTA, LICENSE AGREEMENT TMS1002
 Courtesy of © TOYOTA, LICENSE AGREEMENT TMS1002