Installation (1.6L SOHC)
- Rotate camshaft so locating dowel on camshaft sprocket is at 12 o'clock position and timing mark aligns with cylinder head surface. See Figure
.
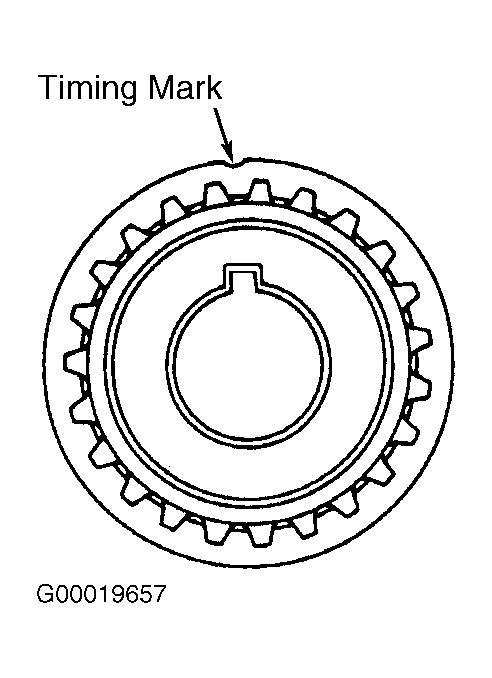
- Ensure timing mark (notch) on rear of crankshaft sprocket aligns with timing mark on oil pump. See Fig 1
. Install timing belt over crankshaft sprocket, tensioner pulley, water pump and camshaft sprocket.
 Courtesy of GENERAL MOTORS CORP.
- Insert a hex wrench into the tensioner pulley hex hole. Rotate pulley counterclockwise to tension the belt. Hold pulley stationary, and temporarily tighten the bolt.
- Turn the crankshaft 2 complete counterclockwise revolutions and align the crankshaft timing sprocket mark with mark on oil pump. See Fig 1
.
- Loosen timing belt tensioner pulley bolt. Insert a hex wrench into the tensioner pulley hex hole. Rotate pulley counterclockwise to tension the belt. Hold pulley stationary, and tighten pulley bolt to specification. See TORQUE SPECIFICATIONS
.
- Move crankshaft back to about 50 degrees BTDC and back to TDC of No. 4 cylinder. Align the crankshaft timing sprocket mark with mark on oil pump. See Fig 1
. Rotate camshaft so locating dowel on camshaft sprocket is at 12 o'clock position and timing mark aligns with cylinder head surface. See Figure
.
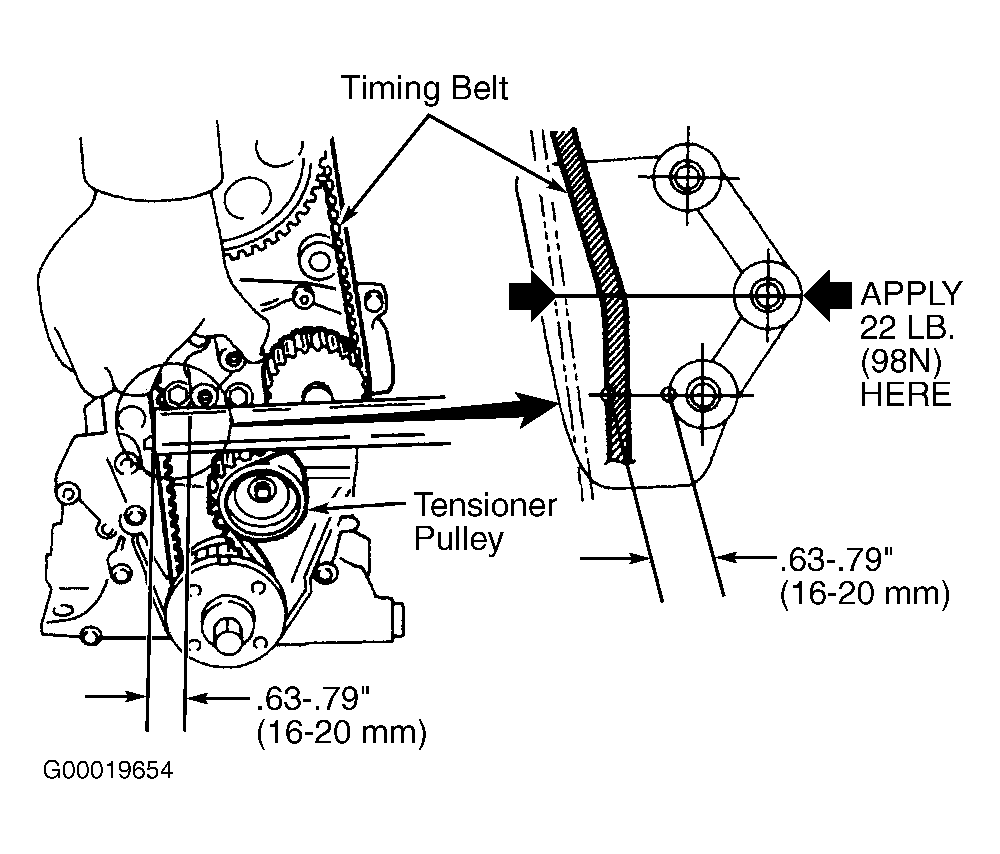
- Measure timing belt deflection. See Fig 2
. If deflection is not 0.63-0.79" (16-20 mm) with 22 lbs. of pressure applied, readjust timing belt tension. Ensure camshaft and crankshaft timing marks are still aligned.
 Courtesy of GENERAL MOTORS CORP.
- Raise and support vehicle. Install timing belt cover with 2 lower bolts. Tighten bolts. See TORQUE SPECIFICATIONS
.
- Install crankshaft pulley to crankshaft. Tighten side bolts and center bolts to specification. See TORQUE SPECIFICATIONS
.
- Install right side under cover. Lower vehicle.
- To install remaining components, reverse removal procedure. Tighten bolts to specification. See TORQUE SPECIFICATIONS
.