Valve Body Retainer Specifications Tables: Reassembly
- Coat all components with ATF. To reassemble, reverse disassembly procedure. Ensure check balls, pins, strainer and vibrating stopper on lower side of upper valve body are installed correctly. See Figure. Ensure retainers and strainer on lower valve body are installed correctly. See Figure.
- Position NEW No. 2 gasket, plate and NEW No. 1 gasket on lower valve body. Ensure gaskets are installed in correct locations. See Fig 1. Place lower valve body with plate and gaskets on upper valve body. DO NOT
let components separate. Align each bolt hole in valve bodies with gaskets and plate.
- Install and finger tighten bolts in lower valve body to secure upper valve body. See Figure. Install lower valve body cover over NEW gasket. Install and finger tighten cover bolts. See Figure. Install and finger tighten bolts in upper valve body.
- Ensure retainers are installed correctly. Position NEW gasket, plate and gasket. Tighten upper and lower valve body bolts to 56 INCH lbs. (6.4 N.m). Install NEW "O" rings on solenoids. Lubricate "O" rings with ATF and install solenoids. Tighten bolts for single solenoid to 56 INCH lbs. (6.5 N.m). Tighten bolts for 2 solenoids mounted together to 89 INCH lbs. (10 N.m).
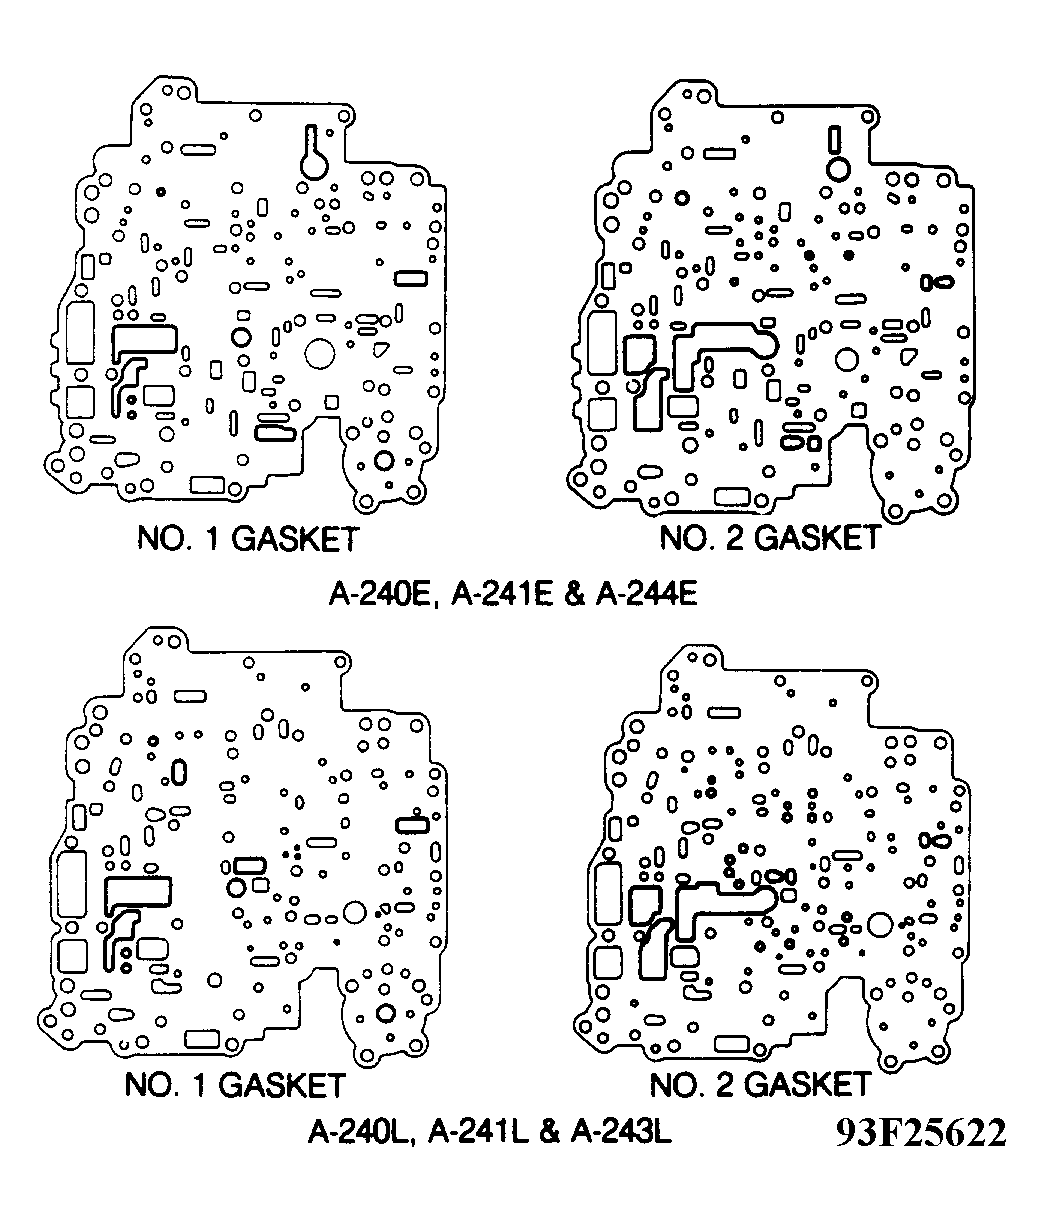 Courtesy of © TOYOTA, LICENSE AGREEMENT TMS1002