Countershaft Assembly: Reassembly
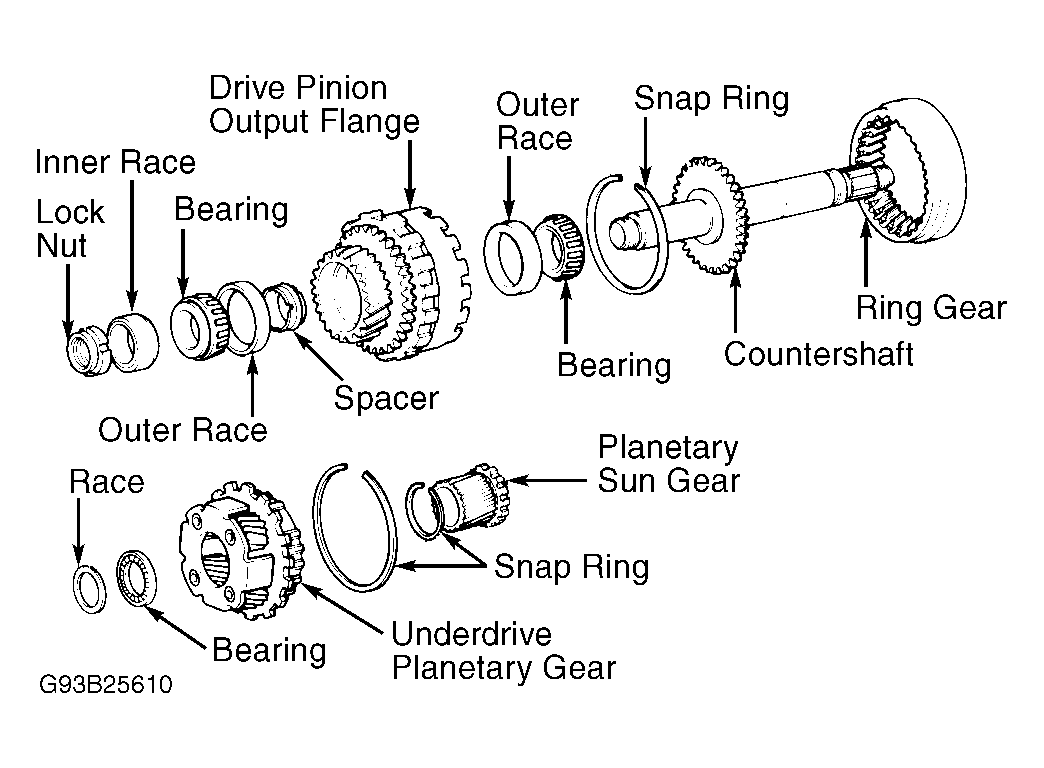
- Using Bearing Installer (09351-32180) and Adapter (09351-32150), press bearing of thick inner race on countershaft. Install ring gear and snap ring to countershaft. Install bearing outer races to drive pinion. Using Adapters (09351-32090 and 09351-32180) and press, press thick bearing race into flange side of drive pinion. Using adapters, press thin bearing race on remaining side of drive pinion. See Fig 1.
- Install NEW spacer on countershaft. Install drive pinion on countershaft. Using bearing installer, install remaining countershaft bearing. Ensure clearance exists between output flange and bearing. Using Adapter (09351-32180) and press, install inner race.
- Using Adapter (09351-32100) and press, temporarily install counterdriven gear on countershaft. Install Holder (09351-32032) on counterdriven gear. Install NEW lock nut. DO NOT
use old lock nut. Countershaft bearing preload must be checked.
- Install holder in vise. Tighten NEW lock nut using torque wrench and Adapter (09351-3270). Tighten lock nut to 116-142 ft. lbs. (157-193 N.m) on A-240L transaxle, and 130-159 ft. lbs. (177-216 N.m) for all other transaxles.
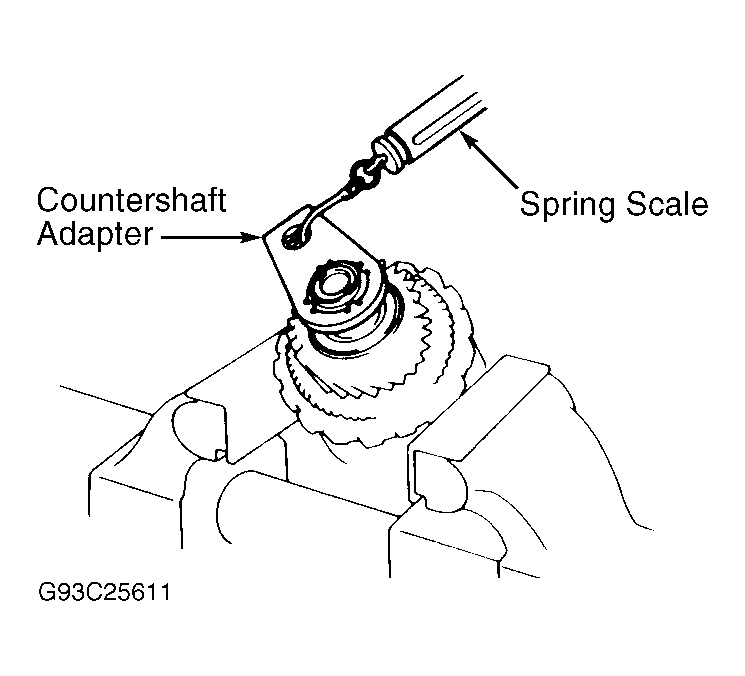
- Using Countershaft Adapter (09351-32170) and a spring scale, measure starting torque of countershaft. Before measuring starting torque, turn countershaft firmly to seat bearing. Starting torque should be 2.6-4.4 lbs. (1.2-2.0 kg). Replace spacer if starting torque exceeds specification. Recheck starting torque. See Fig 2.
- Using a punch and hammer, stake lock nut. Remove counterdriven gear. Install thrust bearing and race "H". See Figure. Install underdrive planetary gear and snap ring. Install snap ring to sun gear. Install planetary sun gear to countershaft. See Fig 1.
 Courtesy of © TOYOTA, LICENSE AGREEMENT TMS1002
 Courtesy of © TOYOTA, LICENSE AGREEMENT TMS1002