Control Valve Assembly: Disassembly
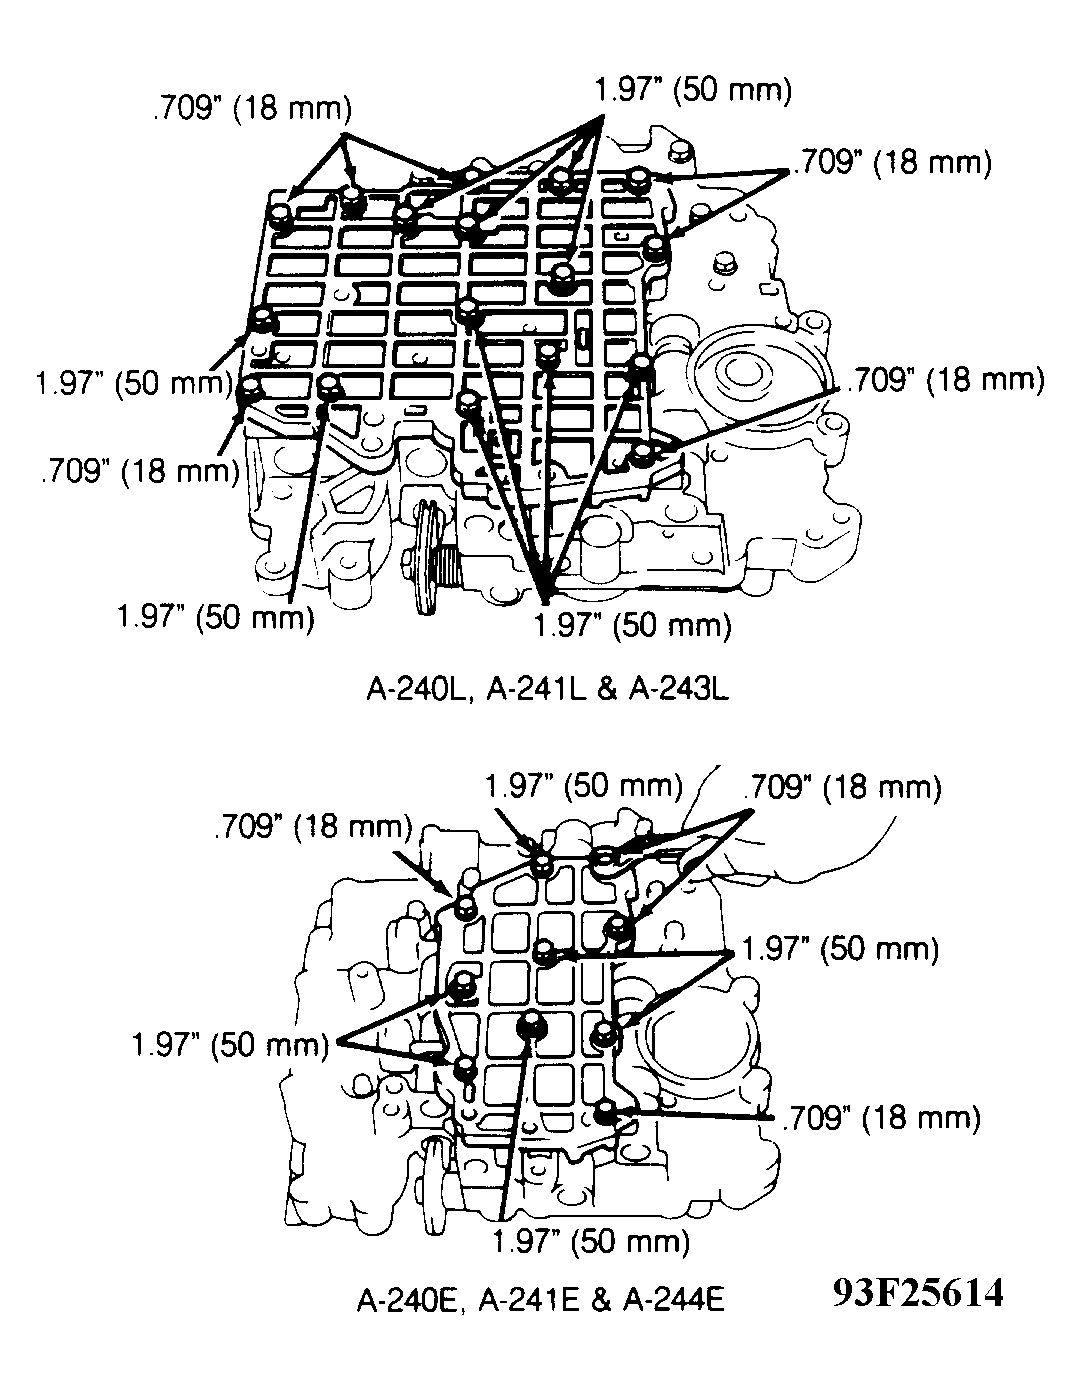
- Remove solenoids. On A-240L, A-241L and A-243L transaxles, remove 17 bolts and lower valve body cover. On A-240E, A-241E and A-244E transaxles, remove 10 bolts and lower valve body cover. See Fig 1. On all transaxles, remove strainer, gaskets and plate.
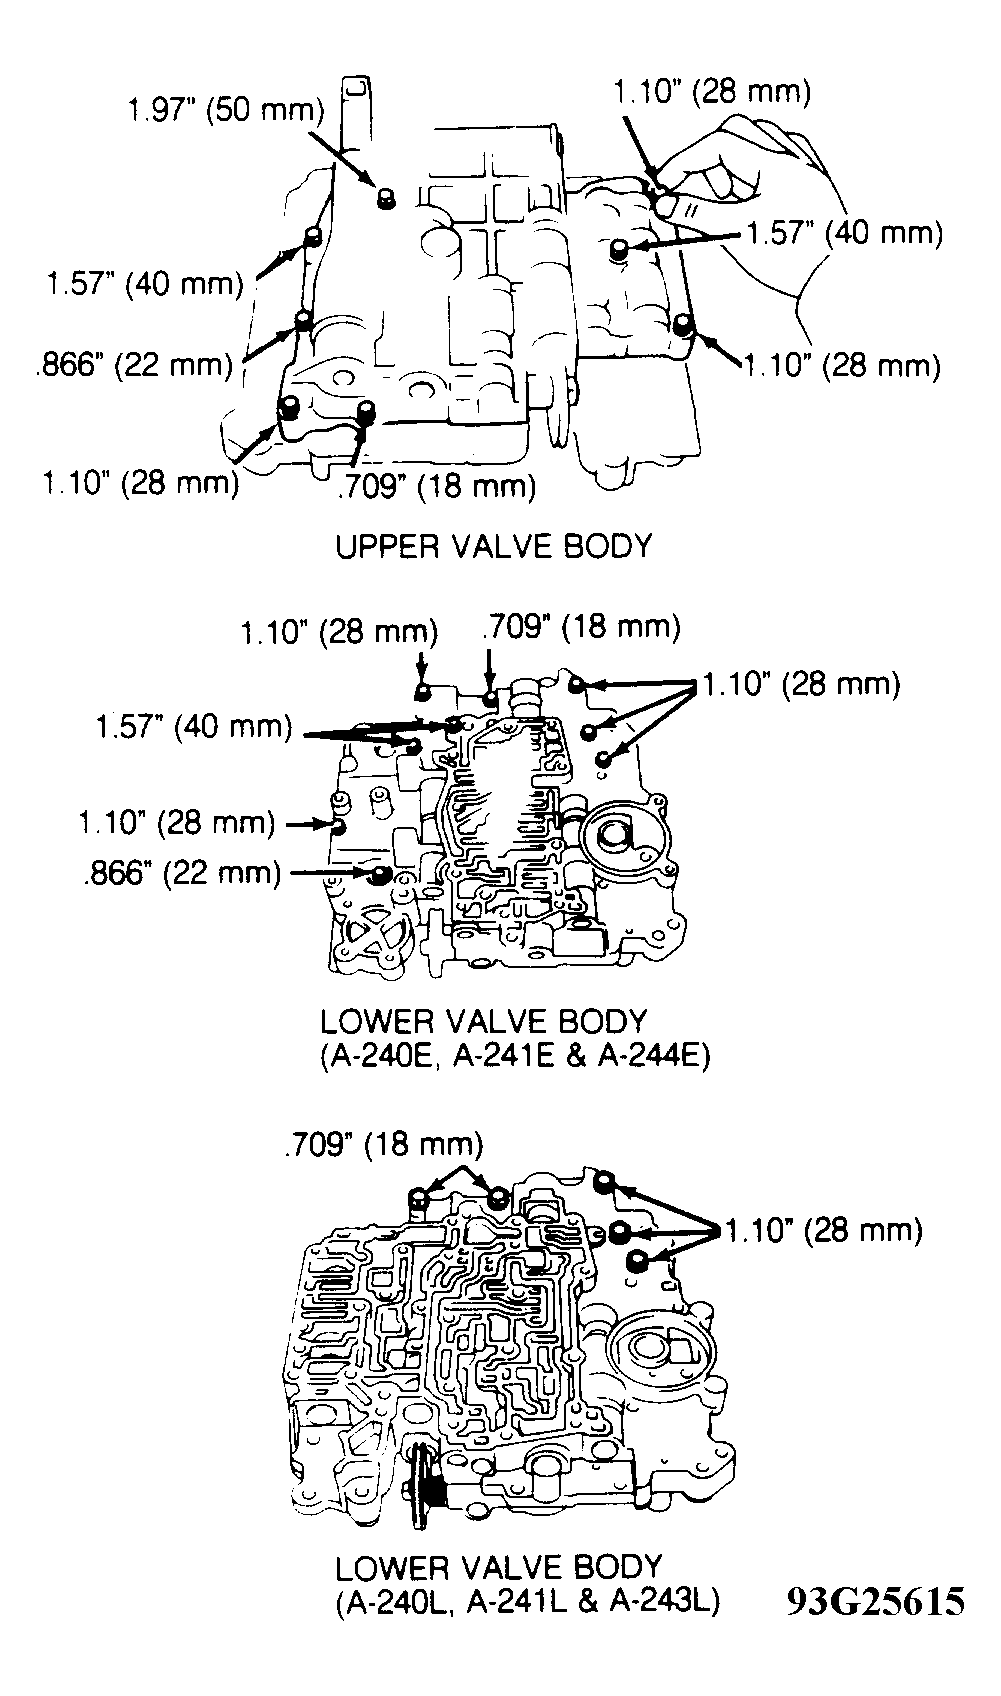
- Remove 8 bolts from upper valve body. On A-240L, A-241L and A-243L transaxles, remove 5 bolts from lower valve body. On A-240E, A-241E and A-244E transaxles, remove 9 bolts from lower valve body. See Fig 2. Hold plate against lower valve body and carefully remove lower valve body. DO NOT
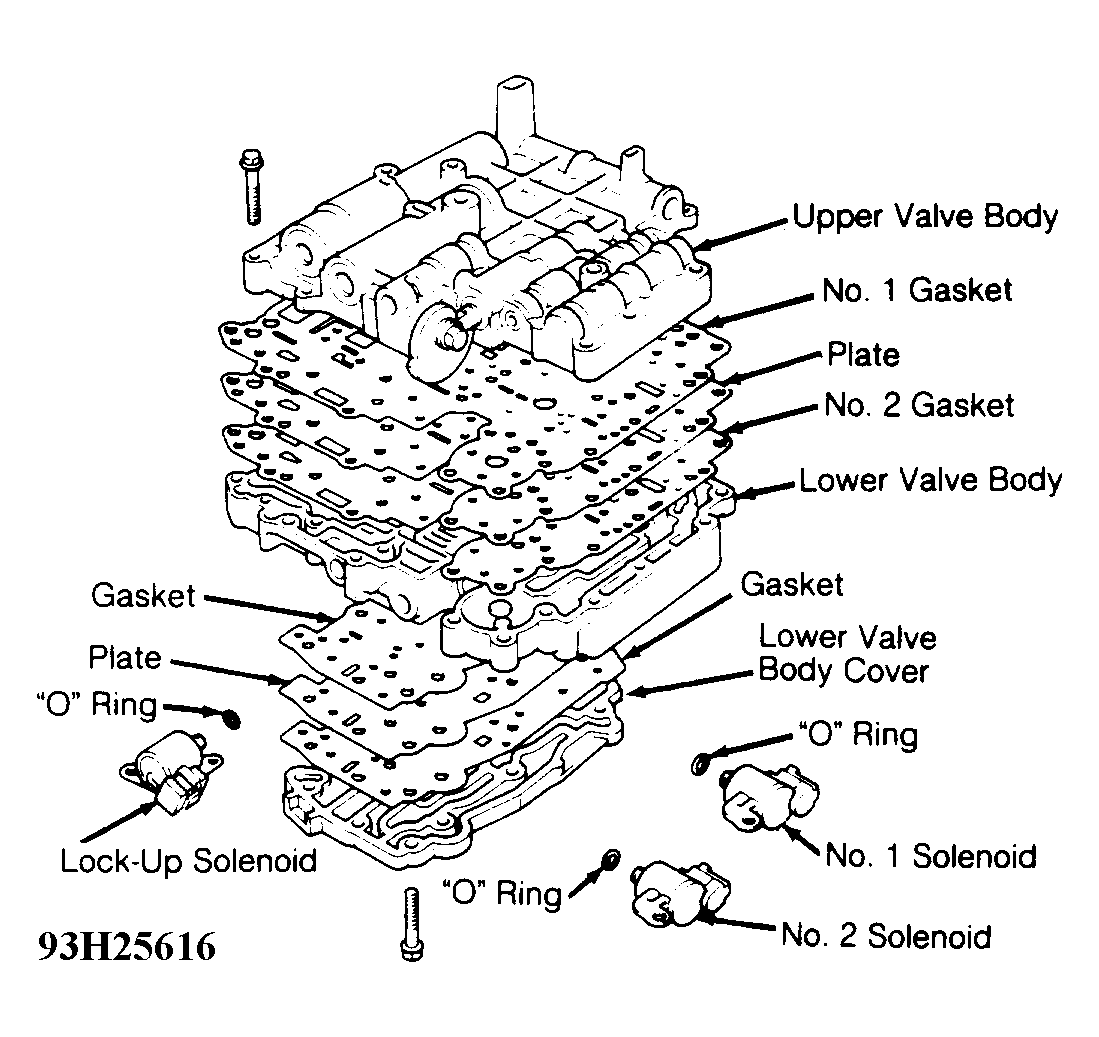
lose check balls. Note location of check balls, retainers, pins and plugs in valve body. Remove plate and gasket. See Fig 3.
 Courtesy of © TOYOTA, LICENSE AGREEMENT TMS1002
 Courtesy of © TOYOTA, LICENSE AGREEMENT TMS1002
 Courtesy of © TOYOTA, LICENSE AGREEMENT TMS1002