Cargo Box Bridge Cross Bar Replacement (Avalanche)
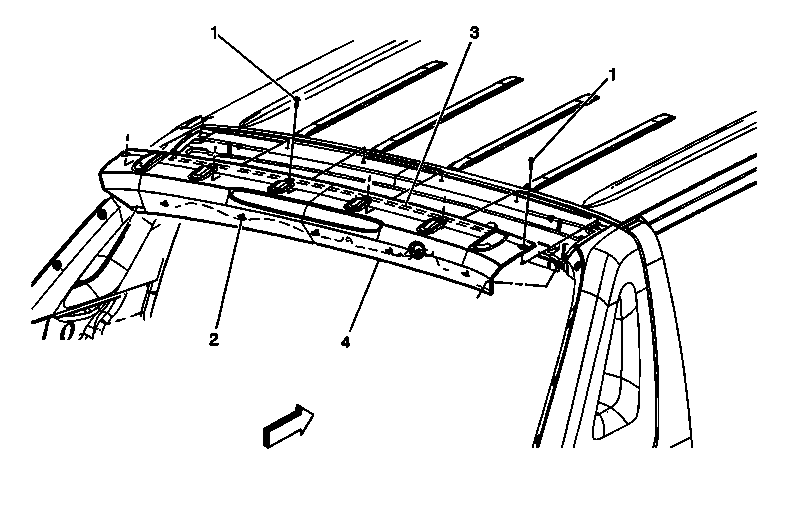 Courtesy of GENERAL MOTORS COMPANY
 Cargo Box Bridge Cross Bar Replacement (Avalanche)
| Callout |
Component Name |
|
Preliminary Procedures
- Ensure the headlamp switch is in the OFF position.
- Remove the rear compartment cover assembly. Refer to Cargo Box Front Cover, Center Cover, and Rear Cover Replacement .
|
| 1 |
Cargo Box Bridge Center Panel Screw (Qty: 8)
Tighten
7 (62 lb in) |
| 2 |
Cargo Box Bridge Center Panel Retainer (Qty: 5) |
| 3 |
Cargo Box Bridge Center Panel Adhesive Strip
- The part and surface should be 21°C (70°F) prior to installation. The vehicle should remain 21°C (70°F) for one hour after assembly to allow adhesive to develop sufficient bond strength.
- Use a J-25070
heat gun or equivalent to loosen/remove the adhesive strip. Clean all adhesive residue from the door opening and wipe the surface dry with a clean lint-free towel prior to installing the new adhesive strip.
- When removing protective liners from the adhesive backed adhesive strip, be careful not to touch the tape with hands. Do not allow the tape to come in contact with dirt or any foreign matter prior to adhesion.
Special Tools
J-25070
Heat Gun |
| 4 |
Cargo Box Bridge Center Panel Assembly
- Disconnect the 2 electrical connectors.
- When re-installing the panel assembly, lubricate the panel grommet prior to seating.
- If replacing the panel assembly, transfer the high mount stop lamp. Refer to High Mount Stop Lamp Replacement (Avalanche)
.
|