Evaporative Emission (EVAP) Hoses/Pipes Replacement - Chassis/Canister
Evaporative Emission Hoses/Pipes Replacement - Chassis/Canister
Removal Procedure
Caution: Refer to Fuel and Evaporative Emission Pipe Caution (Fuel and Evaporative Emission Pipe Caution) .
Caution: Refer to Gasoline/Gasoline Vapors Caution (Gasoline/Gasoline Vapors Caution) .
Notice: Refer to Fuel and Evaporative Emission Hose/Pipe Connection Cleaning Notice (Vehicle Damage Warnings) .
Notice:
* Do not attempt to straighten kinked nylon pipes. Replace any kinked nylon pipes in order to prevent damage to the vehicle.
* Do not attempt to repair sections of nylon pipes. Replace damaged nylon pipes.
* Replace the vapor hoses/pipes with original equipment or parts that meet GM specifications.
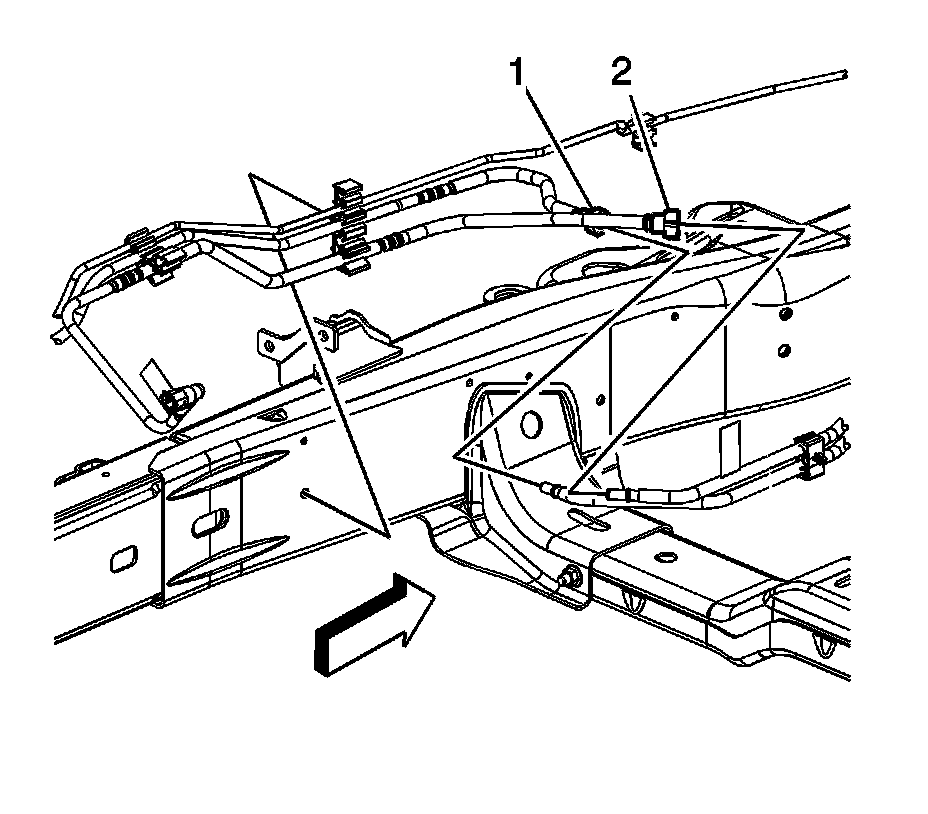
1. Remove the fuel tank. Refer to Fuel Tank Replacement (Service and Repair) .
2. Disconnect the chassis evaporative emission (EVAP) line quick connect fitting (1) from the engine EVAP line. Refer to Plastic Collar Quick Connect Fitting Service (Plastic Collar Quick Connect Fitting Service) .
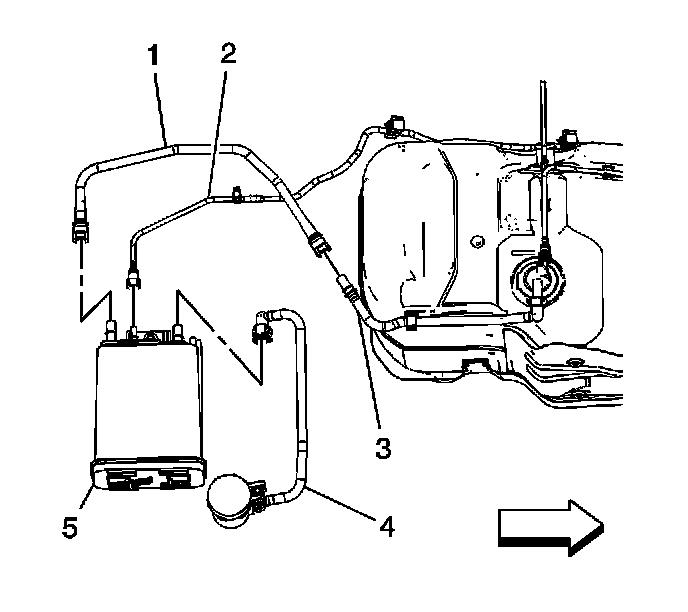
3. Disconnect the chassis EVAP line (2) quick connect fitting from the EVAP canister (5). Refer to Plastic Collar Quick Connect Fitting Service (Plastic Collar Quick Connect Fitting Service) .
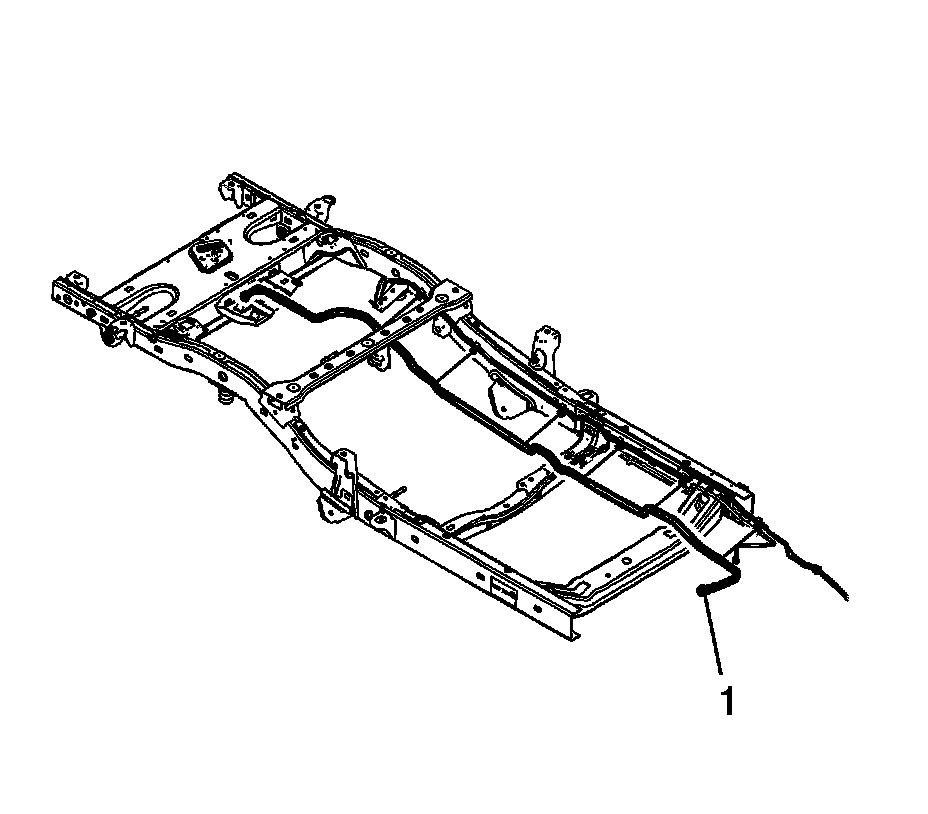
4. Disengage the chassis EVAP line from the frame clips.
5. Remove the chassis EVAP line (1) from the vehicle.
Installation Procedure
1. Position the chassis EVAP line (1) to the vehicle along the frame.
2. Secure the chassis EVAP line to the frame clips.
3. Connect the chassis EVAP line (2) quick connect fitting to the EVAP canister (5). Refer to Plastic Collar Quick Connect Fitting Service (Plastic Collar Quick Connect Fitting Service) .
4. Connect the chassis EVAP line quick connect fitting (1) to the engine EVAP line. Refer to Plastic Collar Quick Connect Fitting Service (Plastic Collar Quick Connect Fitting Service) .
5. Install the fuel tank. Refer to Fuel Tank Replacement (Service and Repair) .