Transfer Case Rear Extension Bushing Replacement
WARNING: This page is about a different car, the 2010 GMC Sierra, 2010 GMC Cab & Chassis Sierra, 2010 Chevrolet Silverado, and 2010 Chevrolet Cab & Chassis Silverado. However, it is still accessible from the selected car via links, so may be relevant.
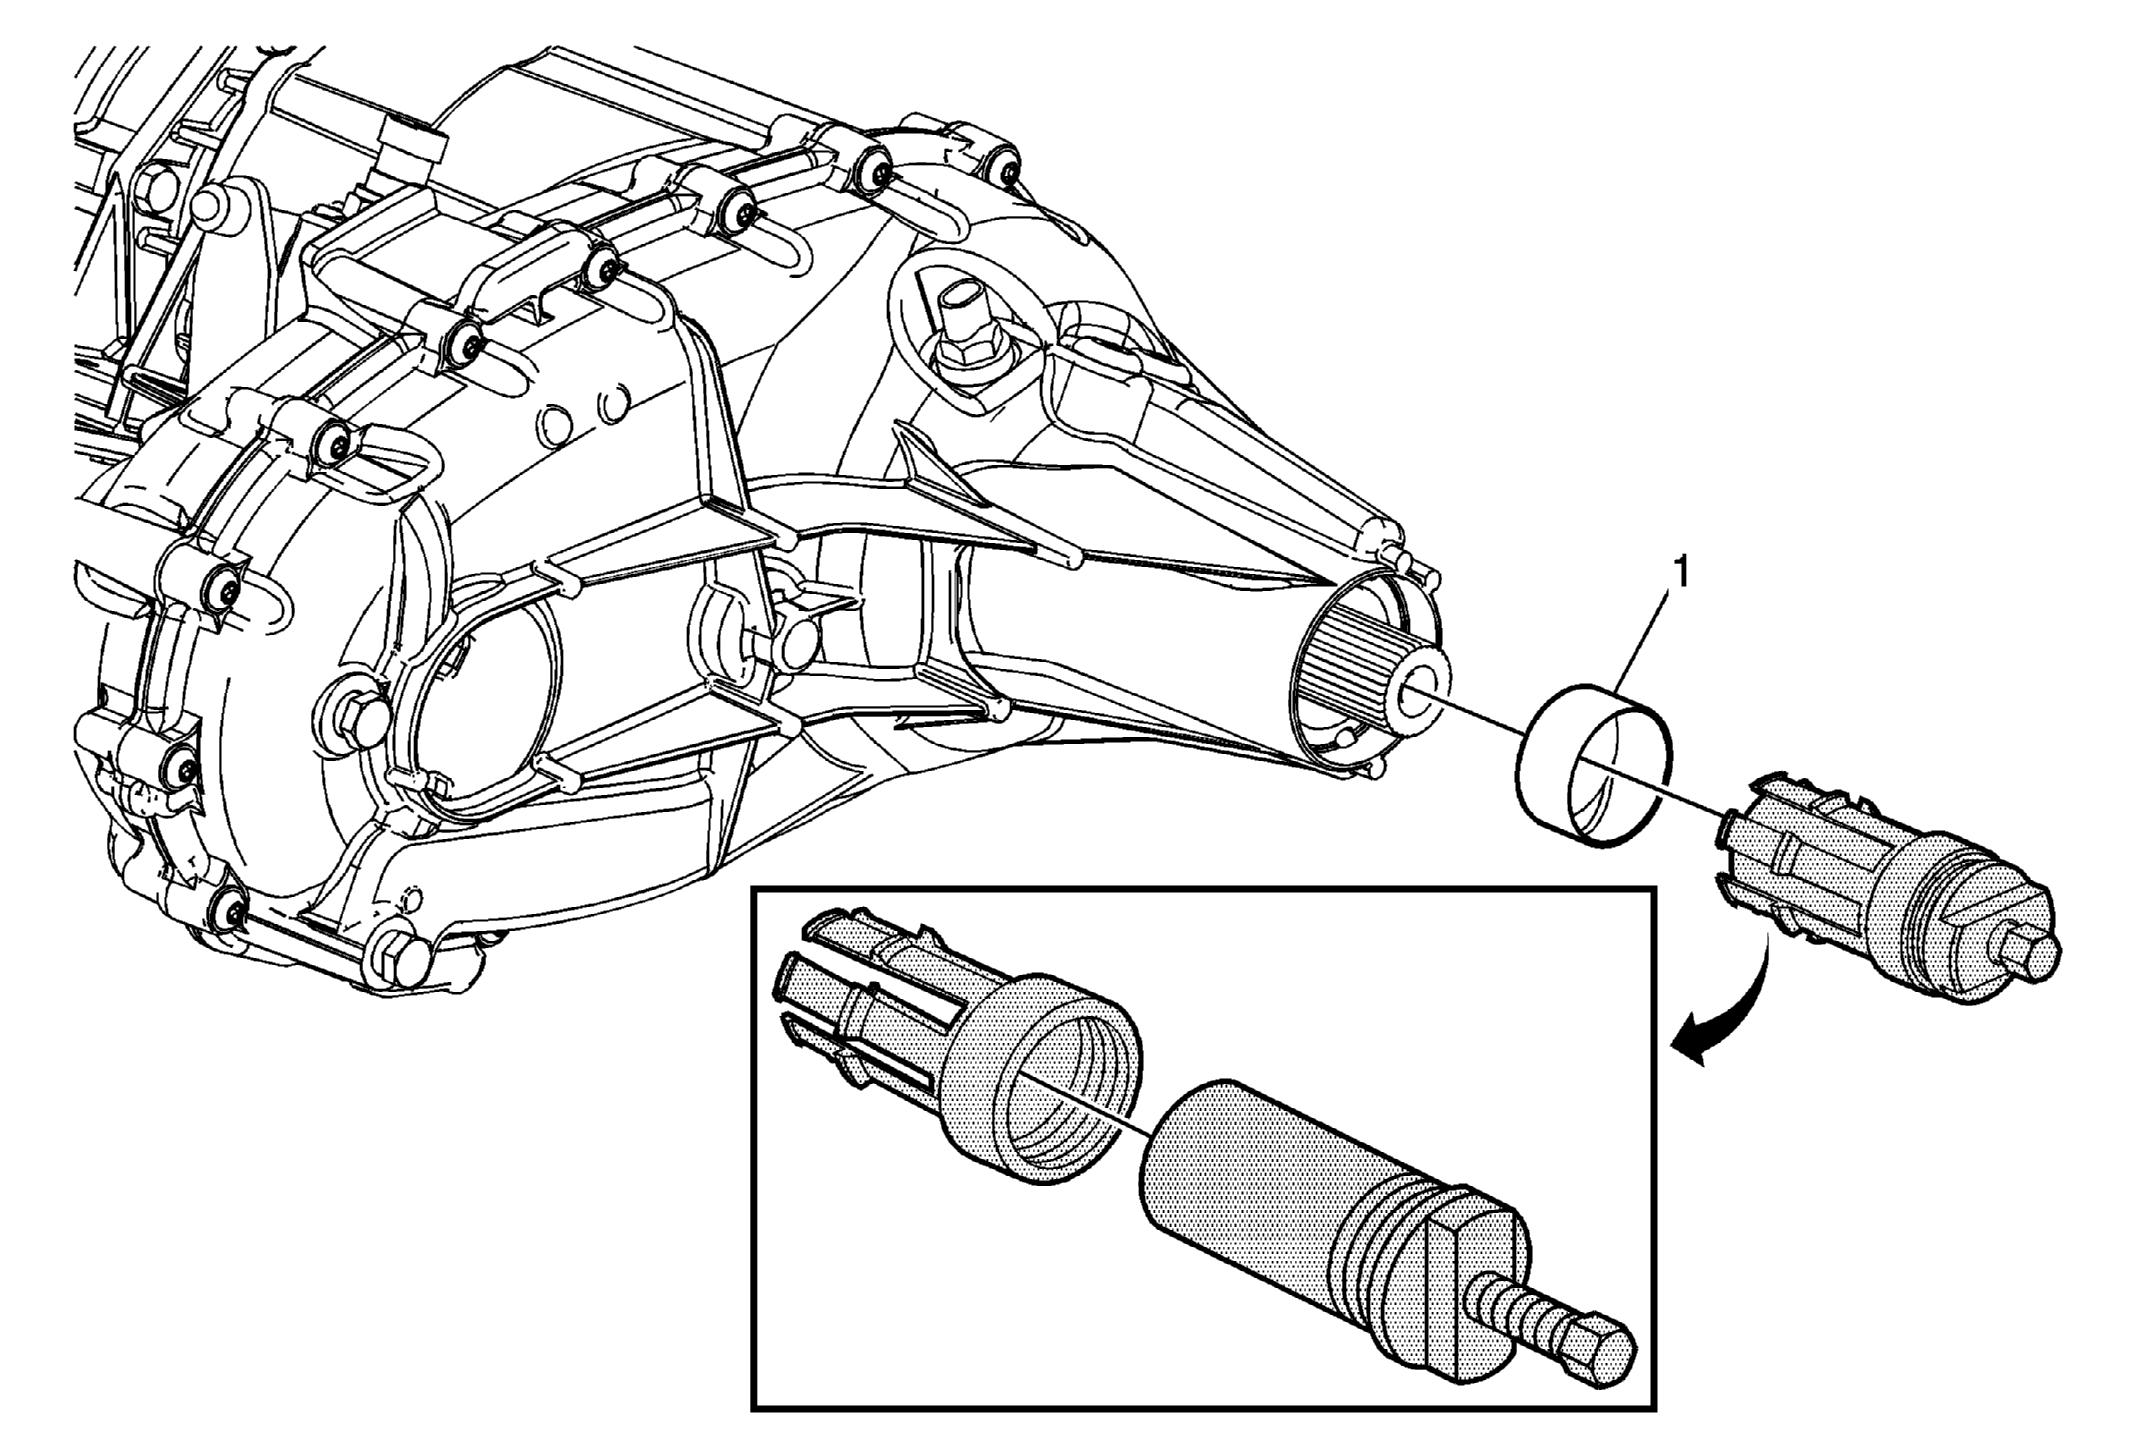 Courtesy of GENERAL MOTORS CORP.
| Callout |
Component Name |
|
Preliminary Procedures: Remove the transfer case rear output shaft seal. Refer to Rear Output Shaft Seal Replacement . |
| 1 |
Transfer Case Rear Output Shaft Bushing Procedure
- Install the finger section of the DT-48734
(Heavy Duty) or J 45380
(Light Duty) in front of the bushing. See Special Tools .
- Install the forcing tube assembly into the finger section. Ensure the forcing screw is backed out.
- Using a wrench on the forcing screw, remove the bushing.
- Remove the old bushing from the DT-48734
(Heavy Duty) or J 45380
(Light Duty). See Special Tools .
- Install the NEW bushing on the finger section of the DT-48734
(Heavy Duty) or J 45380
(Light Duty). See Special Tools .
- Install the finger section to the forcing tube assembly of the DT-48734
(Heavy Duty) or J 45380
(Light Duty). See Special Tools .
- Position the bushing and tool to the rear case half.
- Install the bushing until the tool bottoms on the rear case half.
Tip:
- Use the appropiate bushing tool depending on application.
- Only remove the bushing if faulty.
- If the bushing was removed, a new bushing must be installed.
- Ensure the bushing is installed squarely into the bushing bore.
Special Tools
- DT-48734
Transfer Case Rear Bushing Remover and Installer (Heavy Duty). See Special Tools .
- J 45380
Transfer Case Rear Bushing Remover and Installer (Light Duty)
|