Removal Procedure
- Disable the SIR system. Refer to SIR Disabling and Enabling Zone 3
and to SIR Disabling and Enabling Zone 5
in SIR.
- Remove the left closeout/insulator panel. Refer to Closeout/Insulator Panel Replacement - Left .
- Remove the knee bolster trim panel. Refer to Trim Panel Replacement - Knee Bolster .
- Remove the knee bolster. Refer to Knee Bolster Replacement .
 Courtesy of GENERAL MOTORS CORP.
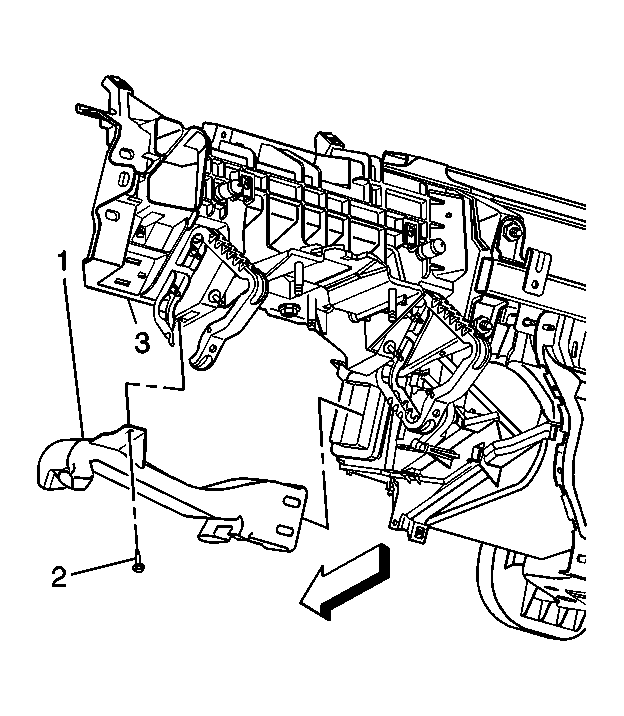
- Remove the left HVAC push pin (2).
- Remove the left HVAC floor duct (1).
- Fully lower the steering column. Refer to Steering Column Replacement
in Steering Wheel and Column.
- Remove the shift lever bezel, Oldsmobile only. Refer to Console Shift Lever Bezel Replacement (Oldsmobile, Buick) .
- Remove the center console. Refer to Console Replacement .
- Remove the I/P lower sound insulator panel, GMC or Chevrolet only. Refer to Closeout/Insulator Panel Replacement - Instrument Panel (I/P) Lower (GMC/Chevrolet) .
- Remove the I/P accessory trim plate, GMC or Oldsmobile only. Refer to Trim Plate Replacement - Instrument Panel (I/P) Accessory (GMC) or Trim Plate Replacement - Instrument Panel (I/P) Accessory (Oldsmobile/Buick) .
- Remove the I/P cluster bezel, Chevrolet only. Refer to Bezel Replacement - Instrument Panel (I/P) Cluster (Chevrolet) or Bezel Replacement - Instrument Panel (I/P) Cluster (GMC/Oldsmobile/Buick) .
- Remove the I/P cluster. Refer to Instrument Panel Cluster (IPC) Replacement .
- Remove the right closeout/insulator panel. Refer to Closeout/Insulator Panel Replacement - Right .
- Remove the I/P storage compartment door. Refer to Door Replacement - Instrument Panel (I/P) Compartment .
- Remove the radio. Refer to Radio Replacement
in Entertainment.
- Remove the HVAC control module. Refer to HVAC Control Module Replacement
in HVAC Systems with A/C-Manual.
 Courtesy of GENERAL MOTORS CORP.
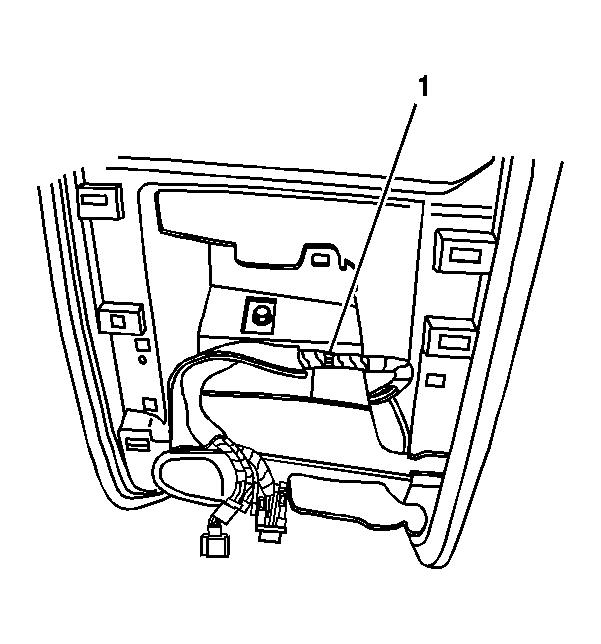
- Remove the HVAC control module wire harness attachment (1) from the I/P substrate.
 Courtesy of GENERAL MOTORS CORP.
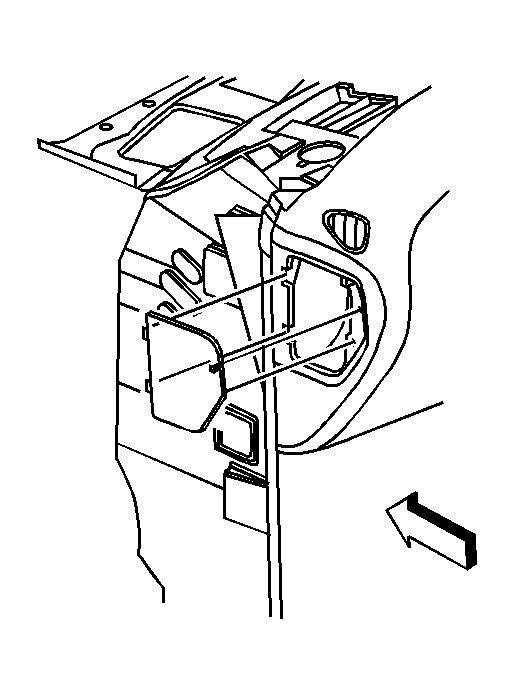
- Remove the left I/P access cover.
- Remove the headlamp switch. Refer to Headlamp Switch Replacement
in Lighting Systems.
- If replacing the I/P, remove the headlamp switch bezel. Refer to Trim Plate Replacement - Instrument Panel (I/P) Accessory Left .
- Remove the windshield garnish moldings. Refer to Garnish Molding Replacement - Windshield Pillar
in Interior Trim.
- Remove the trim pad. Refer to Trim Pad Replacement - Instrument Panel (I/P) Upper .
- Remove the front upper speakers, if equipped. Refer to Speaker Replacement - Front Upper
in Entertainment.
 Courtesy of GENERAL MOTORS CORP.
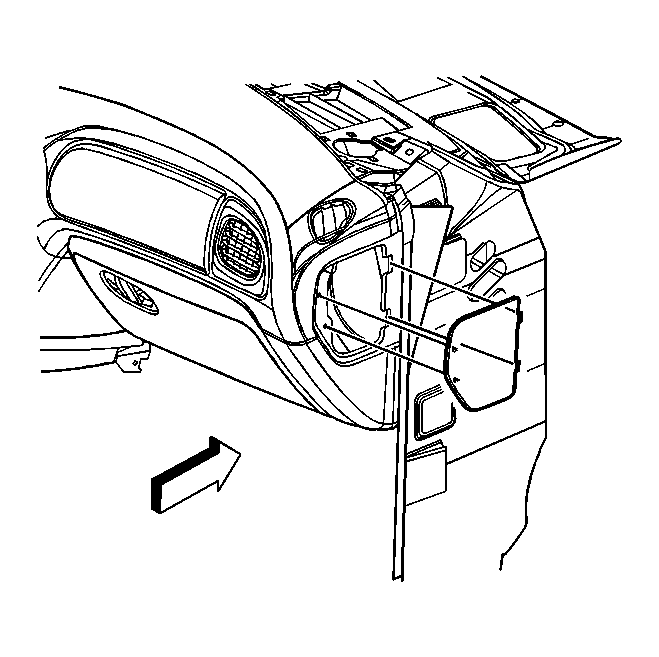
- Remove the right I/P access cover.
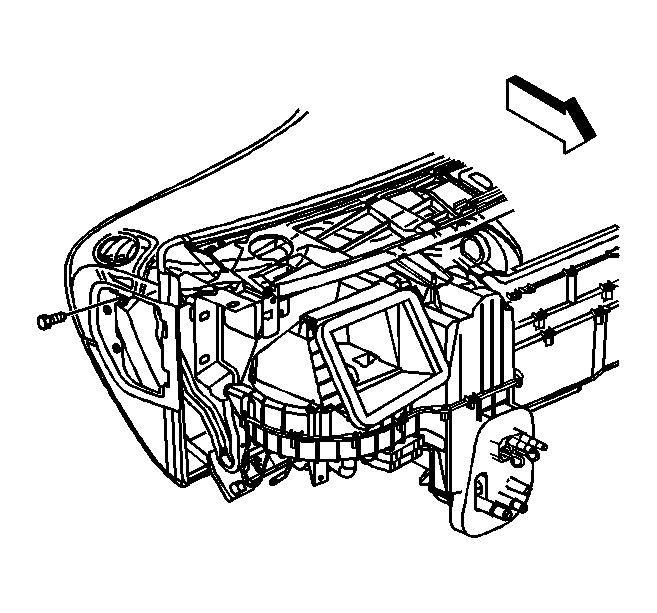 Courtesy of GENERAL MOTORS CORP.
- Remove the side window defogger outlet screw.
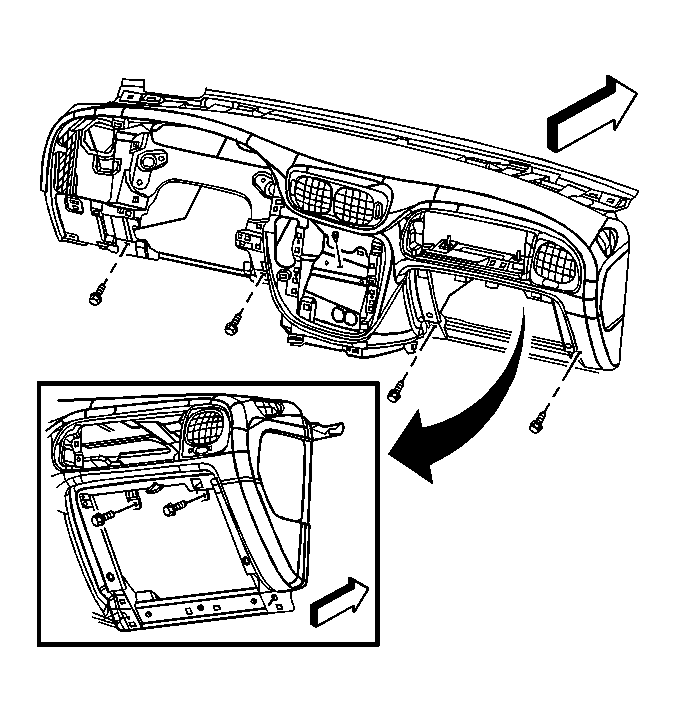 Courtesy of GENERAL MOTORS CORP.
- Remove the bolts securing the lower portion of the instrument panel to the vehicle.
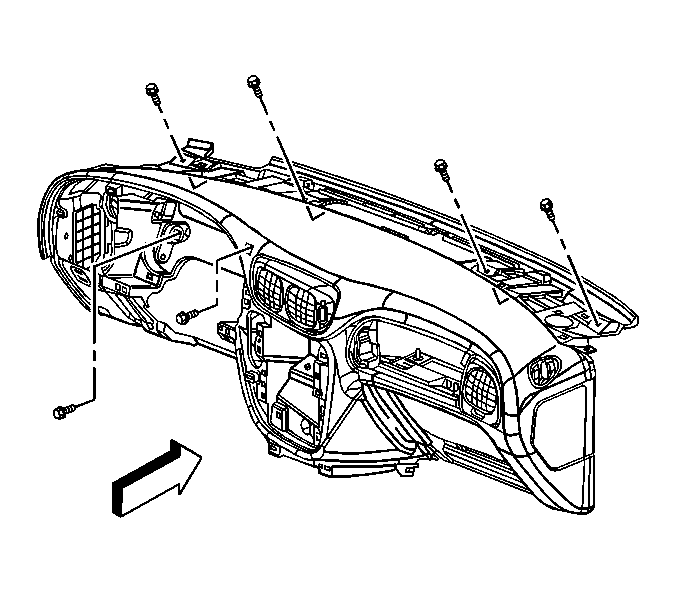 Courtesy of GENERAL MOTORS CORP.
- Remove the bolts that secure the middle and upper portion of the instrument panel to the vehicle.
- With the aid of an assistant, lift up from the bottom of the instrument panel in order to release the I/P from the positioning locators.
- Remove the instrument panel from the vehicle.
- Place the I/P on a clean prepared surface.
- If replacing the I/P, remove the passenger inflatable restraint I/P module. Refer to Inflatable Restraint Instrument Panel Module Replacement
in SIR.
- If replacing the I/P, remove the air distribution duct vents from the instrument panel. Refer to Air Distributor Duct Replacement
in HVAC.