Removal Procedure
- Remove the air cleaner. Refer to AIR CLEANER ASSEMBLY
in Removal & Installation.
- Recover the refrigerant. Refer to REFRIGERANT RECOVERY AND RECHARGING .
- Remove the grille. Refer to GRILLE REPLACEMENT
in Exterior Trim.
- Remove the engine cover. Refer to ENGINE COVER REPLACEMENT
in Interior Trim.
- Raise the vehicle. Refer to LIFTING AND JACKING THE VEHICLE
in General Information.
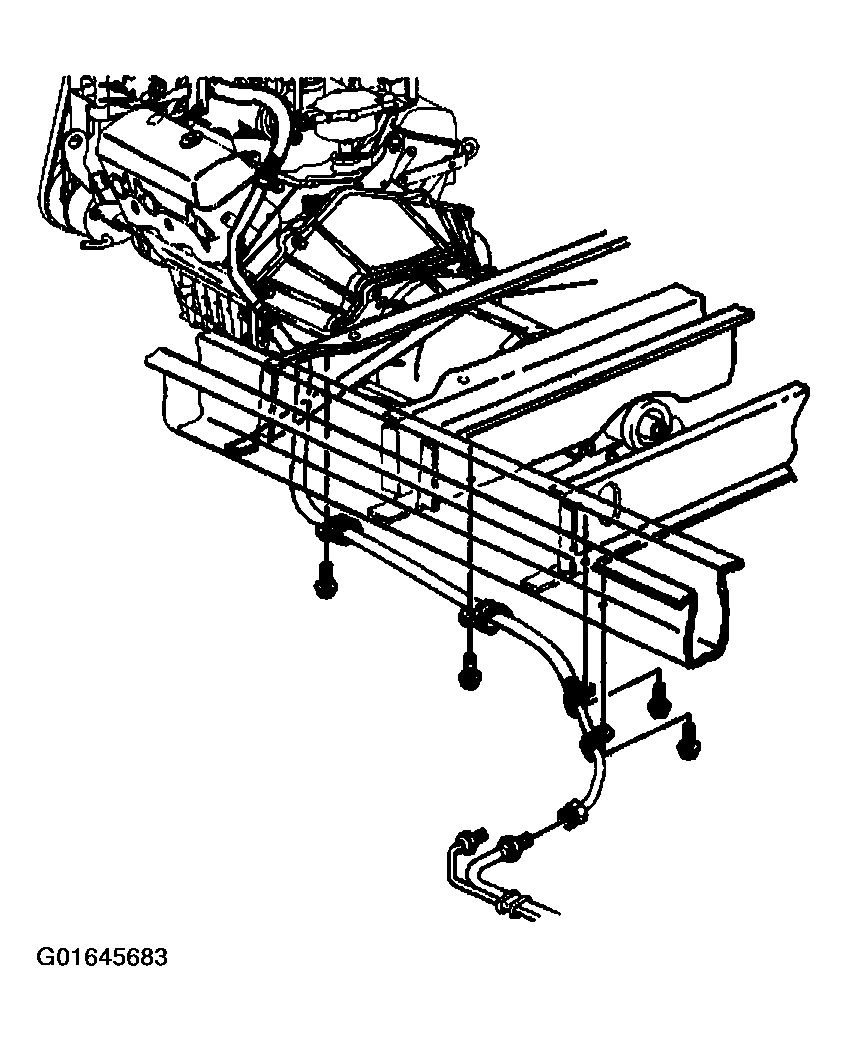
- Disconnect the auxiliary evaporator lines nut from the compressor hose assembly.
 Courtesy of GENERAL MOTORS CORP.
- Lower vehicle.
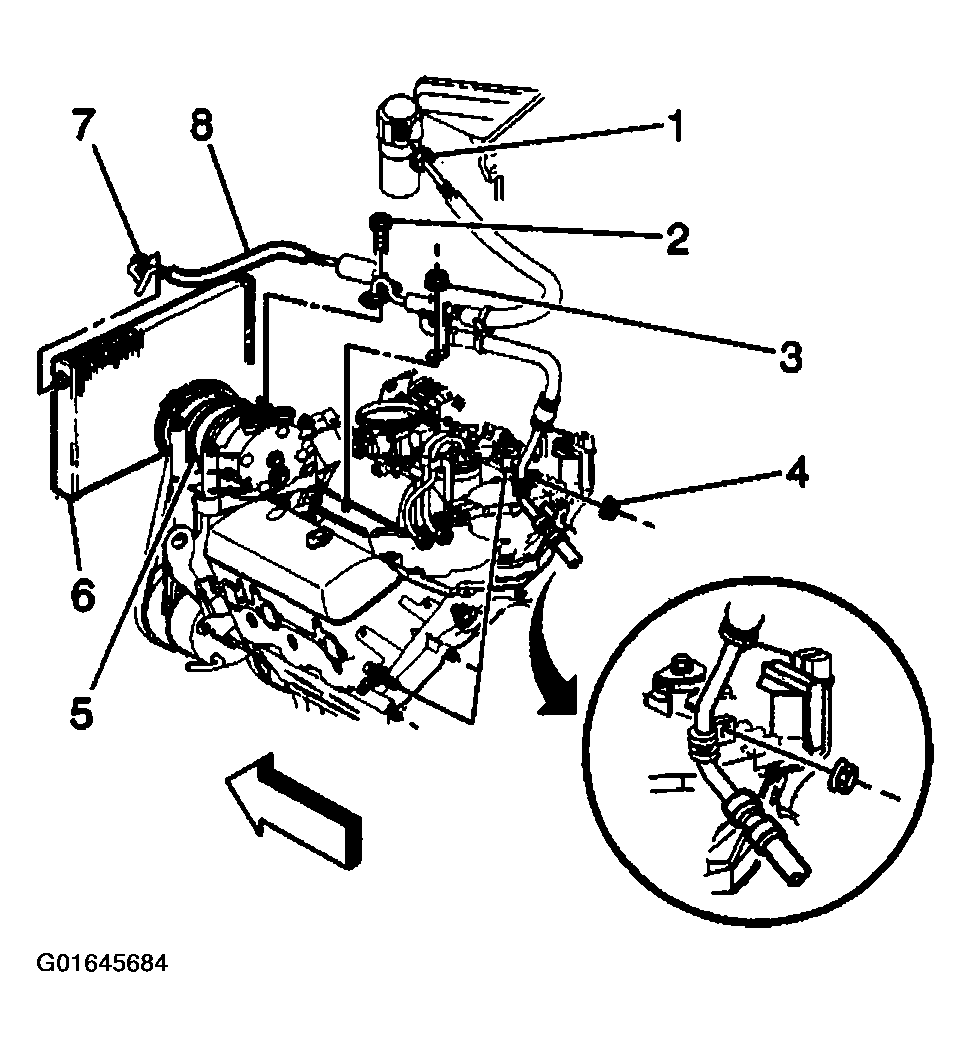
- Remove the nut that attaches the compressor hose assembly bracket to the engine.
 Courtesy of GENERAL MOTORS CORP.
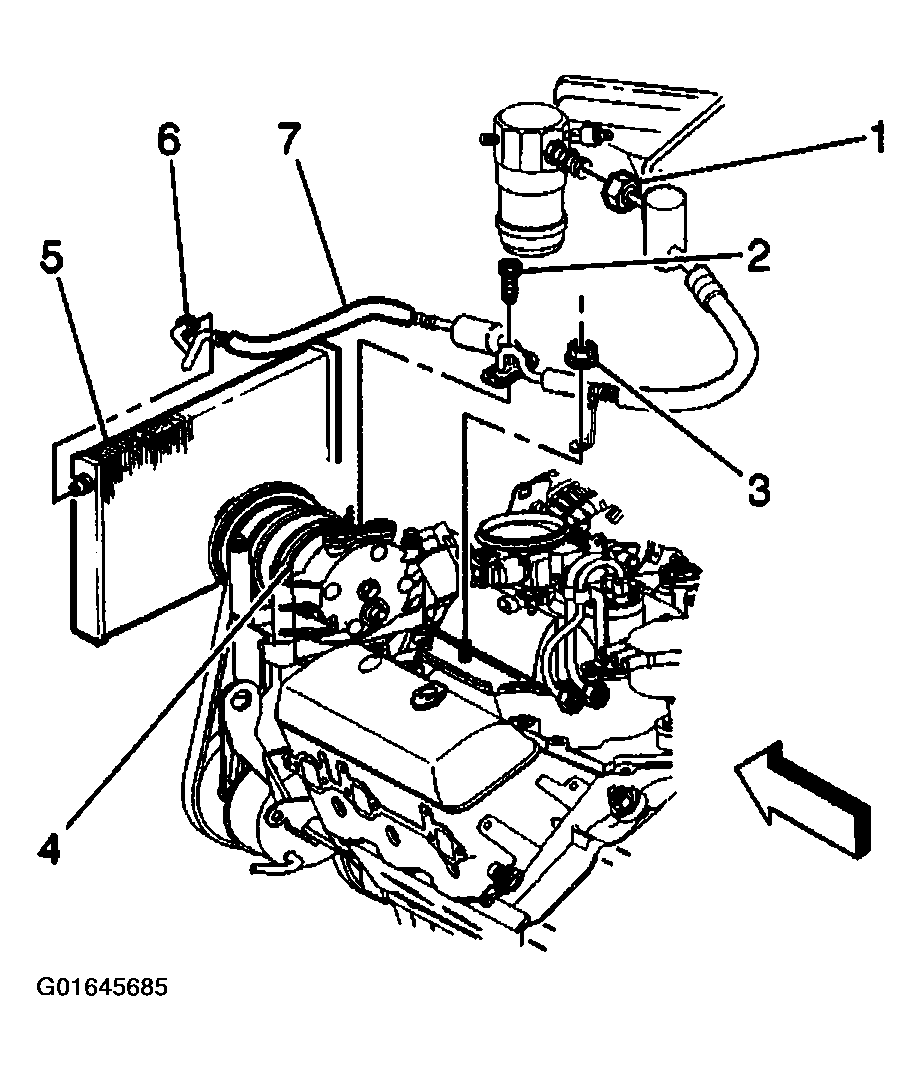
- Remove the hose clamp bracket nut (3) from the engine stud.
 Courtesy of GENERAL MOTORS CORP.
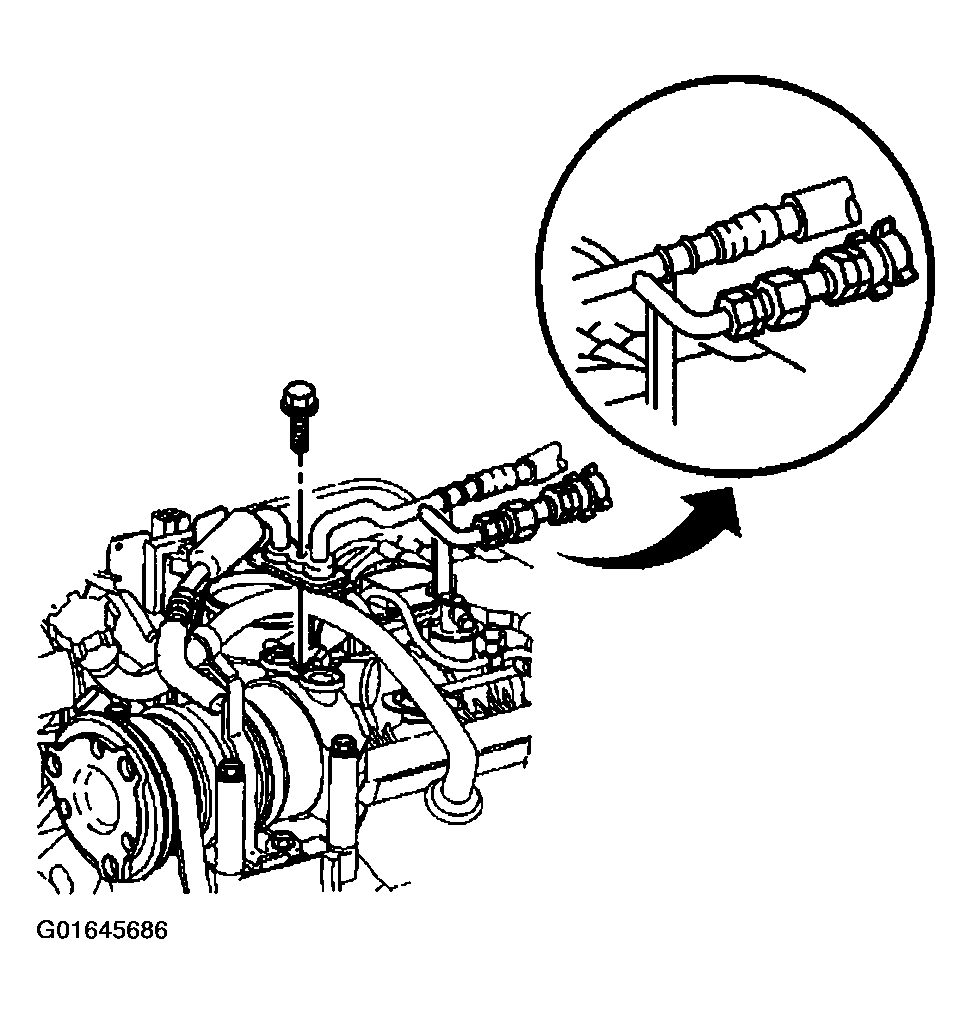
- Remove the compressor hose assembly bolt from the compressor.
 Courtesy of GENERAL MOTORS CORP.
- Remove the sealing washers from the compressor.
- Remove the compressor hose assembly nut (6) from the condenser.
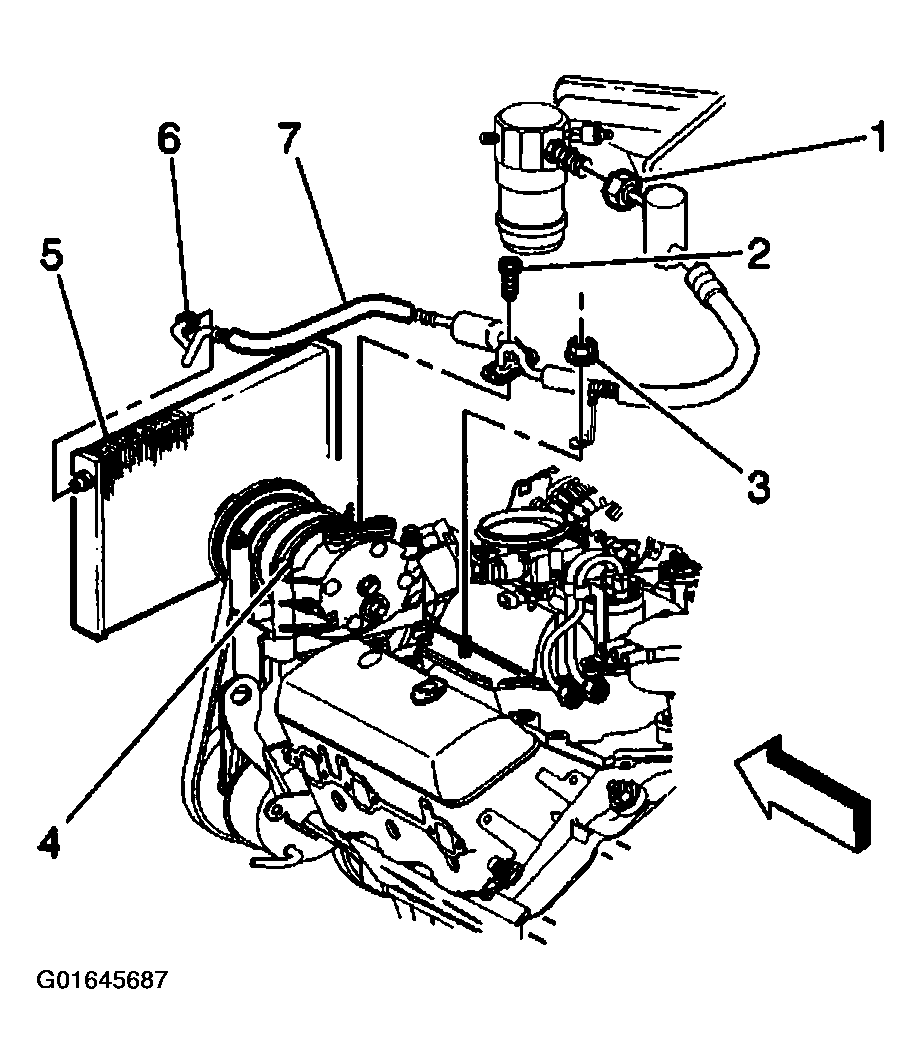 Courtesy of GENERAL MOTORS CORP.
- Remove the compressor hose assembly nut (1) from the accumulator.
- Remove the compressor hose assembly from the vehicle.
- Cap or plug all open connections.