Removal Procedure
- Remove the air cleaner. Refer to AIR CLEANER ASSEMBLY
in Removal & Installation.
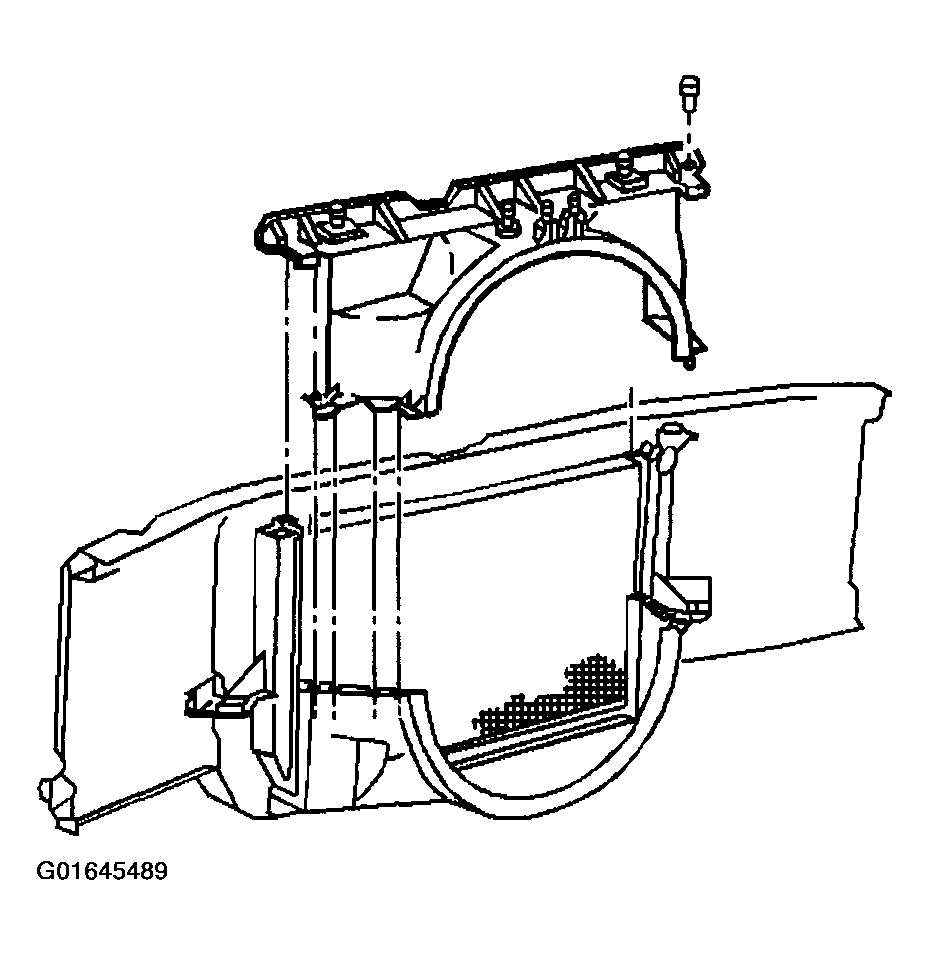
- Remove the upper fan shroud bolts.
- Remove the upper fan shroud.
 Courtesy of GENERAL MOTORS CORP.
- Recover the refrigerant from the system. Refer to REFRIGERANT RECOVERY AND RECHARGING
.
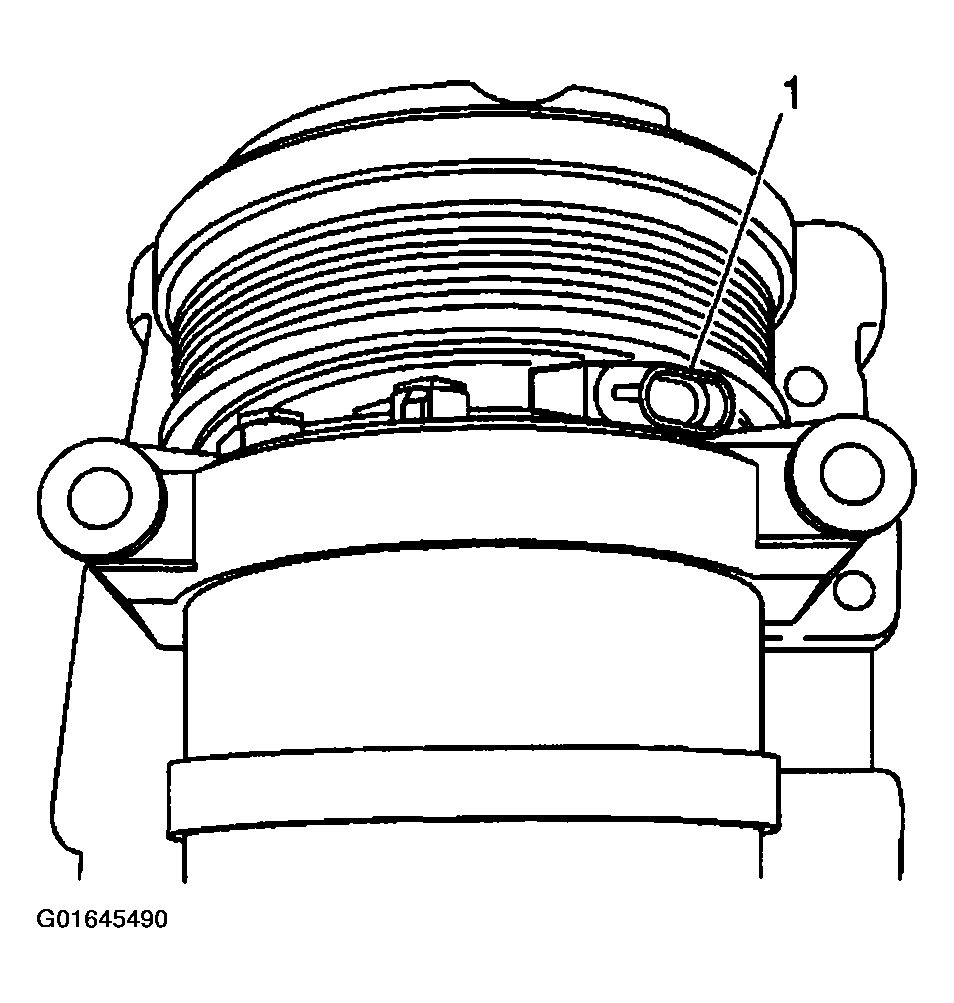
- Disconnect the electrical connector (1) from the A/C compressor.
 Courtesy of GENERAL MOTORS CORP.
- Release the drive belt tensioner and remove the drive belt from the A/C compressor.
- Remove the engine cover. Refer to ENGINE COVER REPLACEMENT
in Interior Trim.
- Remove the oil fill tube bolt.
- Remove the oil fill tube.
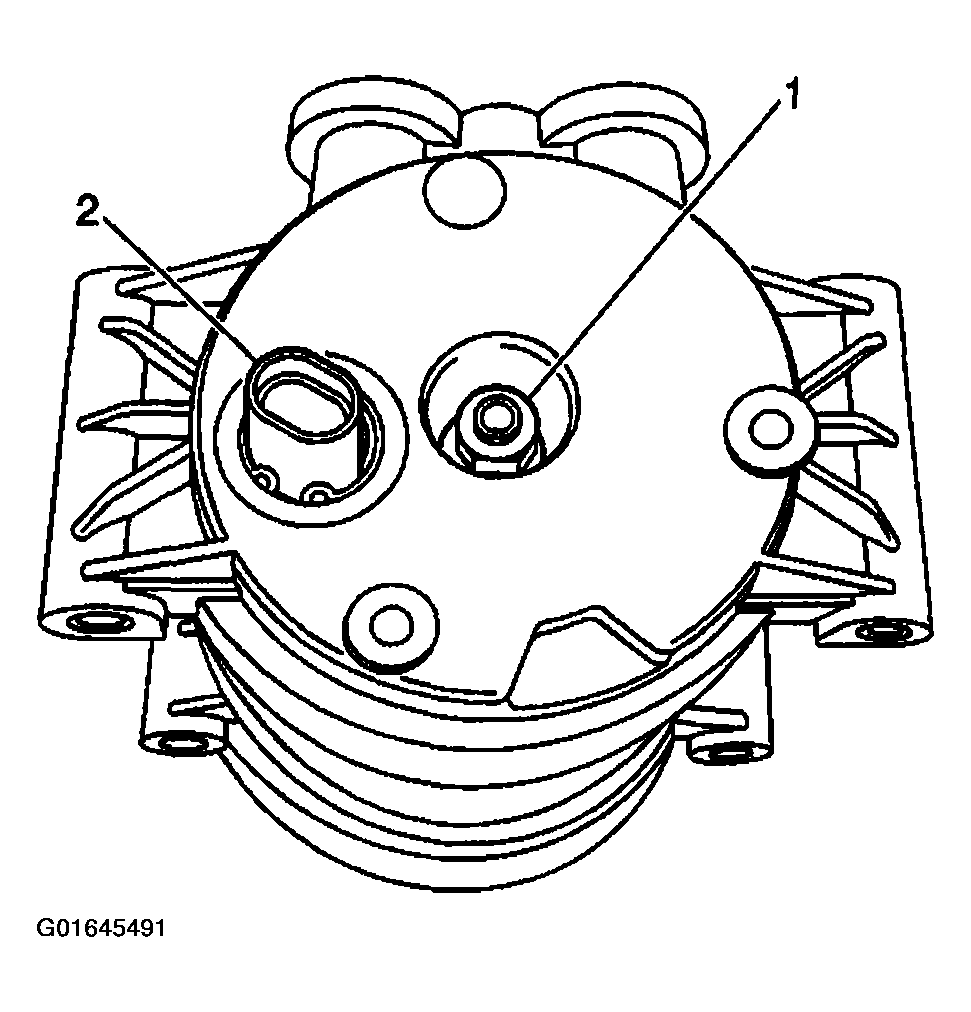
- Disconnect the electrical connector (2) from the A/C compressor high pressure cutoff switch.
 Courtesy of GENERAL MOTORS CORP.
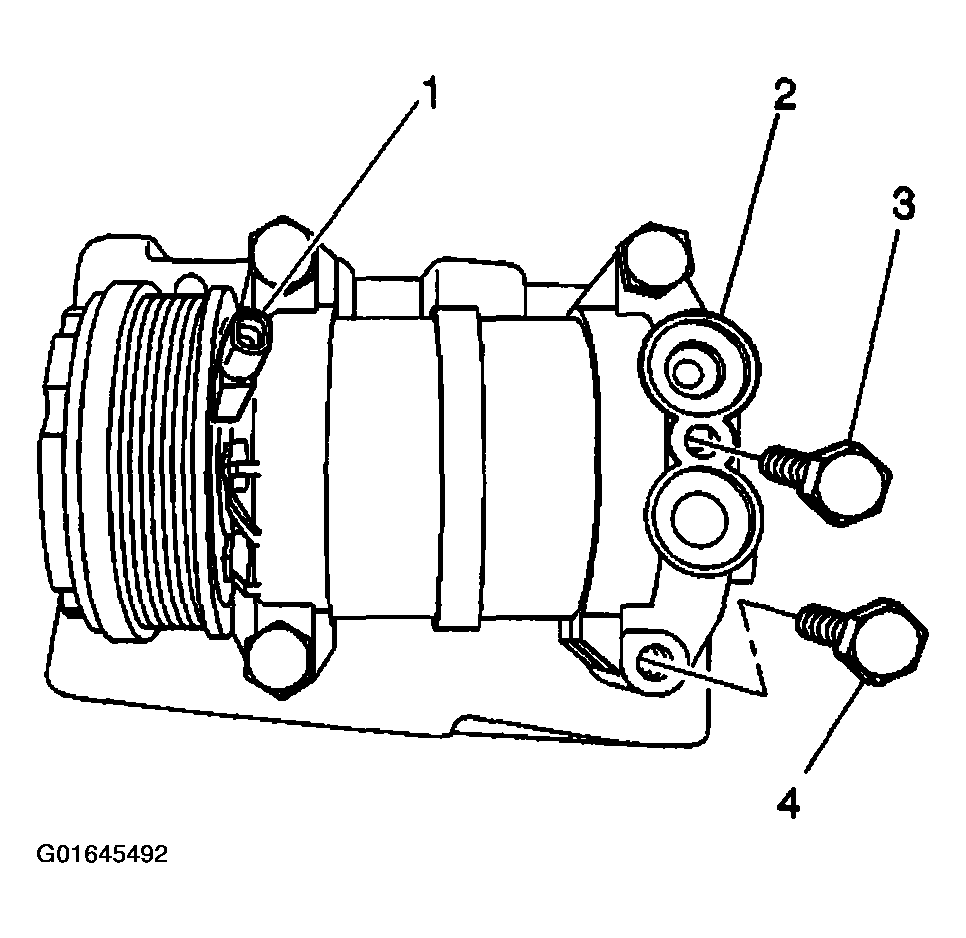
- Remove the compressor hose assembly bolt (3).
- Remove the compressor hose assembly from the compressor.
- Remove and discard the seal washers.
- Remove the compressor brace bolt (1).
 Courtesy of GENERAL MOTORS CORP.
- Remove the compressor mounting bolts (2).
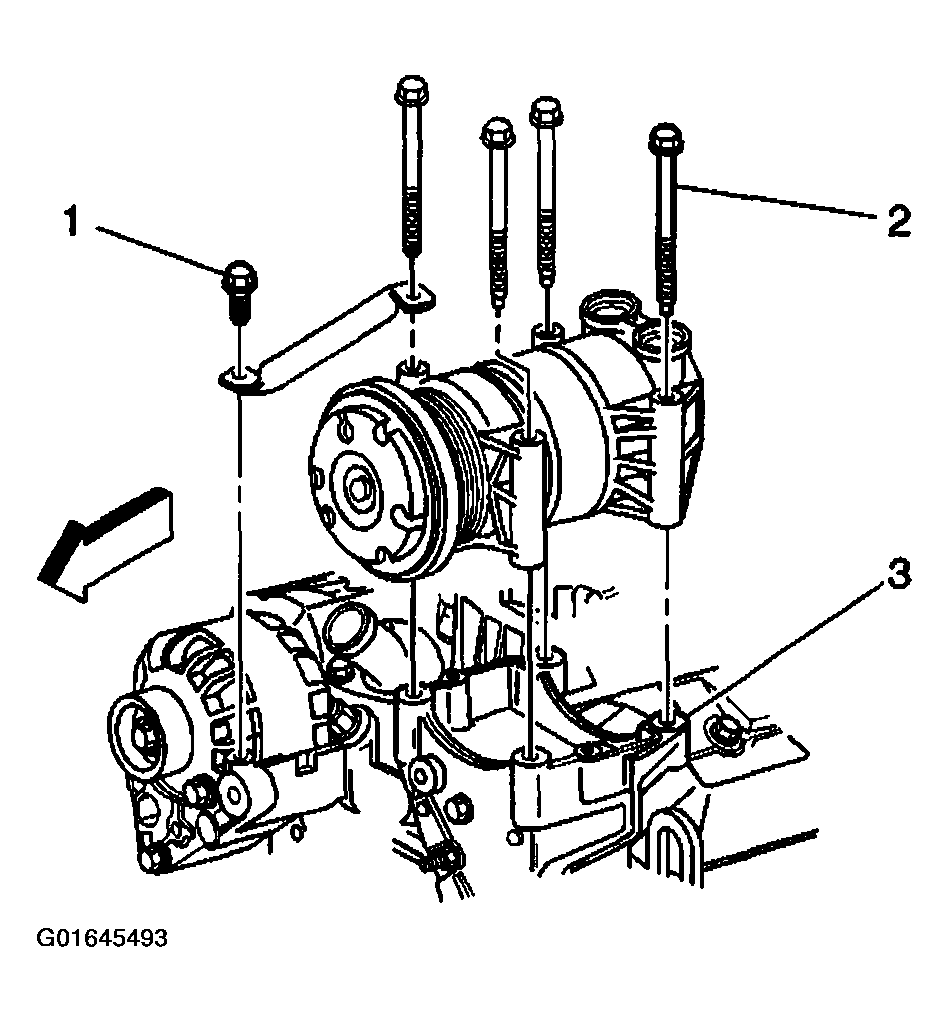 Courtesy of GENERAL MOTORS CORP.
- Remove the compressor brace.
- Remove the compressor from the vehicle.
- If replacing the A/C compressor, the refrigerant oil must be balanced. Refer to COMPRESSOR OIL BALANCING .