Removal Procedure
- Recover the refrigerant from the system. Refer to REFRIGERANT RECOVERY AND RECHARGING .
- Remove the compressor from the vehicle. Refer to COMPRESSOR REPLACEMENT .
- Remove the clutch plate and hub assembly. Refer to COMPRESSOR CLUTCH PLATE/HUB ASSEMBLY REPLACEMENT .
- Use the J 6083
in order to remove the following components:
- The pulley rotor
- The bearing assembly retaining ring
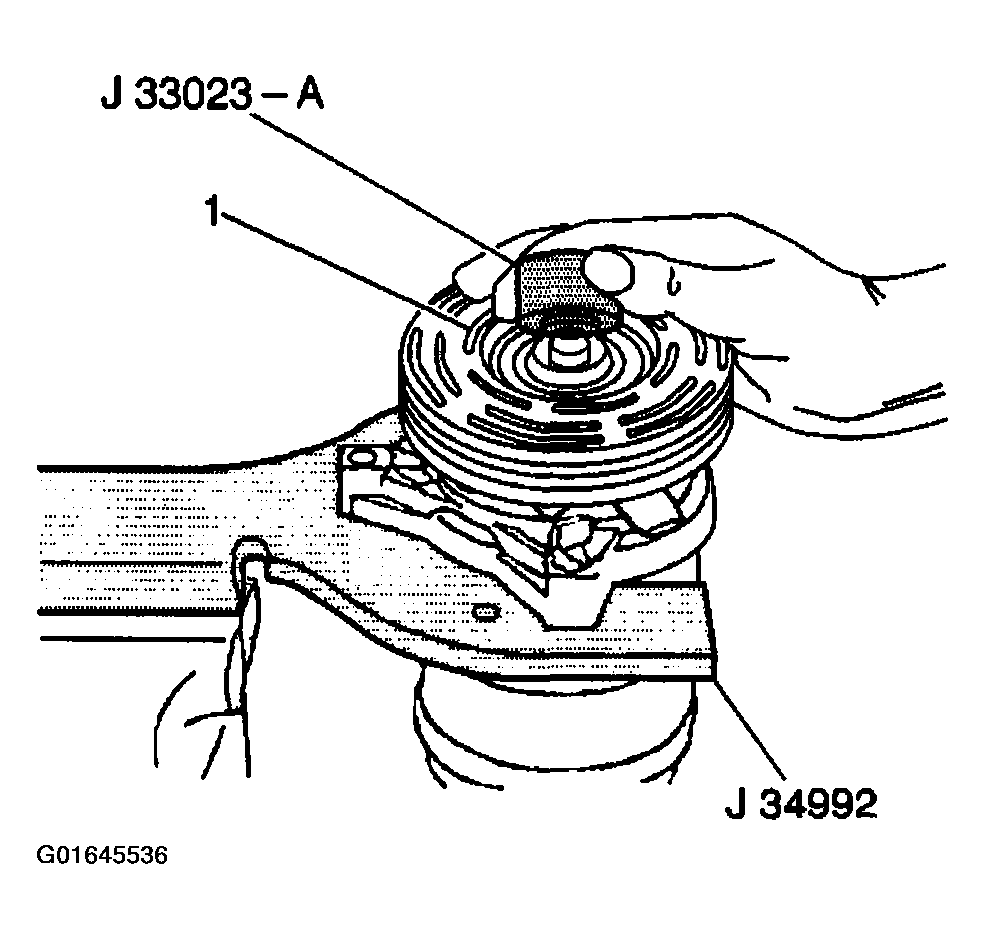
- Install the J 33023-A
to the front head.
- Install the J 41552
down into the inner circle of slots (1) in the rotor.
 Courtesy of GENERAL MOTORS CORP.
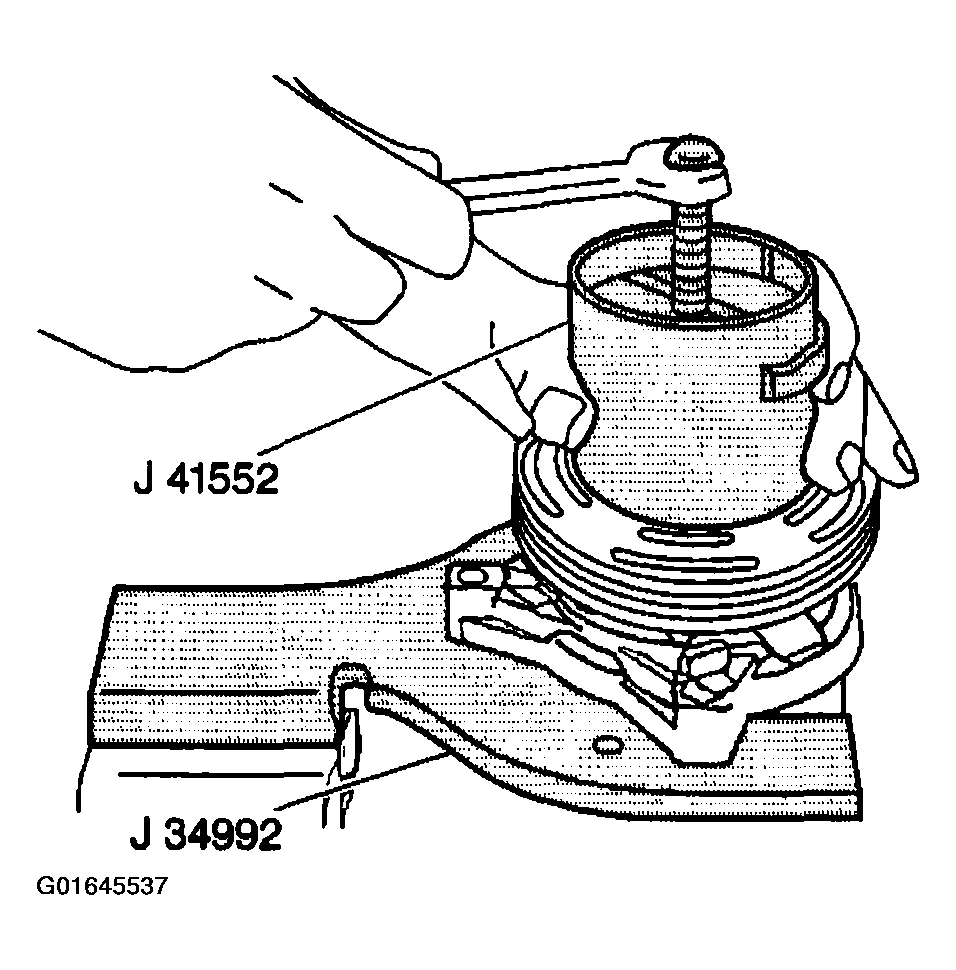
- Turn the J 41552
clockwise in the slots in the rotor.
- Perform the following steps in order to remove the pulley rotor and bearing assembly:
- 8.1. Hold the J 41552
in position.
- 8.2. Tighten the puller screw against the puller guide.
- 8.3. Remove the pulley rotor and bearing assembly.
 Courtesy of GENERAL MOTORS CORP.
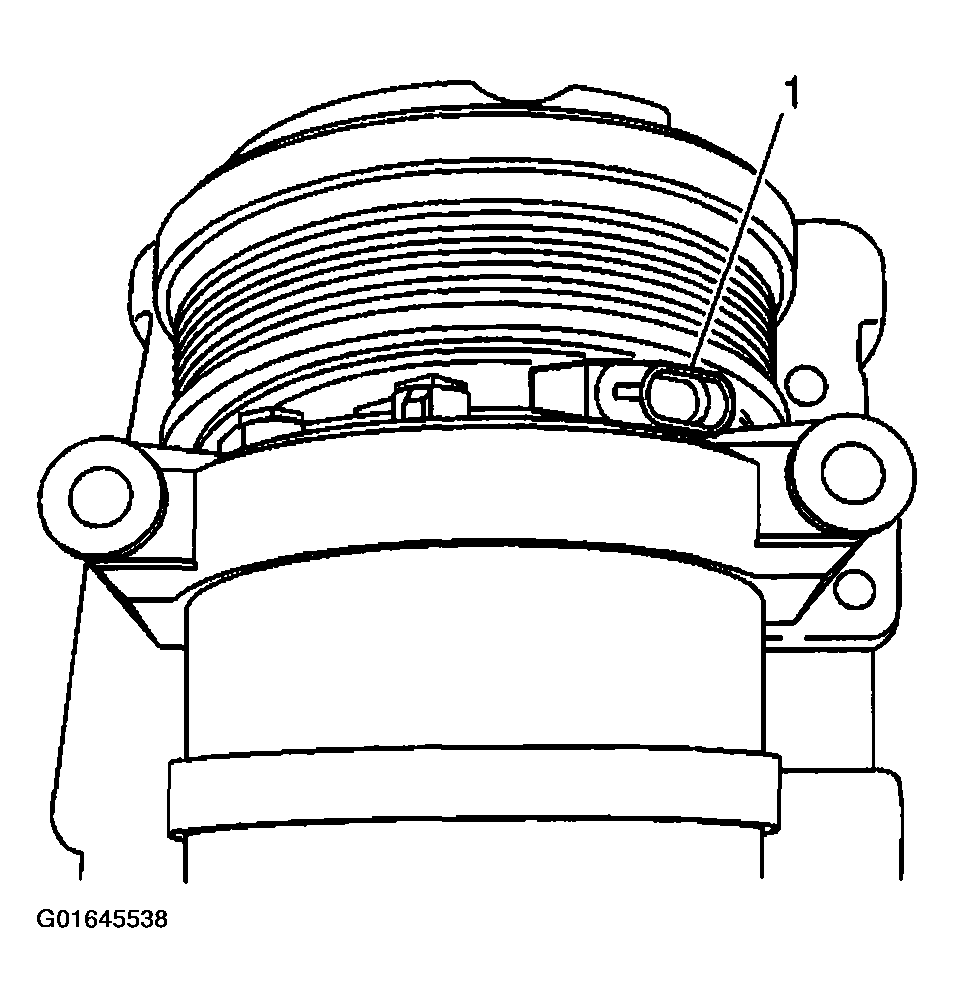
- Mark the clutch coil terminal location (1) on the compressor front head.
 Courtesy of GENERAL MOTORS CORP.
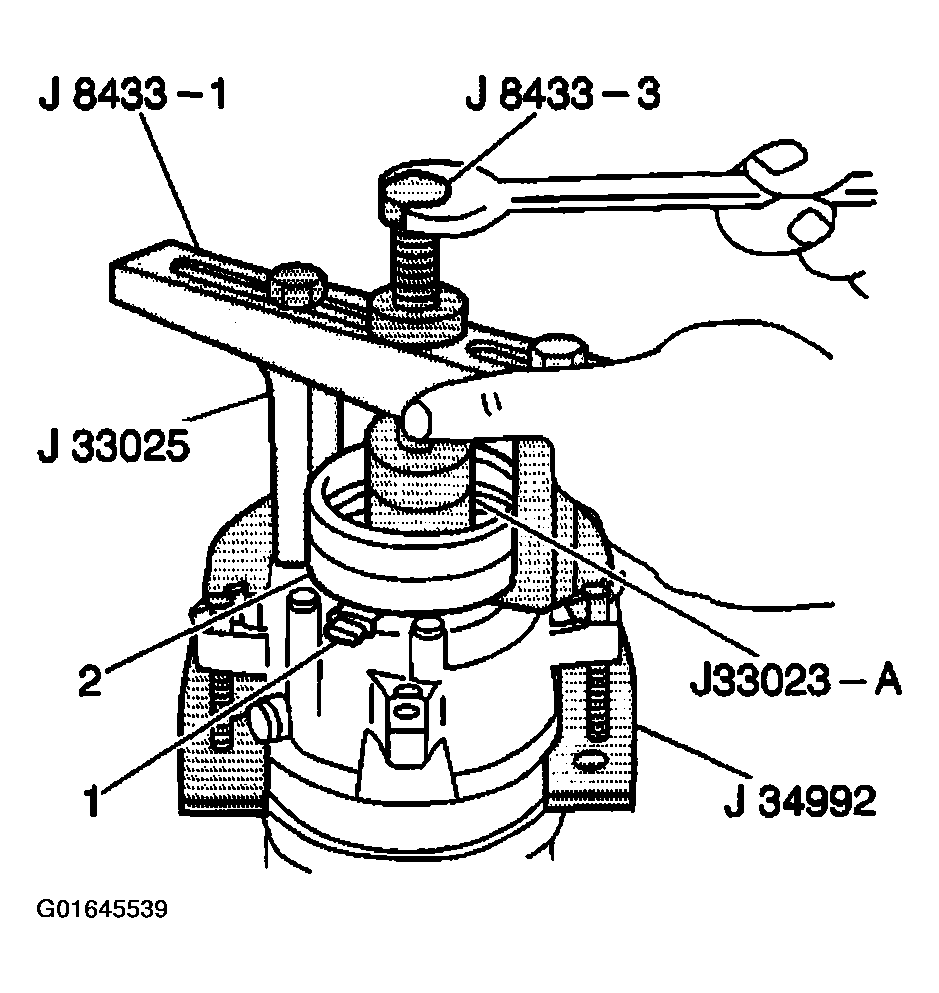
- Install the J 33023-A
on the front head of the compressor.
- Install the J 8433-1
and the J 33025.
- Tighten the J 8433-3
against the puller pilot in order to remove the clutch coil (2).
- Remove the clutch coil from the compressor.
 Courtesy of GENERAL MOTORS CORP.