Installation Procedure
- Route the belt over all the pulleys except the tensioner arm.
- Observe drive belt routing for vehicles without air conditioning.
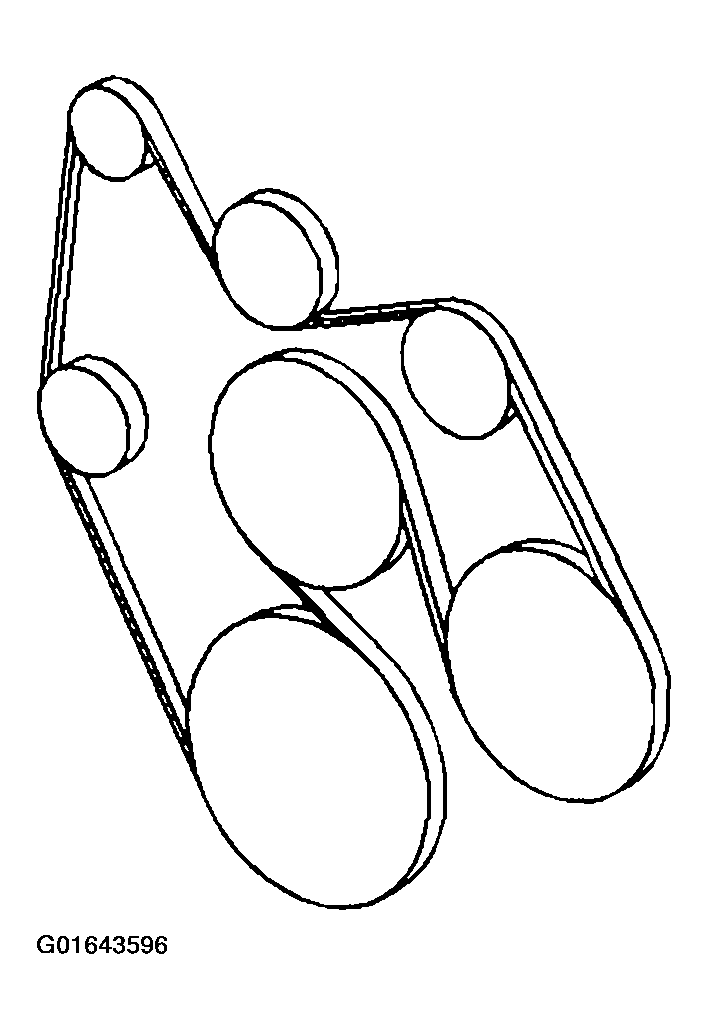 Courtesy of GENERAL MOTORS CORP.
- Observe drive belt routing for vehicles with air conditioning.
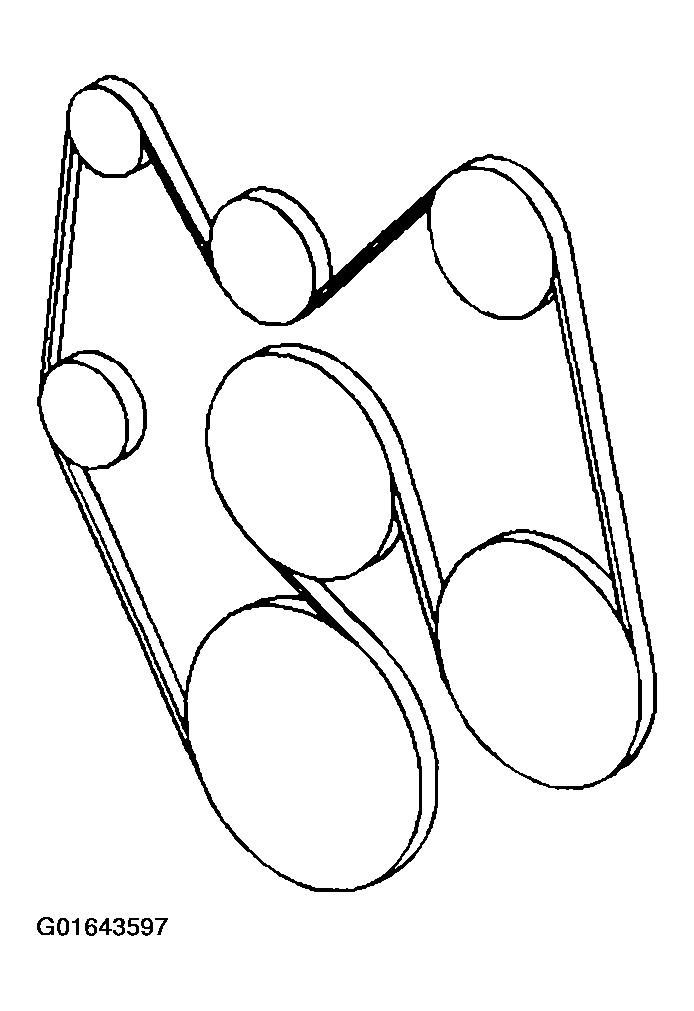 Courtesy of GENERAL MOTORS CORP.
- Install a 3/8 inch drive wrench on the drive belt tensioner arm and rotate the arm counterclockwise.
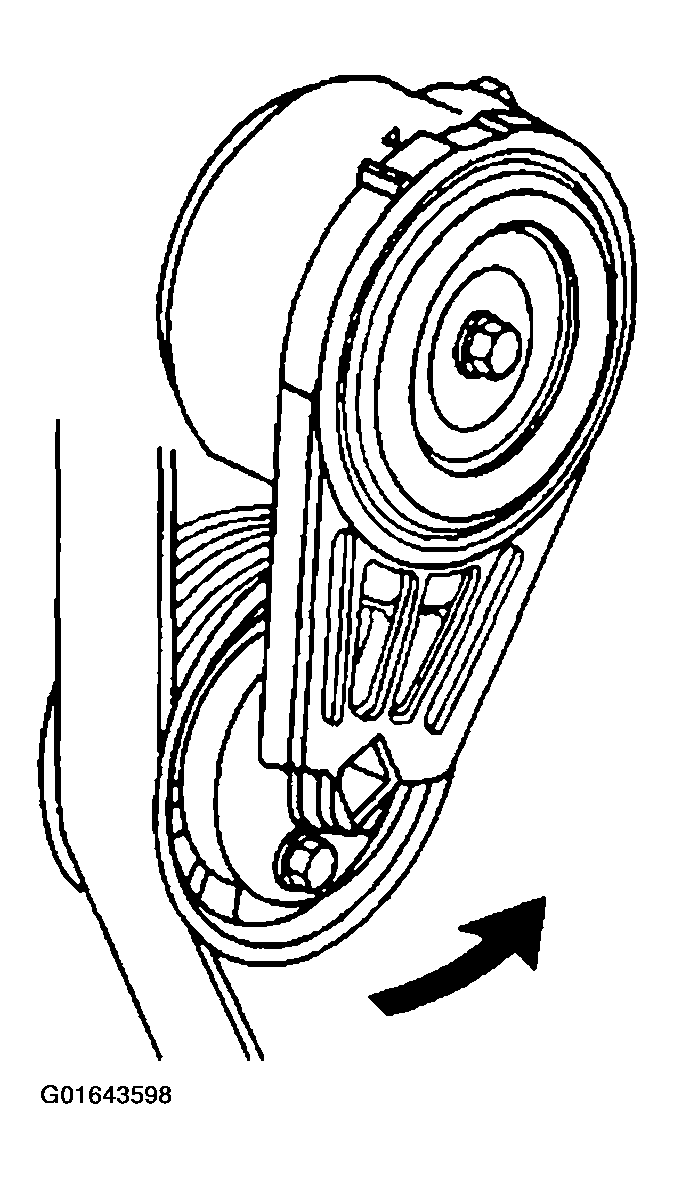 Courtesy of GENERAL MOTORS CORP.
- Install the drive belt over the drive belt tensioner pulley.
- Slowly release the tension on the tensioner arm.
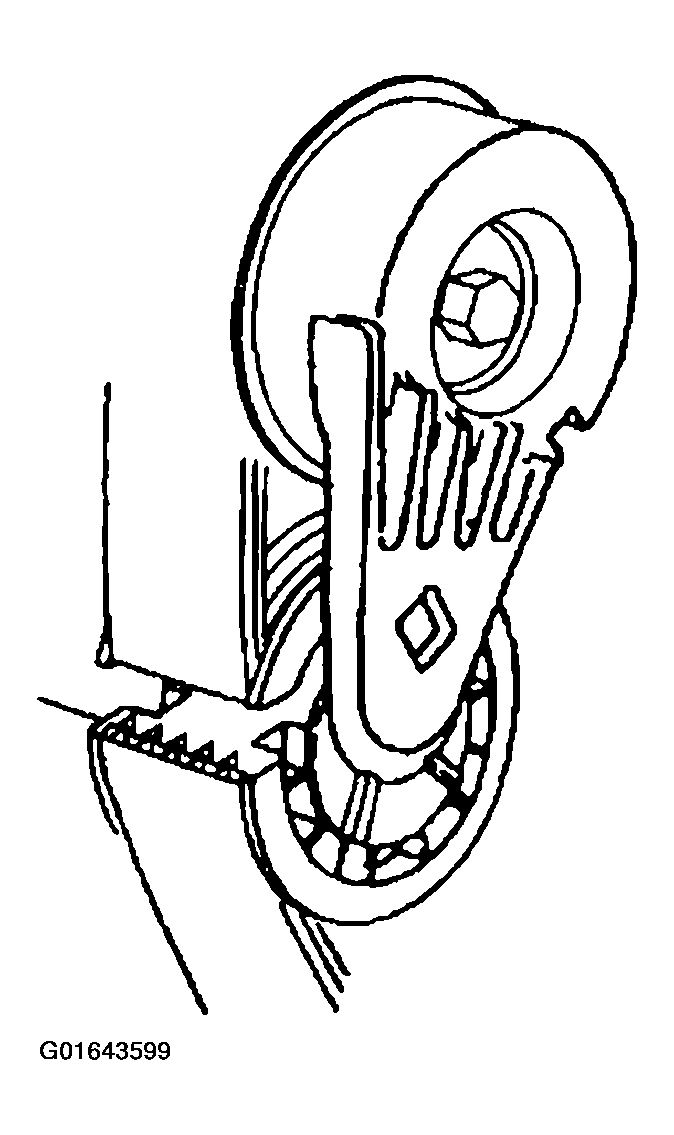
- Inspect for the drive belt being properly installed on the pulleys.
 Courtesy of GENERAL MOTORS CORP.
- Avoid mis-positioning the drive belt by one or more grooves.
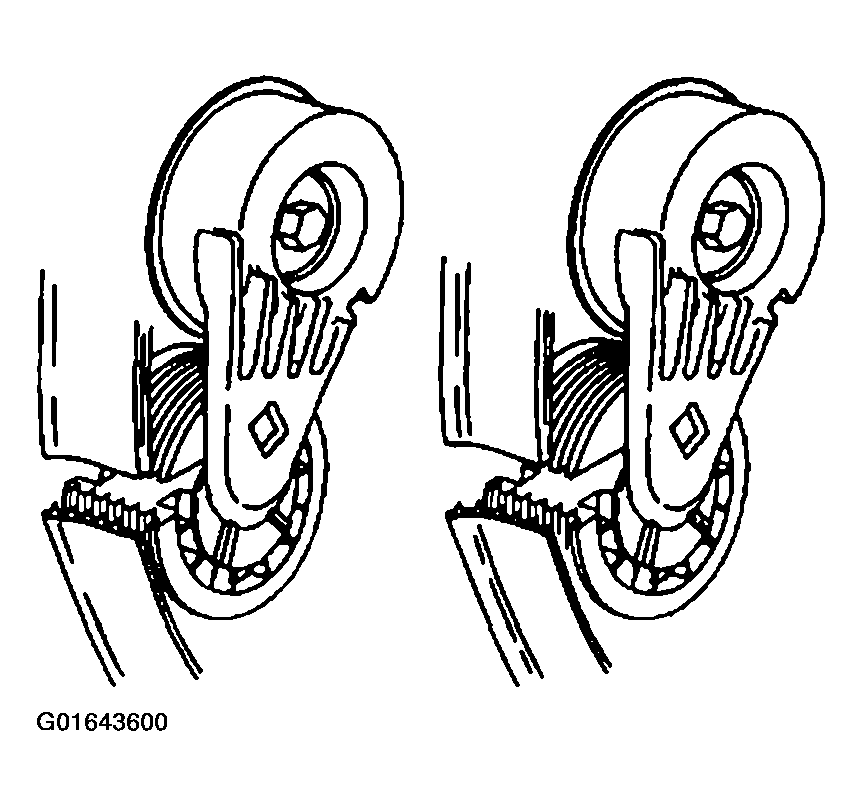 Courtesy of GENERAL MOTORS CORP.
- Confirm for the proper drive belt size and the correct drive belt routing by observing the location of the fix pointer and the index marks on the drive belt tensioner. With a new drive belt installed, the fix pointer should align within the indentation on the drive belt tensioner.
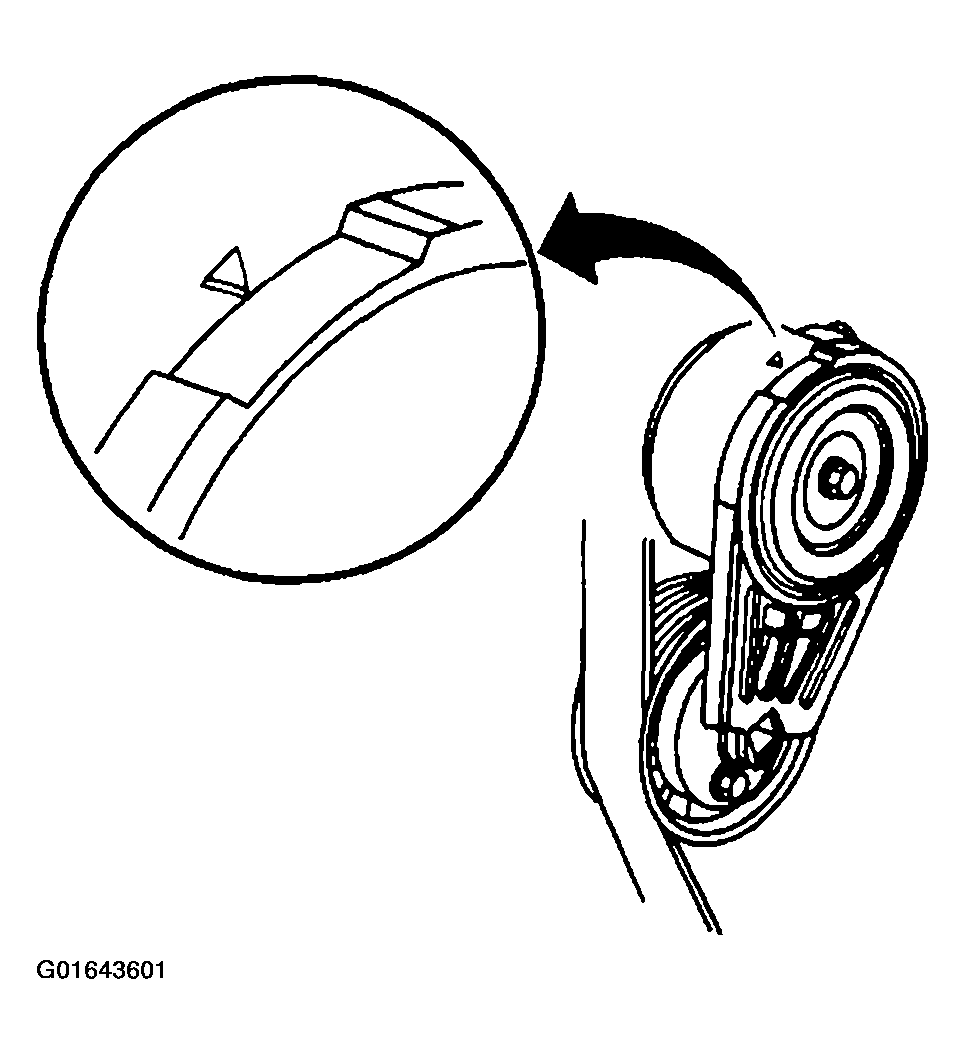 Courtesy of GENERAL MOTORS CORP.
- With a used drive belt installed, the fix pointer should not align past the index mark.
- Install the air cleaner outlet duct. Refer to ENGINE CONTROLS - REMOVAL & INSTALLATION
in Engine Performance
- Install the air cleaner assembly. Refer to ENGINE CONTROLS - REMOVAL & INSTALLATION
in Engine Performance
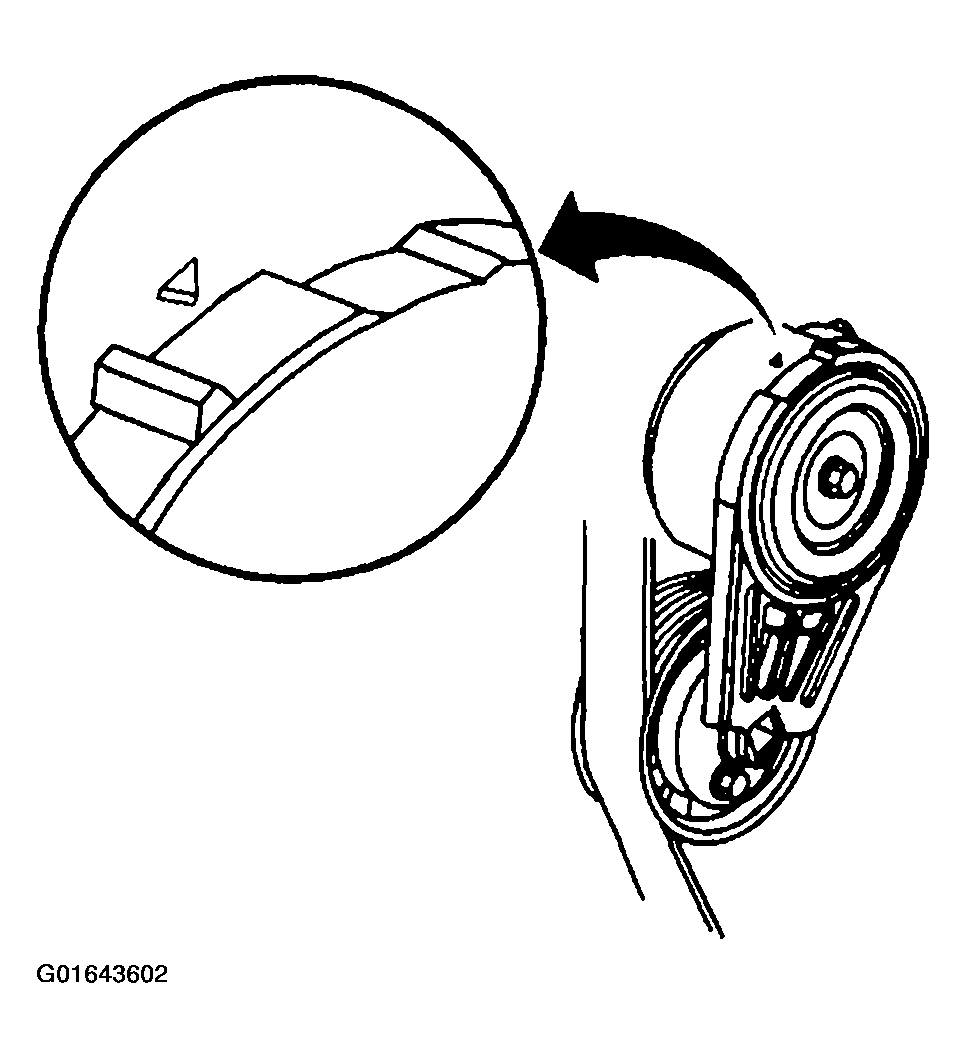 Courtesy of GENERAL MOTORS CORP.