Intake Manifold Disassemble (LU3)
- Remove the nuts, the studs, and the accelerator control cable bracket.
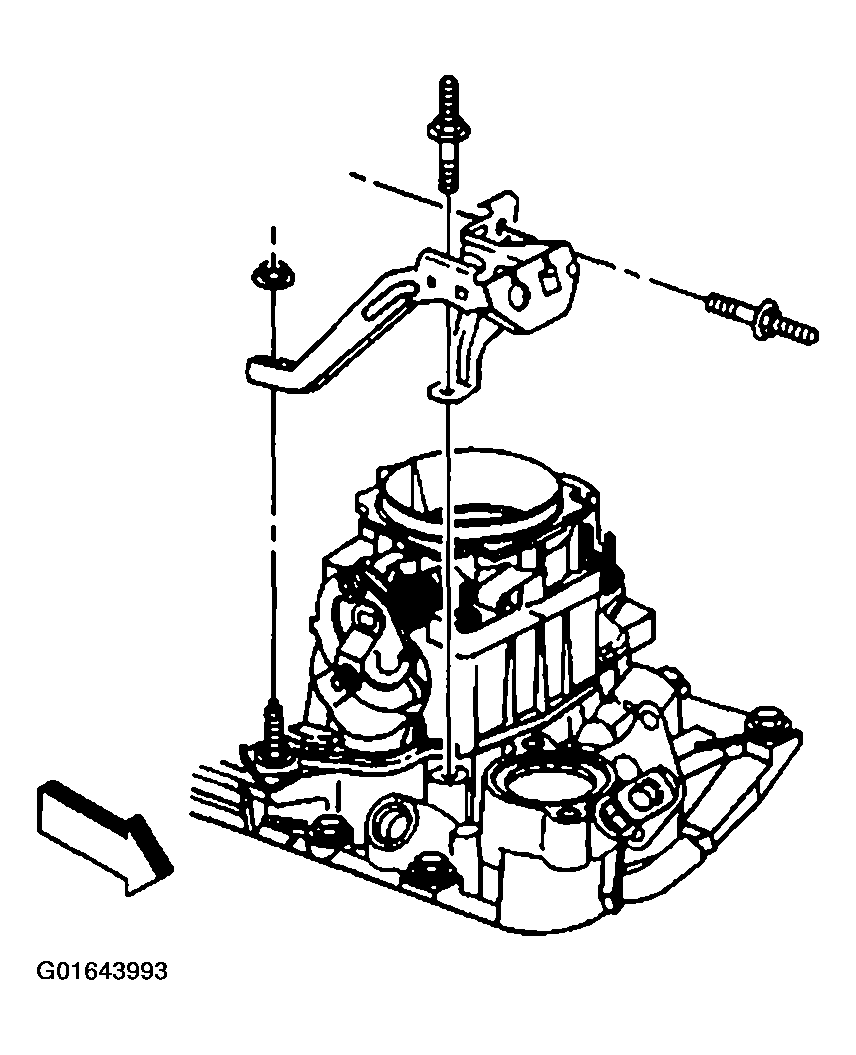 Courtesy of GENERAL MOTORS CORP.
- Remove the throttle body attaching studs.
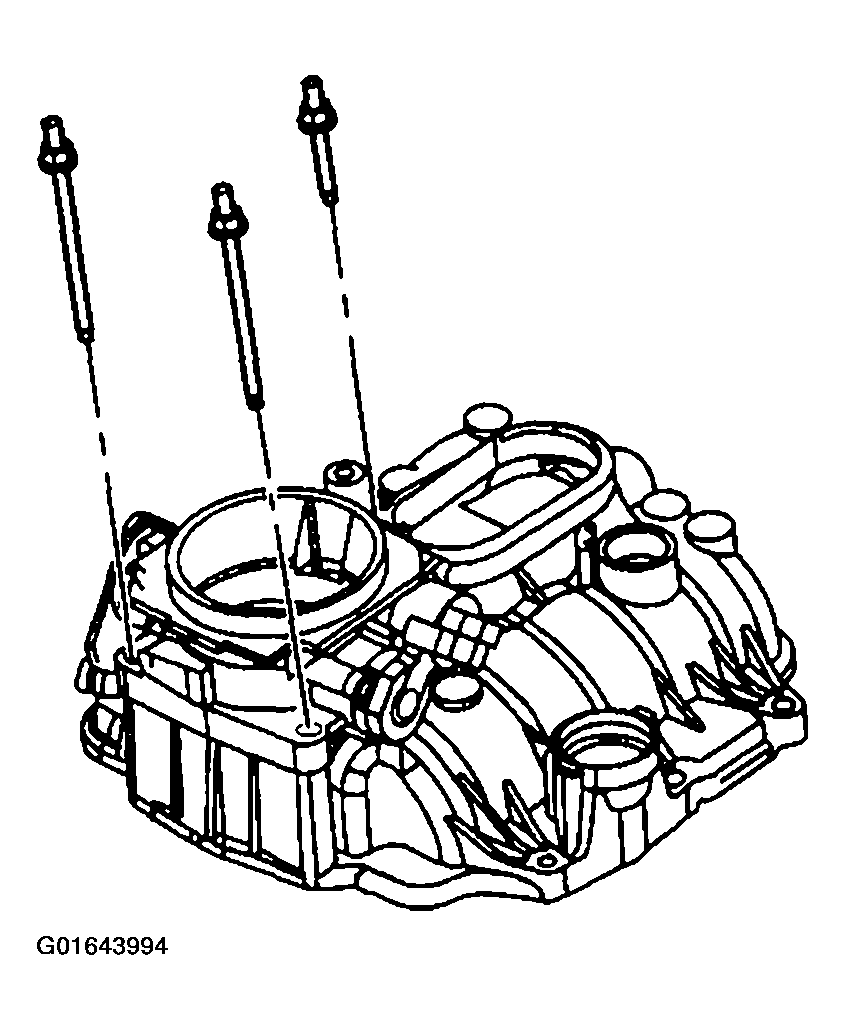 Courtesy of GENERAL MOTORS CORP.
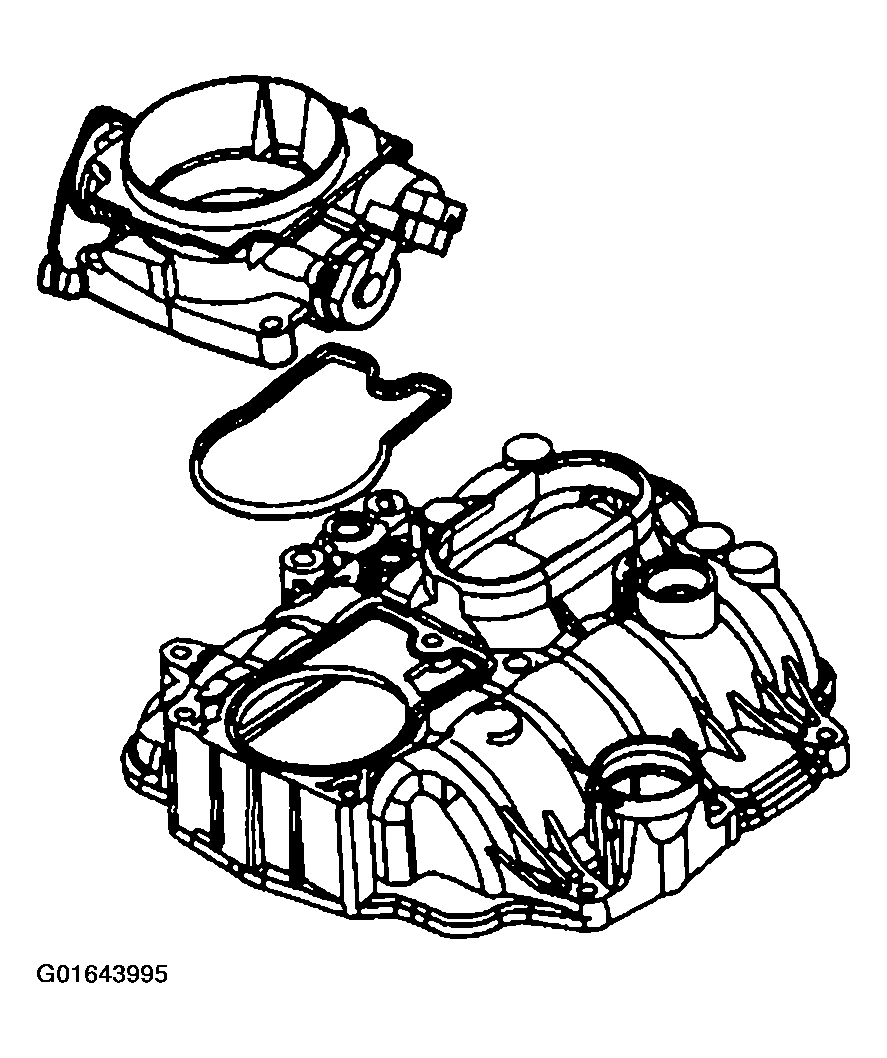
- Remove the throttle body.
- Remove the throttle body to upper intake manifold gasket.
 Courtesy of GENERAL MOTORS CORP.
- Discard the throttle body to upper intake manifold gasket.
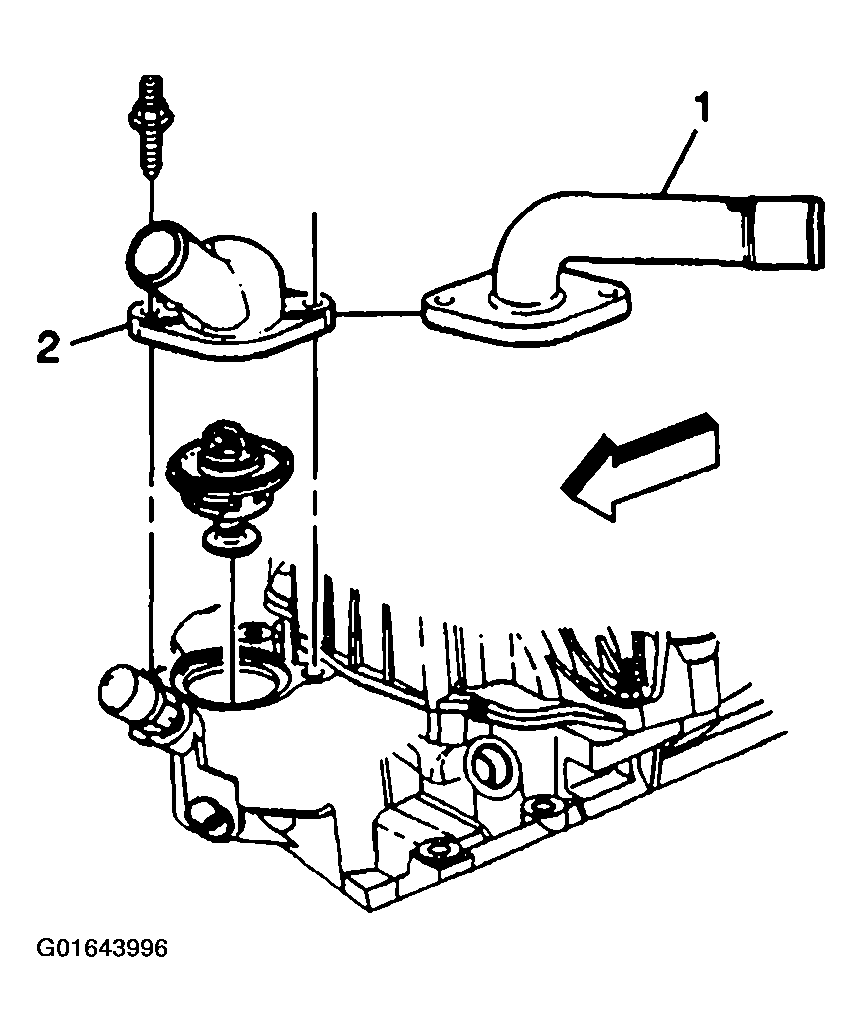
- Remove the water outlet studs.
- Remove the water outlet (1 or 2).
 Courtesy of GENERAL MOTORS CORP.
- Remove the engine coolant thermostat.
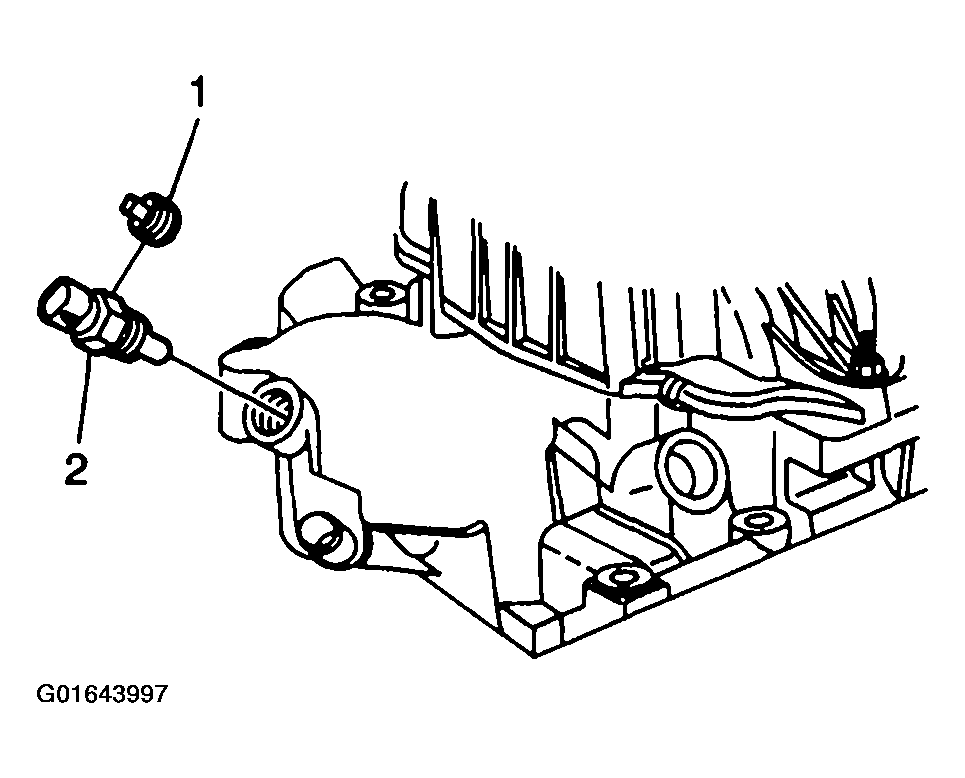
- Remove the engine coolant temperature (ECT) sensor plug (1) or the ECT sensor (2) from the front of the lower intake manifold, if equipped.
 Courtesy of GENERAL MOTORS CORP.
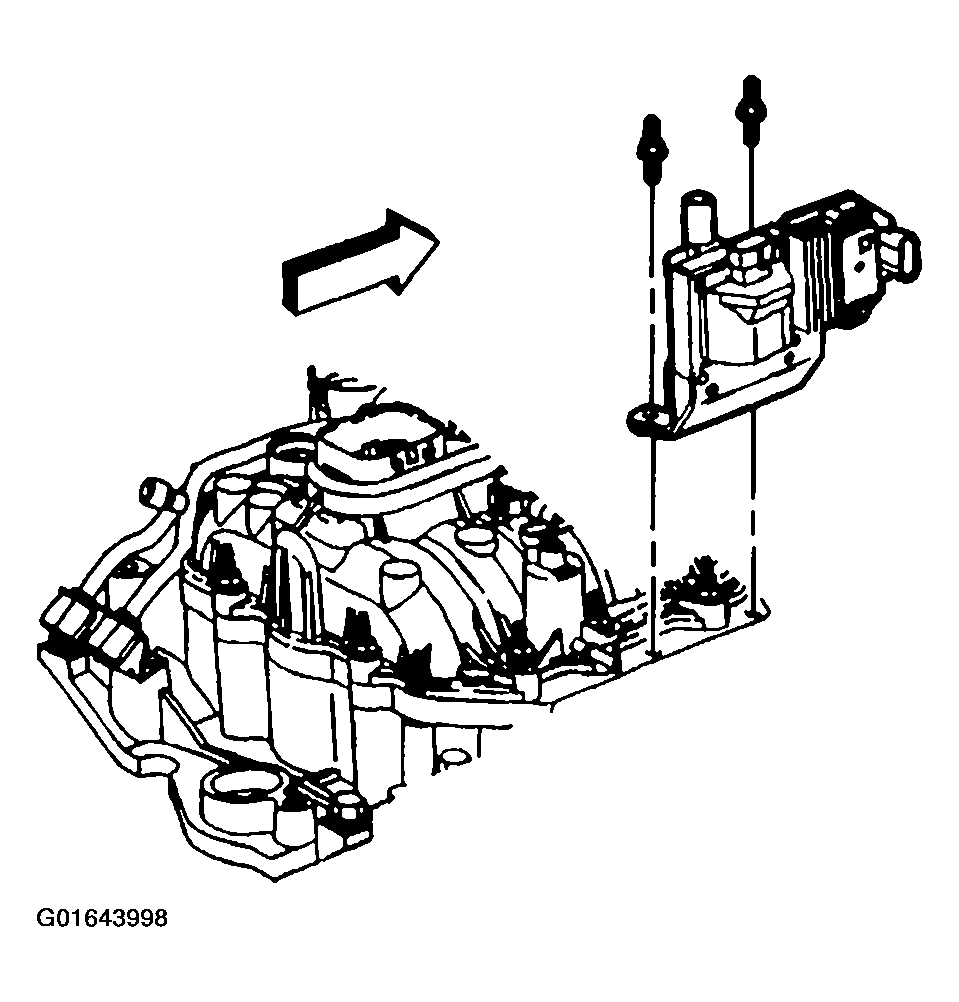
- Remove the studs and the ignition coil.
 Courtesy of GENERAL MOTORS CORP.
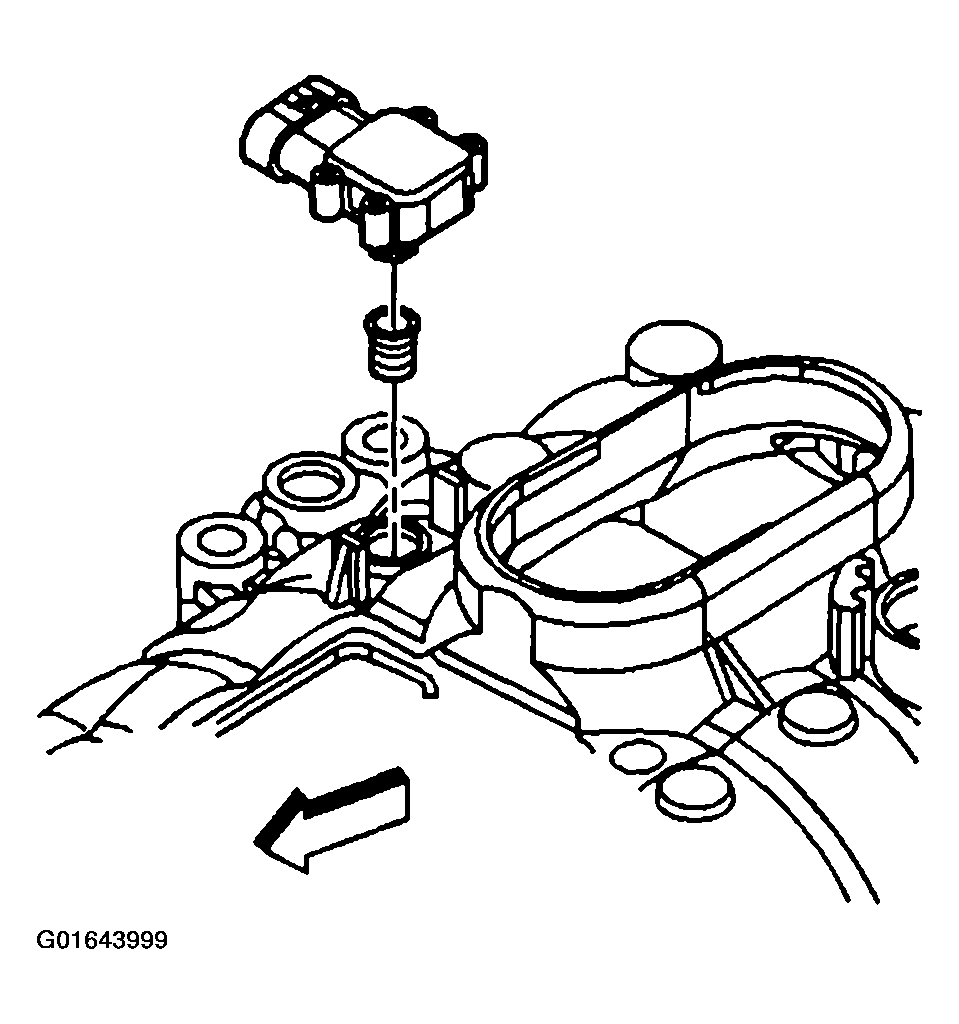
- Remove the manifold absolute pressure (MAP) sensor.
- Remove the MAP sensor seal from the MAP sensor.
 Courtesy of GENERAL MOTORS CORP.
- Discard the MAP sensor seal.
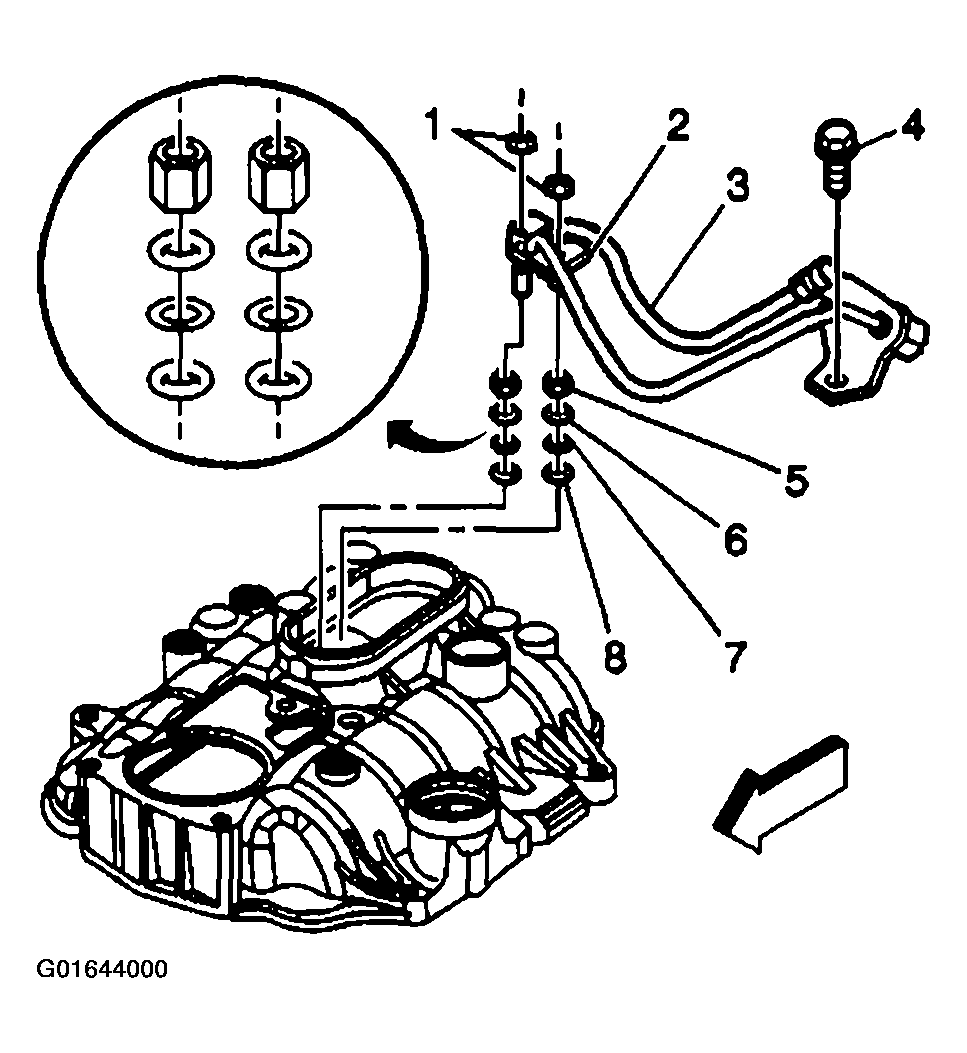
- Remove the fuel pipe bolt (4).
- Remove the fuel pipe retainer nuts (1).
- Remove the fuel pipe retainer (2).
- Remove the fuel pipe (3).
- Remove and discard the fuel seal retainers (5).
- Remove the discard the fuel seals (6), yellow O-rings.
- Remove and discard the spacer rings (7), flat washers.
- Remove and discard the fuel seals (8), black O-rings.
 Courtesy of GENERAL MOTORS CORP.
- Remove the studs and the evaporative emission (EVAP) canister purge solenoid valve.
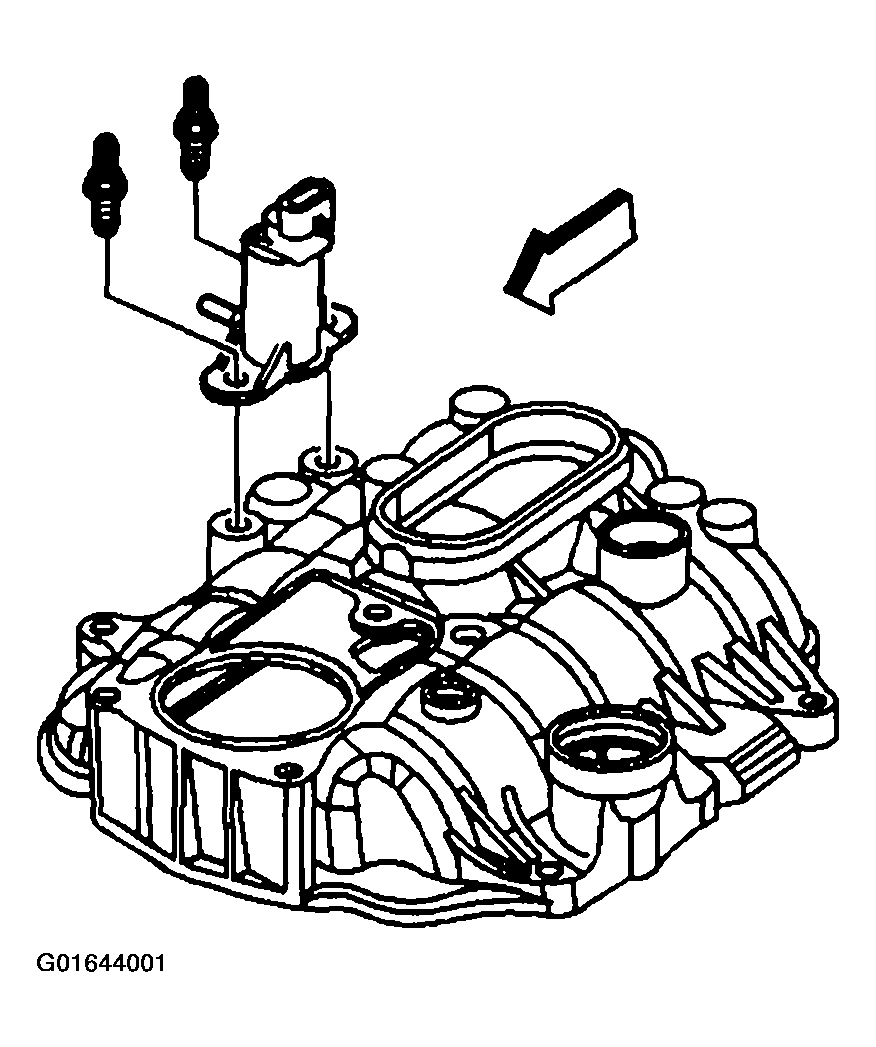 Courtesy of GENERAL MOTORS CORP.
- Remove the nut and the engine wiring harness bracket.
- Remove the upper intake manifold attaching studs.
- Remove the upper intake manifold.
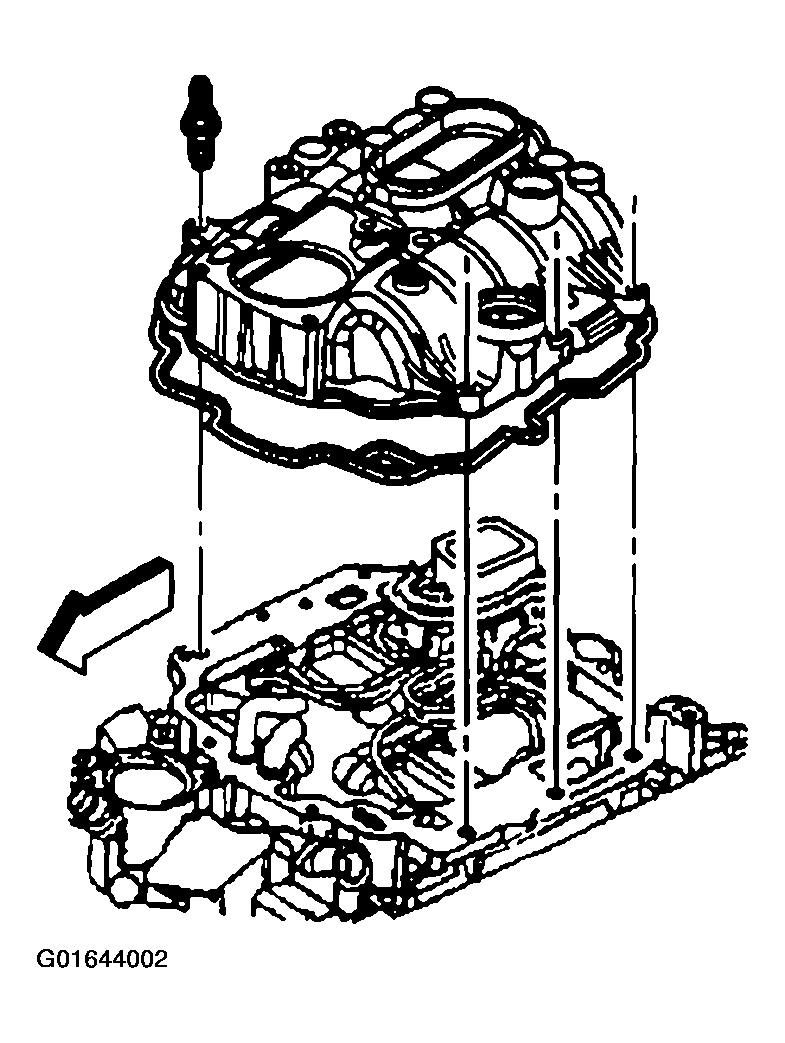 Courtesy of GENERAL MOTORS CORP.
- Remove the upper intake manifold. to lower intake manifold gasket.
- Discard the upper intake manifold to lower intake manifold gasket.
- Remove the fuel meter body seal and discard.
- Remove the 6 injectors from the lower intake manifold bores.
- Remove the fuel meter body.
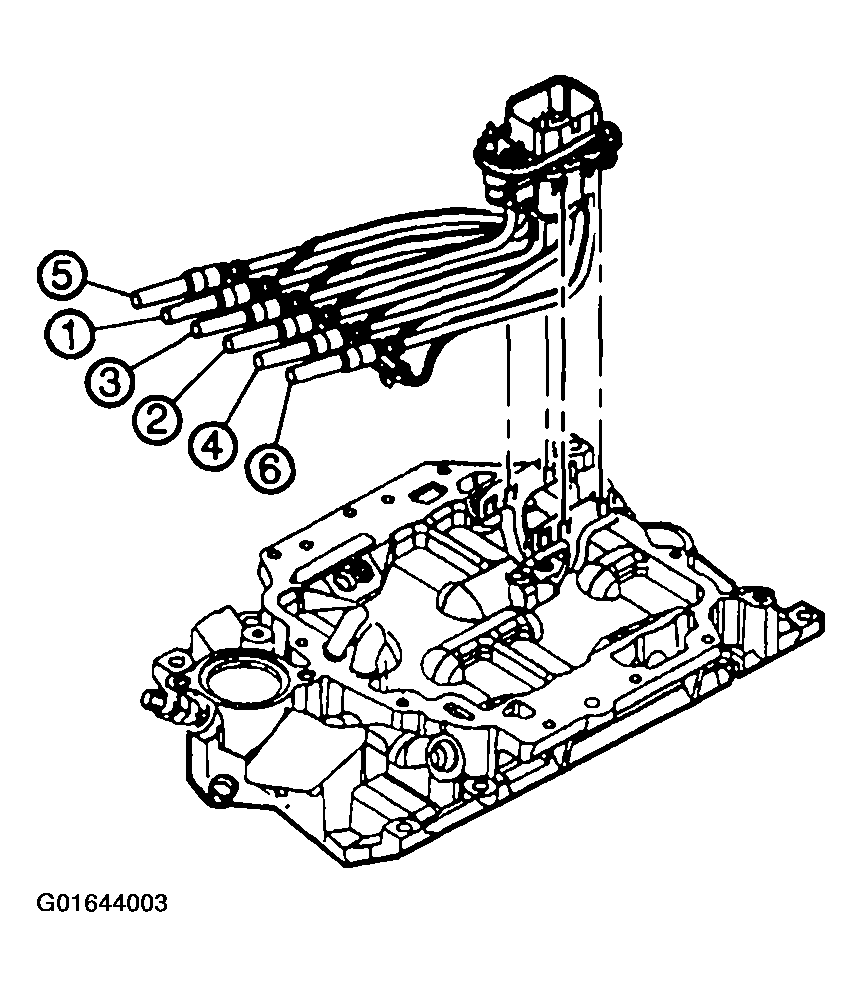 Courtesy of GENERAL MOTORS CORP.
- Remove the bolt and the fuel meter body bracket.