Lower Ball Joint
- Tools Required- J 9519-E Lower Ball Joint Remover and Installer Set
- J 23742 Ball Joint Separator
Removal Procedure
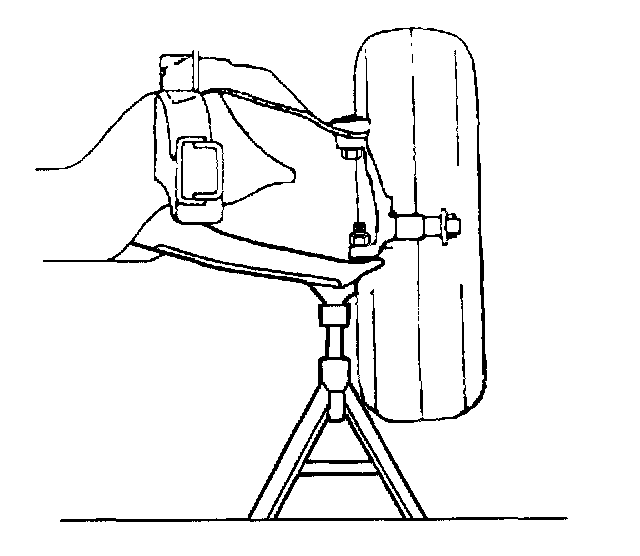
Caution: Floor jack must remain under the lower control arm during removal and installation to retain the lower control arm in position. Failure to do so could result in personal injury.
1. Raise the vehicle. Refer to Vehicle Lifting.
2. Support the lower control arm with a safety stand.
3. Remove the tire and wheel. Refer to Tire and Wheel Removal and Installation.
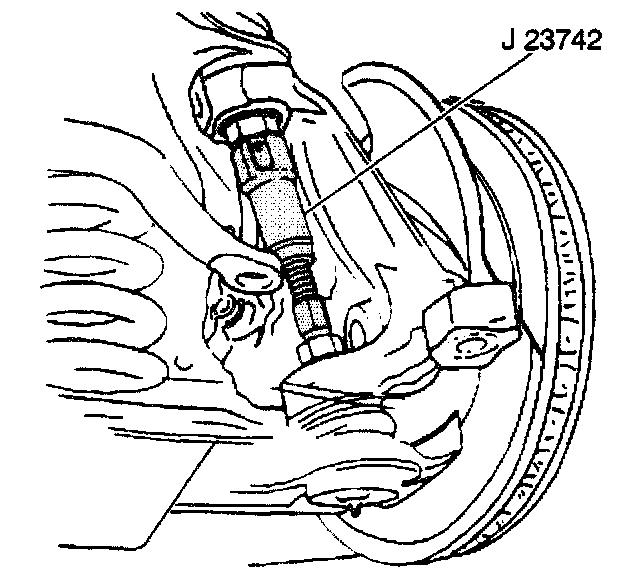
4. Remove the lower ball joint cotter pin and the retaining nut.
5. Break the lower ball joint loose from the steering knuckle using J23742.
6. Remove J 23742.
7. Pull the steering knuckle free from the lower ball joint.
8. Support the steering knuckle in order to prevent the steering knuckle weight from damaging the brake hose.
9. Remove the rubber grease seal from the lower ball joint.
10. Remove the lower ball joint grease fitting.
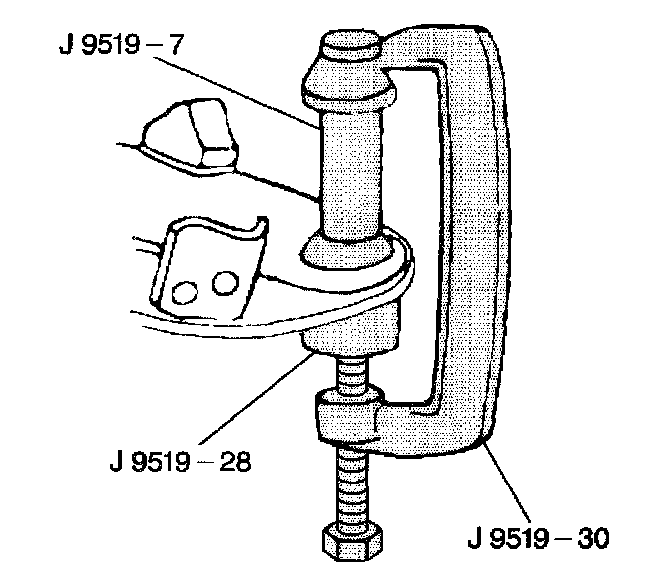
11. Remove the lower ball joint from the lower control arm using J 9519-E.
Installation Procedure
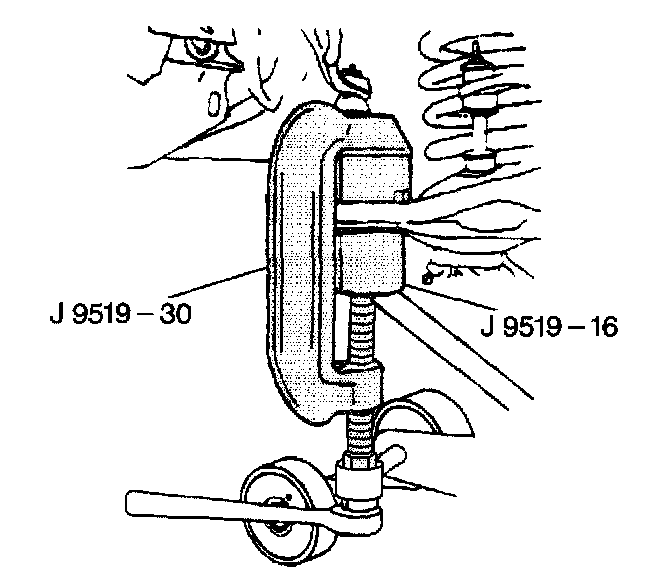
1. Install the lower ball joint to the lower control arm.
2. Press the lower ball joint into the lower control arm using J 9519-E.
Press in until the ball joint bottoms in the control arm.
3. Install the grease seal and the grease fitting to the lower ball joint.
- The grease-purge hole of the seal must face inboard.
- Press the grease seal into place. The seal must be fully seated on the ball joint.
4. Remove the steering knuckle support.
5. Install the lower ball joint to the steering knuckle.
Notice: Refer to Fastener Notice in Service Precautions.
6. Install the lower ball joint retaining nut.
- Tighten the lower ball joint retaining nut to 125 Nm (90 ft. lbs.).
7. Install a new cotter pin.
- Tighten the nut up to an additional 1/6 amount in order to insert the cotter pin through the lower ball joint stud. Bend the pin ends against the nut flats.
8. Using a grease gun, grease to the lower ball joint until grease appears at the lower ball joint grease seal.
9. Install the tire and wheel. Refer to Tire and Wheel Removal and Installation.
10. Remove the safety stand from the lower control arm.
11. Lower the vehicle.
12. Check the front wheel alignment. Refer to Measuring Wheel Alignment.