Drive Pinion Assembly & Preload
- Place required shims and baffle, if used, in inner bearing bore. Use Pinion Bearing Cup Installer (D-111) on 9 3/4" axles or (C-4204) on 10 1/2" axles, and Handle (C-4171) to install drive pinion inner bearing cup into drive axle housing. Ensure cup is seated on shims.
- Use Pinion Bearing Cup Installer (J-7818) and Handle (J-8092) to install drive pinion outer bearing cup into drive axle housing. Use Pinion Bearing Installer (J-5590) to install inner bearing and oil slinger (if used) on drive pinion.
 Courtesy of GENERAL MOTORS CORP.
- Install drive pinion in drive axle housing. Install outer drive pinion bearing and slinger (if used). DO NOT
install preload shims and oil seal at this time.
- Install drive pinion flange. Install washer and drive pinion nut. Using Pinion Flange Holder/Remover (J-8614-01), tighten drive pinion nut until a torque of 10 INCH Lbs. (1.13 N.m) is required to rotate drive pinion. Rotate drive pinion several times to seat bearings.
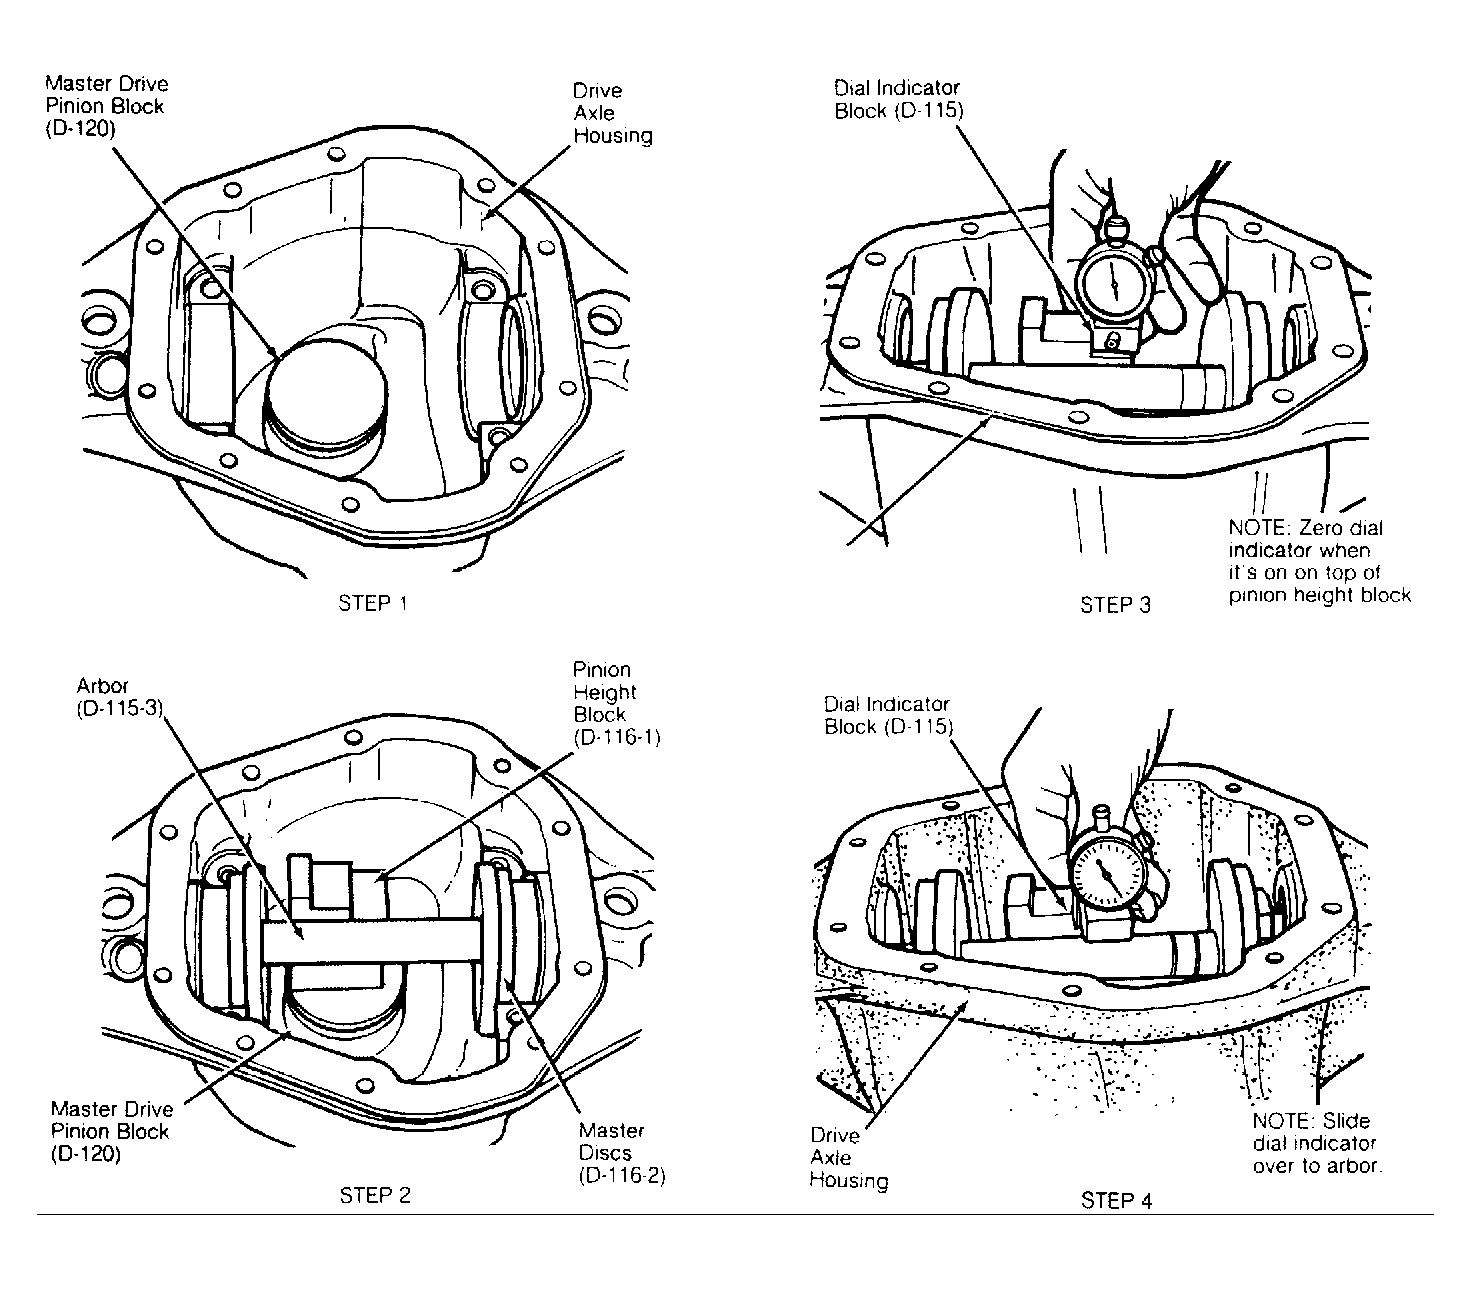
- Assemble Master Discs (D-116-2) onto Arbor (D-115-3). Install arbor and disc assembly into drive axle housing. Place Pinion Height Block (D-116-1) on top of drive pinion and against arbor. Place Dial Indicator Block (D-115) on lowest step of pinion height block. While applying a downward pressure on dial indicator block, set dial indicator to zero.
- Slide dial indicator block over to arbor. See Fig 1. Move dial indicator block back and forth (perpendicular to arbor) to get highest reading. If reading is within .002" (.05 mm) of drive pinion marking, drive pinion depth is set correctly.
- If depth is not within drive pinion marking, change shim pack by the amount indicator needle is deflected away from drive pinion marking. Dial indicator needle will move to left if drive pinion has a positive (+) value etched on it. Needle will move to right if pinion head has a negative (-) value etched on it.
- Remove drive pinion nut, washer, pinion flange and bearing. Remove preload shims. Install shims that were removed, or measure old shims and replace them with new shims if necessary.
- Install outer drive pinion bearing and oil slinger (if used). Apply a light coat of lubricant to pinion seal lip. Use Seal Installer (D-163) to install drive pinion oil seal.
- Install drive pinion flange. Install washer and new drive pinion nut. Using Pinion Flange Holder/Remover (J-8614-01), tighten drive pinion nut until a torque of 20-40 INCH Lbs. (2.26-4.53 N.m) is required to rotate pinion. See Figure. If necessary, add shims to increase preload, or remove shims to decrease preload.