Clutch Slave Cylinder Service
Fig. 5 Clutch slave cylinder replacement:
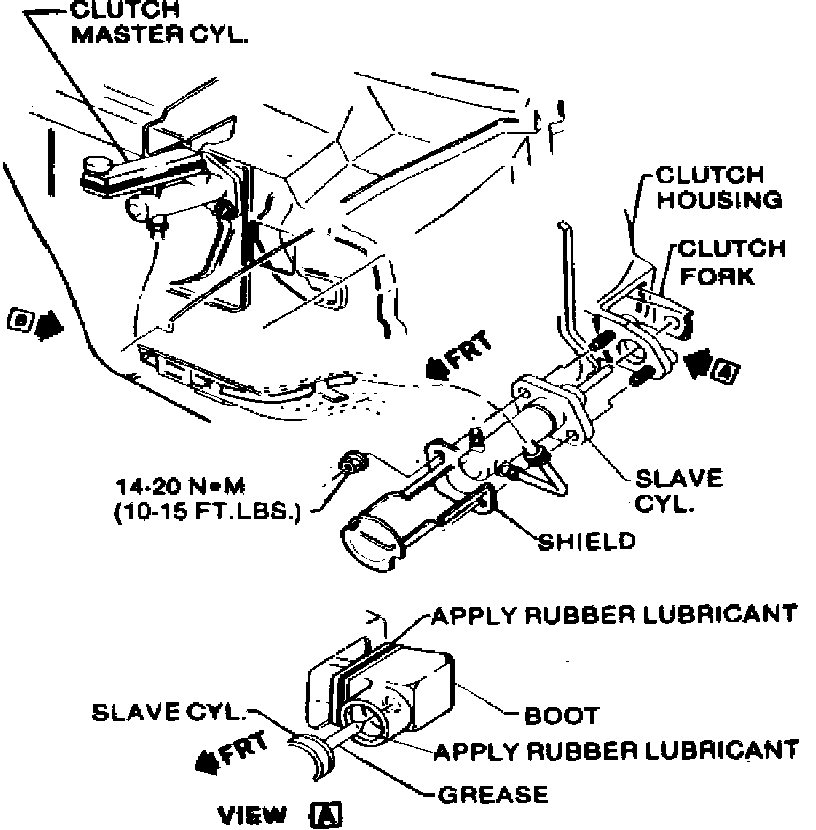
REMOVAL
1. Disconnect battery ground cable.
2. Raise and support vehicle.
3. Disconnect hydraulic line from slave cylinder.
4. Remove slave cylinder attaching nuts and the slave cylinder, Fig. 5.
Fig. 6 Exploded view of clutch slave cylinder:
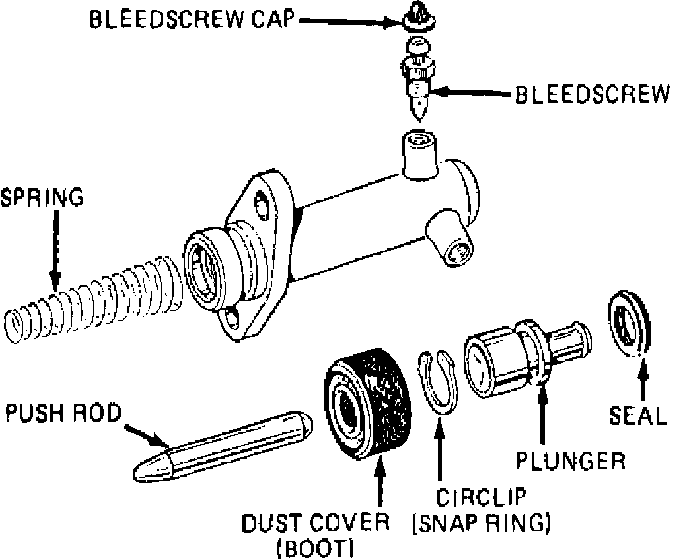
DISASSEMBLY
1. Remove pushrod and rubber dust cover from slave cylinder, Fig. 6.
2. Remove snap ring, then shake out plunger and spring assembly.
3. Remove seal from plunger, using care to avoid damaging plunger surfaces.
INSPECTION
1. Replace seal and clean all components in clean brake fluid.
2. Inspect cylinder bore for visible scores and ridges and ensure it is smooth to the touch. Replace slave cylinder if defective.
ASSEMBLY
1. Install seal and spring on plunger.
2. Lubricate seal and cylinder bore with clean brake fluid, then slide plunger and spring assembly into cylinder bore.
3. Depress plunger and install snap ring.
4. Apply suitable grease to inside of rubber dust cover, then install the dust cover and pushrod.
INSTALLATION
1. Connect hydraulic line to slave cylinder, then fill reservoir with new brake fluid and bleed system as described under ``Clutch System, Bleed.''
2. Install slave cylinder to bellhousing and torque retaining nuts to 10---15 ft. lbs.