Power Brake Units - BENDIX HYDROBOOST: Overhaul: Disassembly
- Secure unit in vise (bracket end up) and use chisel to cut bracket nut that secures linkage bracket to power section. Cut nut at slot in threaded section to prevent damage to threads. Remove linkage bracket from unit.
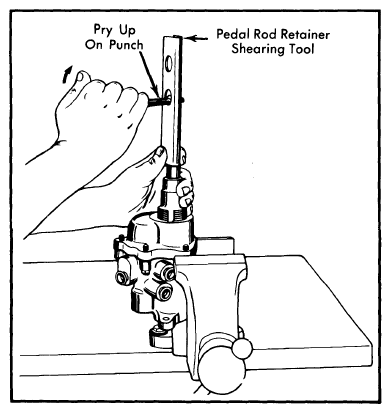
- Remove pedal rod boot (if equipped) and place rod retainer shearing tool (see tool chart for number) over rod. Place a punch through pedal rod from lower side of tool and push punch on through to rest on higher side of tool. Lift up on punch to shear pedal rod retainer. Remove pedal rod.
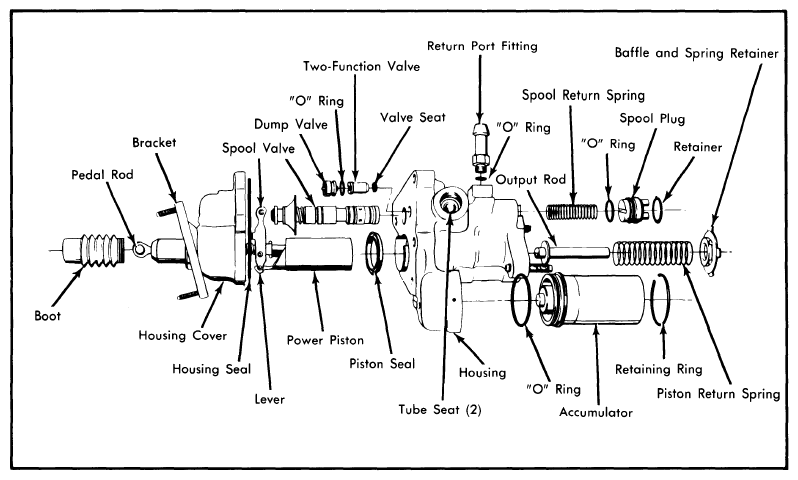
- Remove remnants of rubber grommet from groove near end of pedal rod and from groove inside input rod end. With small screwdriver, pry plastic guide out of output push rod retainer. Disengage tabs of spring retainer from ledge inside opening near master cylinder mounting flange of booster. Remove retainer, piston return spring and output rod from opening.
- Place booster cover in a soft-jawed vise and remove 5 screws securing booster housing to cover. Remove booster assembly from vise and while holding over a pan, separate cover from housing. Remove large seal ring from groove in cover and discard.
- Remove input rod and piston assembly, spool assembly and spool spring from booster housing. If spool valve is defective, the complete assembly must be replaced. Inspect power piston, if deep scratches are evident, input rod and piston must be replaced.
 Courtesy of NOT AVAILABLE
 Courtesy of NOT AVAILABLE
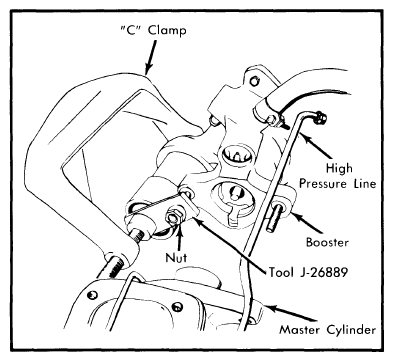
- Remove input rod seals and piston seal from piston bore. Place retaining cap tool (see tool chart for number) over master cylinder stud and install nut as shown in Fig 3. Using a large "C" clamp, depress accumulator. Insert a punch into hole in housing and remove retaining ring with screwdriver.
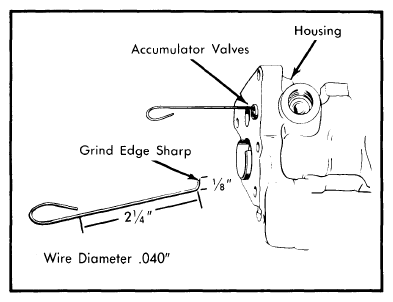
- Slowly back off clamp until tension on accumulator is released, then remove accumulator and "O" ring. If accumulator valve is faulty, remove valve using a small diameter wire tool. See Fig 4. Remove the dump valve by catching the tool under the pin guide near the center of the valve, then remove 2 function valve and seat.
- Remove return hose "O" ring fitting if it is leaking. Remove spool valve plug, retaining ring and "O" ring. Remove tube seats using a No. 4 Easy Out.
 Courtesy of NOT AVAILABLE
 Courtesy of NOT AVAILABLE