Removal And Installation
WARNING: This page is about a different car, the 2016 Ford Expedition. However, it is still accessible from the selected car via links, so may be relevant.
All vehicles
- 1.
NOTE:
Inspect the shoulder safety belt guide cover for damage. If the shoulder safety belt guide cover is damaged or the cover does not remain closed, install a new shoulder safety belt guide cover.
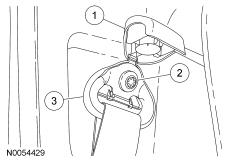
Remove the shoulder safety belt guide.
- 1.
Position the shoulder safety belt cover upward.
- 2.
Remove the safety belt guide bolt.
- To install, tighten to 40 Nm (30 lb-ft).
- 3.
Remove the shoulder safety belt guide.
 Courtesy of FORD MOTOR COMPANY Courtesy of FORD MOTOR COMPANY
|
- 2.
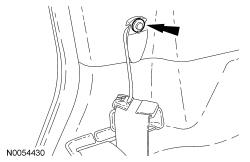
Detach the safety belt holder pin-type retainer.
 Courtesy of FORD MOTOR COMPANY Courtesy of FORD MOTOR COMPANY
|
- 3.
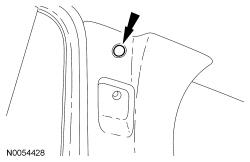
Remove the C-pillar trim panel fastener cover.
 Courtesy of FORD MOTOR COMPANY Courtesy of FORD MOTOR COMPANY
|
Expedition EL/Navigator L only
- 4.
Remove the C-pillar trim panel nut.
- To install, tighten to 8 Nm (71 lb-in).
All vehicles except Expedition EL/Navigator L
- 5.
Remove the C-pillar trim panel bolt.
- To install, tighten to 8 Nm (71 lb-in).
All vehicles
- 6.
NOTE:
To avoid damage to the C-pillar trim panel, remove any retaining clips from the body and attach them to the C-pillar trim panel before installing.
Remove the C-pillar trim panel.
- Pull the C-pillar trim panel outward to release the C-pillar trim panel retaining clips.
- 7.
NOTE:
During installation, make sure the safety belt webbing is not twisted and the safety belts and buckles are accessible to the occupants.
To install, reverse the removal procedure.