Removal and Installation
- If equipped, remove the 2 rivets and pull the pivot release handle out of the pocket.
- Use a 5 mm (0.196 in) drill to remove the rivets.
- If equipped, separate the pivot release cable and casing and remove the pivot release handle.
- To install a new RH cushion cover, from the RH load floor flapper panel, detach the 2 wire harness retainers and disconnect the 2 electrical connectors.
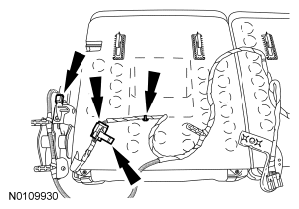 Courtesy of FORD MOTOR CO.
- To install a new LH cushion cover, from the LH load floor flapper panel, detach the 3 wire harness retainers, disconnect the electrical connector, disengage and remove the Power-Fold Seat Module (PFSM) with wire harness.
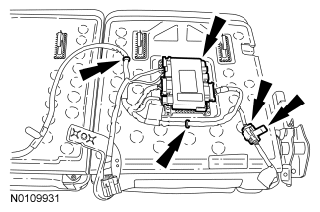 Courtesy of FORD MOTOR CO.
- Remove the 2 load floor panel screws at the back of the cushion.
- Pull out to release the retainers and remove the load floor panel.
- Remove the screw, release the tab and remove the floor latch cover.
- Release the cushion trim cover retainers from the cushion frame, and remove the cushion trim cover and cushion foam pad.
- On assembly, the lower anchors and tethers for children and child safety seat tether anchor must be accessible through the cushion trim cover.
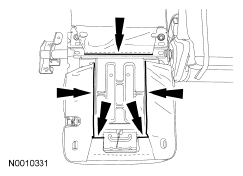 Courtesy of FORD MOTOR CO.
- Remove the hog rings and the cushion cover.
- To install, reverse the removal procedure.