B-Pillar Trim Panel - Regular Cab
B-Pillar Trim Panel - Regular Cab
Removal and Installation
1. Position seats fully down and forward.
2. Depower the Supplemental Restraint System (SRS). For additional information, refer to Restraints and Safety Systems &/or Air Bag Systems.
3. Pull upward to release the scuff plate clips and remove the front door scuff plate.
- Detach the scuff plate from the weatherstrip.
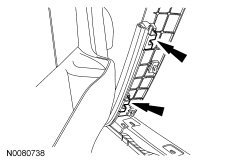
4. Position the weatherstrips aside.
- If equipped, position the rear weatherstrips aside.
5. Remove the safety belt D-ring trim cover.
6. Remove the safety belt D-ring bolt.
- To install, tighten to 40 Nm (30 lb-ft).
7. Remove the B-pillar trim panel pin-type retainer.
8. NOTE: Starting at the top of the cover, use a non-marring tool.
Remove the B-pillar trim panel bolt cover.
9. Remove the B-pillar trim panel bolt.
- To install, tighten to 9 Nm (80 lb-in).
10. Remove the safety belt anchor bolt trim cover.
11. Remove the safety belt anchor bolt.
- Disconnect electrical connector.
- To install, tighten to 40 Nm (30 lb-ft).
12. Remove the safety belt trim ring.
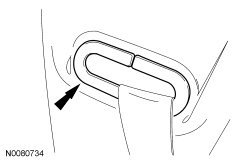
13. Remove the B-pillar trim panel.
- Position the safety belt through the B-pillar trim panel.
14. NOTE: The B-pillar trim panel has a 2-way locator and a 4-way locator that must be positioned correctly on installation.
To install, reverse the removal procedure.