Thermostatic Expansion Valve Manifold and Tube Assembly - 2.0L GTDI, Auxiliary Climate Control: Removal
- Recover the refrigerant. REFER to Air Conditioning (AC) System Recovery, Evacuation, and Charging .
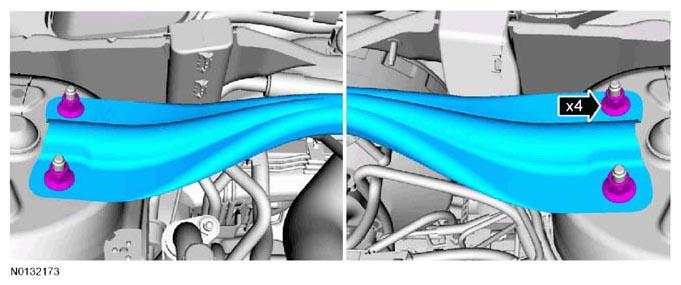
- Remove the 4 strut tower brace nuts and remove the strut tower brace.
- To install, tighten to 55 Nm (41 lb-ft).
 Courtesy of FORD MOTOR CO.
- Remove the cowl panel grille. REFER to COWL PANEL GRILLE
.
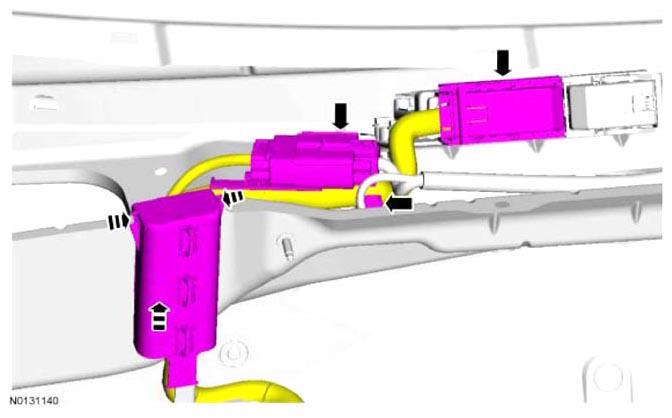
- Remove the engine wiring harness retainer from the bulkhead.
- Disconnect the PCM, engine harness electrical connectors and detach the wiring harness retainer.
- Push the wiring harness retainer tab in and slide the wiring harness up and out of the bulkhead.
 Courtesy of FORD MOTOR CO.
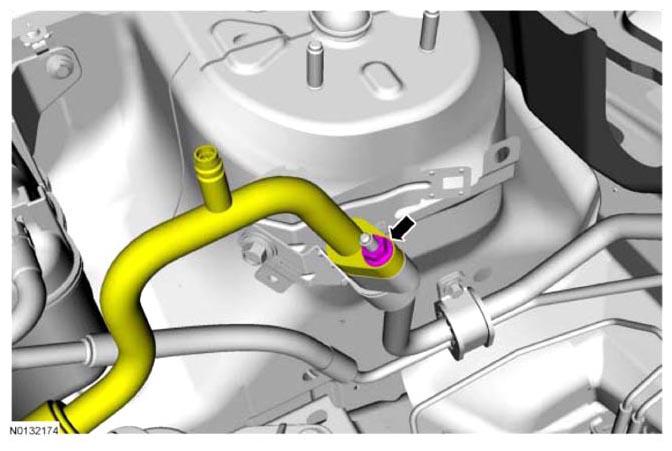
- Remove the evaporator outlet line fitting nut and disconnect the fitting.
- Discard the O-ring seal and gasket seal.
- To install, tighten to 15 Nm (133 lb-in).
 Courtesy of FORD MOTOR CO.
- Position aside the TXV manifold and tube assembly line.
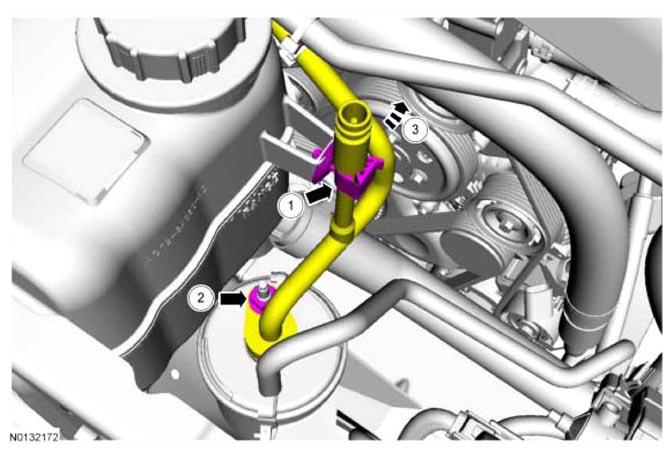
- Detach the receiver/drier outlet line clip.
- Remove the receiver/drier outlet fitting nut and disconnect the fitting.
- Discard the O-ring seal and gasket seal.
- Tighten to 15 Nm (133 lb-in).
- Position aside the TXV manifold and tube assembly line.
 Courtesy of FORD MOTOR CO.
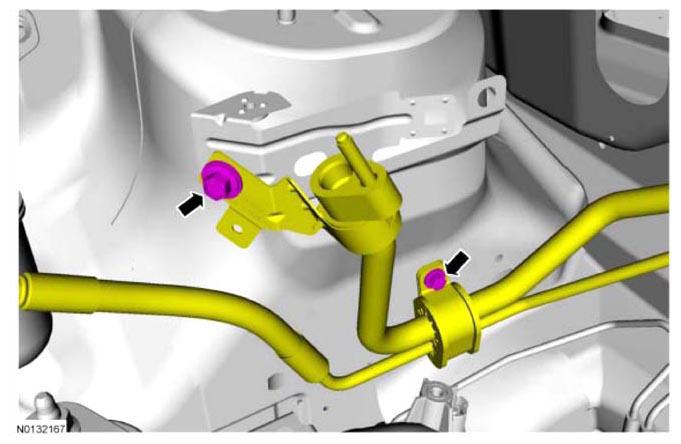
- Remove the TXV manifold and tube bracket bolt, and completely loosen the TXV manifold and tube clamp bracket bolt.
- To install, tighten to 8 Nm (71 lb-in).
 Courtesy of FORD MOTOR CO.
- Remove the TXV manifold tube assembly.
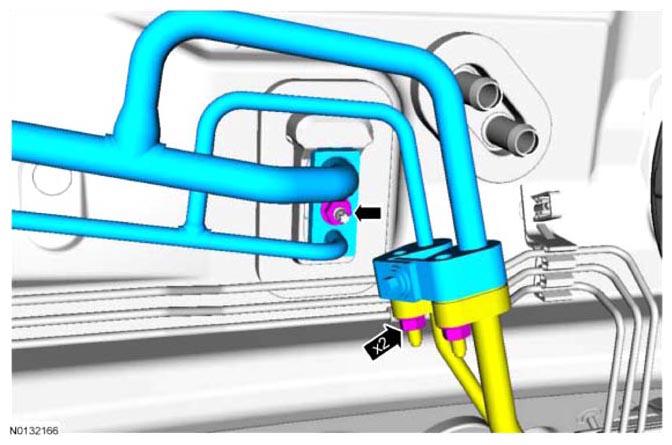
- Remove the TXV fitting and disconnect the fitting.
- Discard the O-ring seals.
- To install, tighten to 8 Nm (71 lb-in).
 Courtesy of FORD MOTOR CO.