Seat Control Switch
Seat Control Switch
Removal
NOTE: 6-way seat control switch shown, 10-way seat control switch similar.
1. If equipped, remove the manual lumbar adjustment knob.
1. Insert a flat-blade screwdriver between the seat cushion and cushion side shield, at the location shown, and remove the manual lumbar adjustment knob retaining clip.
2. Slide the manual lumbar adjustment knob off the shaft.
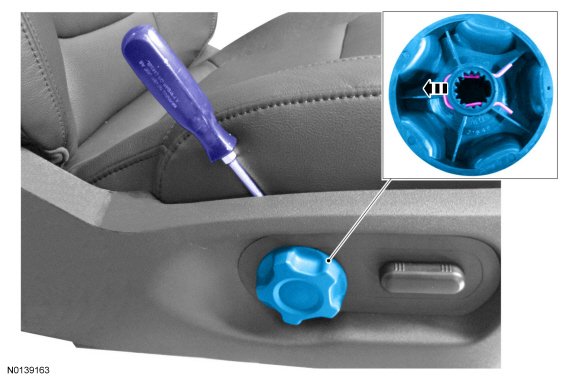
2. Insert a flat-blade screwdriver between the seat cushion and cushion side shield and release the rear retaining tab, while pulling the rear seat control switch bezel outward.
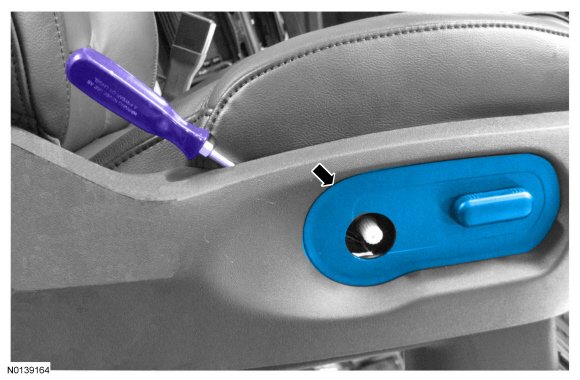
3. Insert a flat-blade screwdriver between the seat cushion and cushion side shield and release the upper rear retaining tab, while pulling the rear seat control switch bezel outward.
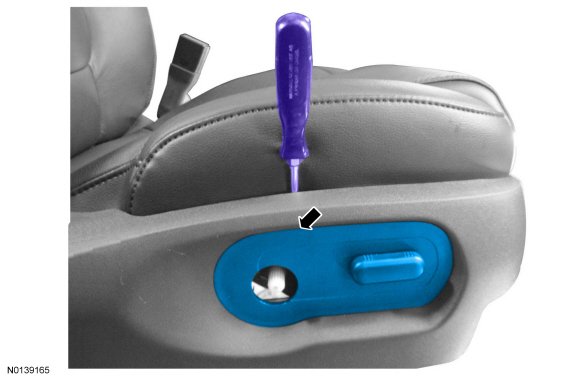
4. Insert a flat-blade screwdriver between the seat cushion and cushion side shield and release the upper front retaining tab, while pulling the rear seat control switch bezel outward.
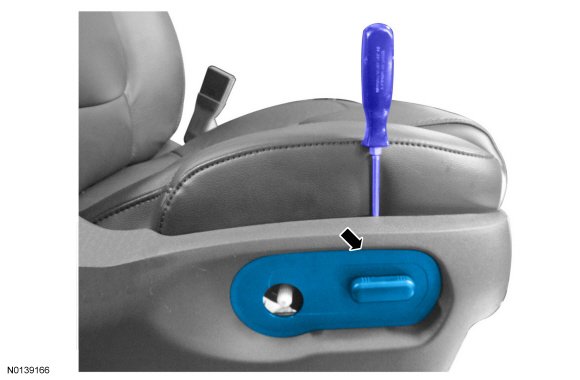
5. Slide the seat control switch bezel rearward and remove it from the cushion side shield.
6. Disconnect the electrical connector.
Installation
1. Connect the electrical connector.
2. Install the seat control switch.
3. If equipped, install the manual recline handle.