Crankshaft Rear Seal with Retainer Plate
Crankshaft Rear Seal with Retainer Plate
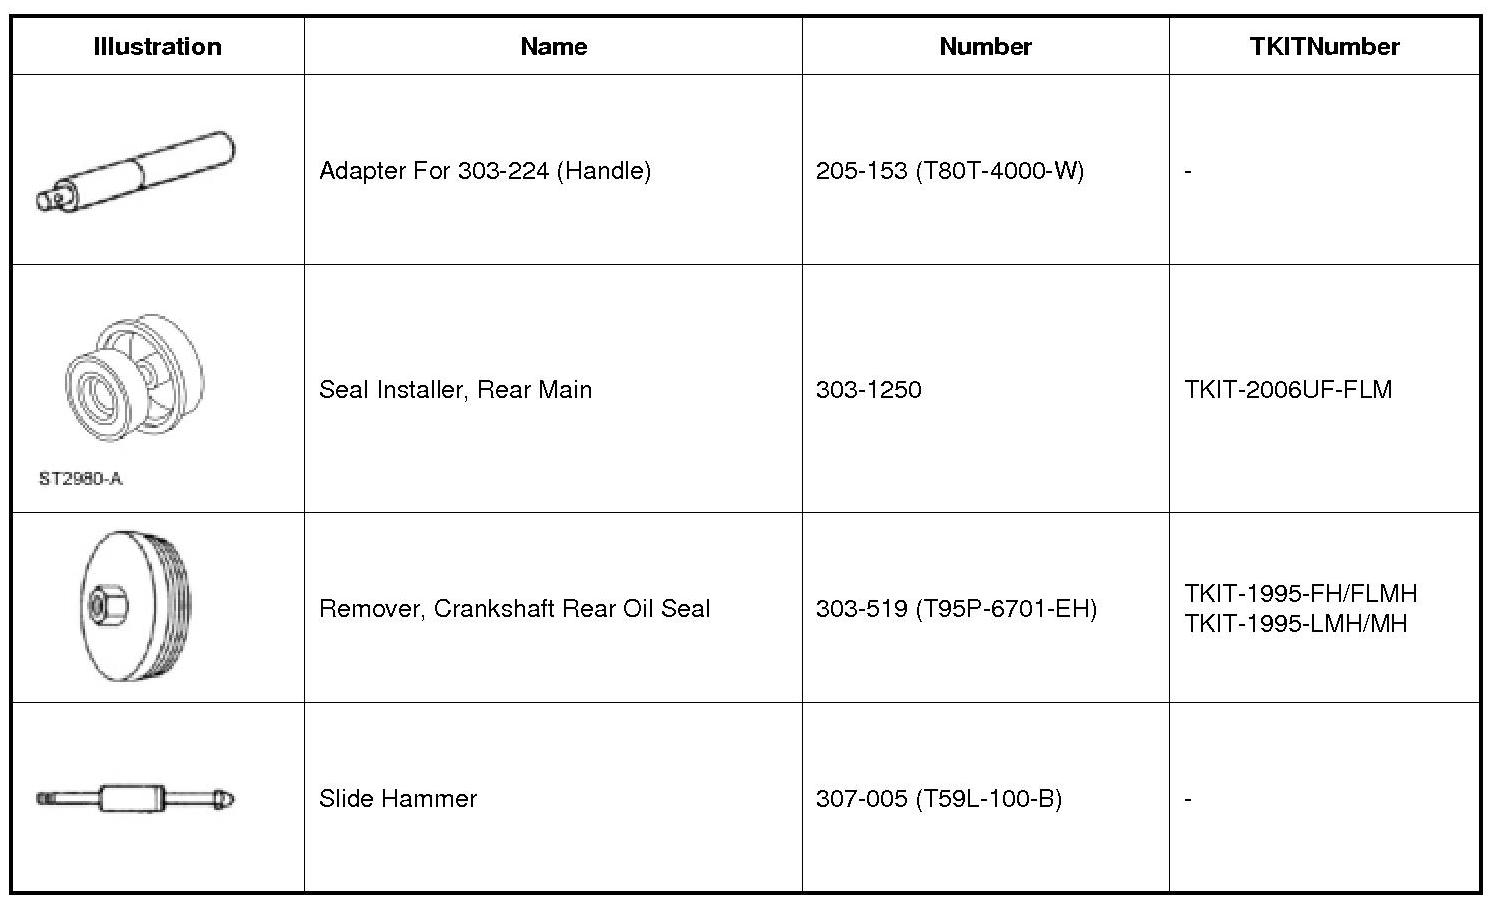
Special Tool(s)
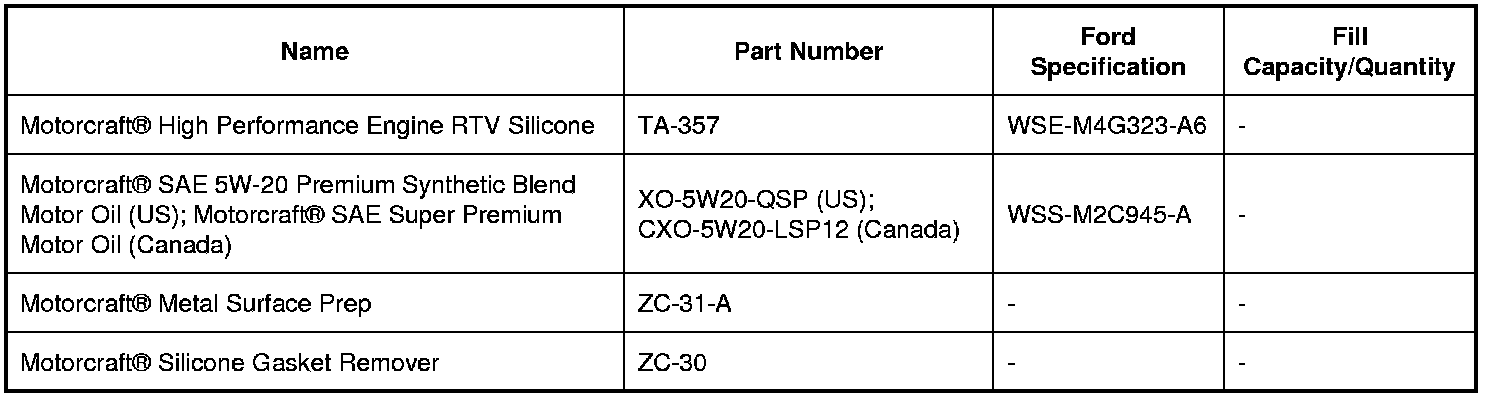
Material(s)
Removal
NOTICE: During engine repair procedures, cleanliness is extremely important. Any foreign material, including any material created while cleaning gasket surfaces that enters the oil passages, coolant passages or the oil pan, may cause engine failure.
1. With the vehicle in NEUTRAL, position it on a hoist. REFER to Jacking and Lifting Service and Repair.
2. Remove the flexplate. REFER to Flexplate Removal and Replacement.
3. Remove the crankshaft sensor ring.
4. Disconnect the CKP (Crankshaft Position) sensor electrical connector.
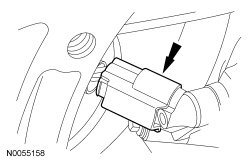
5. Remove the bolt and the CKP (Crankshaft Position) sensor.
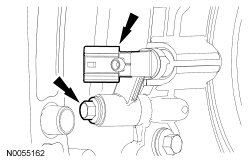
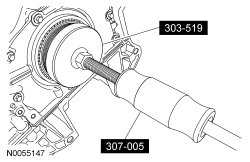
6. Using 303-519 (T95P-6701-EH) and 307-005 (T59L-100-B) , remove and discard the rear crankshaft seal.
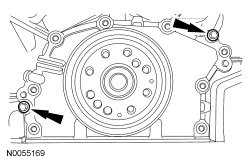
7. Remove the 2 oil pan to crankshaft rear seal retainer bolts.
8. Remove the 8 crankshaft rear seal retainer bolts.
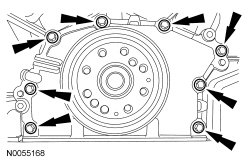
9. Install the 2 M6 oil pan bolts (finger-tight) into the 2 threaded holes in the crankshaft rear seal retainer.
1. Alternately tighten the 2 bolts one turn at a time until the crankshaft rear seal retainer-to-cylinder block seal is released.
2. Remove the crankshaft rear seal retainer.
10. NOTICE: Only use a 3M Roloc(R) Bristle Disk (2-in white, part number 07528) to clean the crankshaft rear seal retainer plate. Do not use metal scrapers, wire brushes or any other power abrasive disk to clean the crankshaft rear seal retainer plate. These tools cause scratches and gouges that make leak paths.
Clean the crankshaft rear seal retainer plate using a 3M Roloc(R) Bristle Disk (2-in white, part number 07528) in a suitable tool turning at the recommended speed of 15,000 rpm. Thoroughly wash the crankshaft rear seal retainer plate to remove any foreign material, including any abrasive particles created during the cleaning process.
11. NOTICE: Place clean, lint-free shop towels over exposed engine cavities. Carefully remove the towels so foreign material is not dropped into the engine. Any foreign material (including any material created while cleaning gasket surfaces) that enters the oil passages or the oil pan, may cause engine failure.
NOTICE: Do not use wire brushes, power abrasive discs or 3M Roloc(R) Bristle Disk (2-in white, part number 07528) to clean the sealing surfaces. These tools cause scratches and gouges that make leak paths. They also cause contamination that will cause premature engine failure. Remove all traces of the gasket.
Clean the sealing surfaces of the cylinder block and oil pan flange in the following sequence.
1. Remove any large deposits of silicone or gasket material.
2. Apply Motorcraft(R) Silicone Gasket Remover and allow to set for several minutes.
3. Remove the Motorcraft(R) Silicone Gasket Remover. A second application of Motorcraft(R) Silicone Gasket Remover may be required if residual traces of silicone or gasket material remain.
4. Apply Motorcraft(R) Metal Surface Prep to remove any remaining traces of oil or coolant and to prepare the surfaces to bond. Do not attempt to make the metal shiny. Some staining of the metal surfaces is normal.
Installation
1. NOTICE: Failure to use Motorcraft(R) High Performance Engine RTV Silicone may cause the engine oil to foam excessively and result in serious engine damage.
NOTE: The crankshaft rear seal retainer must be installed and the bolts tightened within 10 minutes of sealant application.
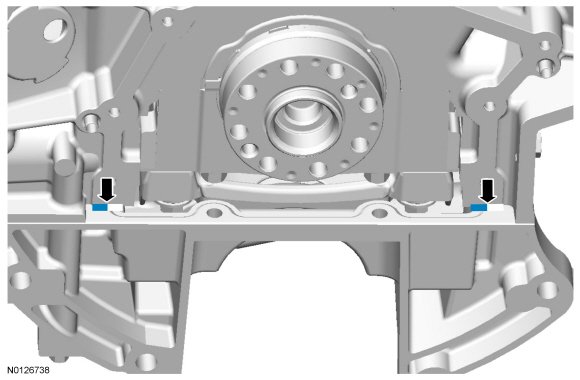
Apply a 5 mm (0.20 in) bead of Motorcraft(R) High Performance Engine RTV Silicone to the 2 cylinder block/oil pan joints.
2. NOTICE: Failure to use Motorcraft(R) High Performance Engine RTV Silicone may cause the engine oil to foam excessively and result in serious engine damage.
NOTE: The crankshaft rear seal retainer must be installed and the bolts tightened within 10 minutes of sealant application.
Apply a 3 mm (0.1181 in) bead of Motorcraft(R) High Performance Engine RTV Silicone to the sealing surface of the crankshaft rear seal retainer.
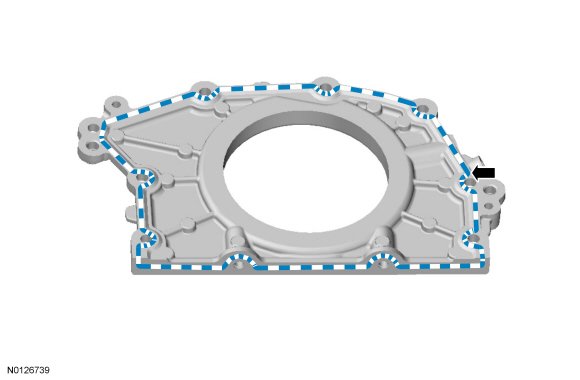
3. NOTE: Use the 2 oil pan bolts as handles during installation to avoid touching the sealant.
Install the crankshaft rear seal retainer at an angle above the oil pan flange to avoid scraping off the sealer. Tilt the seal retainer up and onto the rear of the cylinder block.
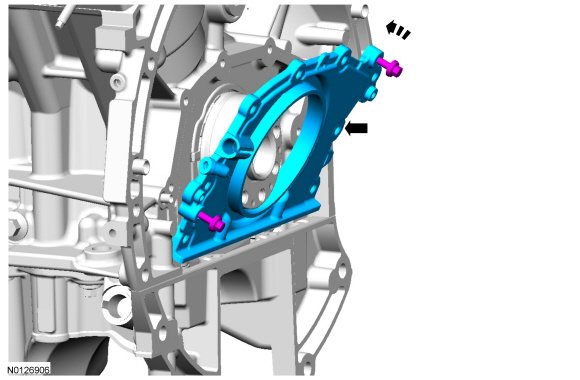
4. Install the rear seal retainer and the 8 bolts in the sequence shown.
- Tighten in the sequence shown to 10 Nm (89 lb-in).
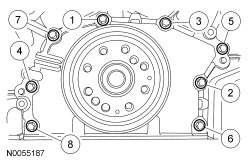
5. Install the rear seal retainer and the 8 bolts in the sequence shown.
- Tighten in the sequence shown to 10 Nm (89 lb-in) plus an additional 45 degrees.
6. NOTE: Lubricate the seal lips and bore with clean engine oil prior to installation.
Install the 2 oil pan to crankshaft rear seal retainer bolts.
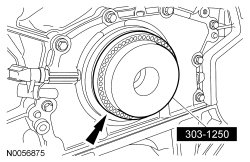
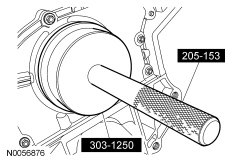
7. Using 303-1250 and 205-153 (T80T-4000-W) , install the new crankshaft rear seal.
8. Install the CKP (Crankshaft Position) sensor and install the bolt.
- Tighten to 10 Nm (89 lb-in).
9. Connect the CKP (Crankshaft Position) sensor electrical connector.
10. Install the crank sensor ring.
11. Install the flexplate. REFER to Flexplate Removal and Replacement.