Removal and Installation
- Recover the refrigerant. For additional information, refer to
CLIMATE CONTROL SYSTEM - GENERAL INFORMATION AND DIAGNOSTICS
.
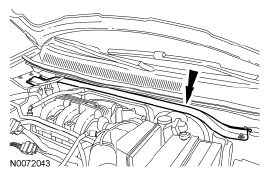
- Remove the 4 cross vehicle beam nuts and remove the beam.
- To install, tighten to 30 Nm (22 lb-ft).
 Courtesy of FORD MOTOR CO.
- Remove the auxiliary evaporator outlet and inlet line fitting nuts and position the auxiliary lines aside.
- Discard the O-ring seals and gasket seals.
- To install, tighten to 15 Nm (133 lb-in).
- Remove the Thermostatic Expansion Valve (TXV) fitting nut.
- Discard the O-ring seals.
- To install, tighten to 8 Nm (71 lb-in).
- Remove the 2 TXV
bolts.
- To install, tighten to 8 Nm (71 lb-in).
- Remove the TXV
.
- Discard the O-ring seals.
- To install, reverse the removal procedure.
- Evacuate, leak test and charge the refrigerant system. For additional information, refer to
CLIMATE CONTROL SYSTEM - GENERAL INFORMATION AND DIAGNOSTICS
.