Removal and Replacement
Engine Mount
Removal
1. With the vehicle in NEUTRAL, position it on a hoist.
2. Loosen the exhaust flexible pipe clamp and disconnect the 2 exhaust hangers.
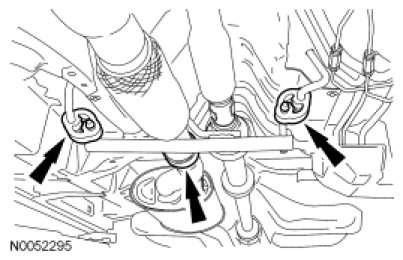
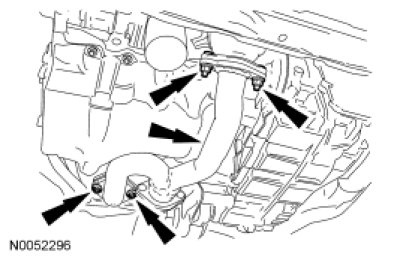
3. Remove the 4 nuts, the exhaust flexible pipe and the Y-pipe as an assembly.
- Discard the nuts and the gasket.
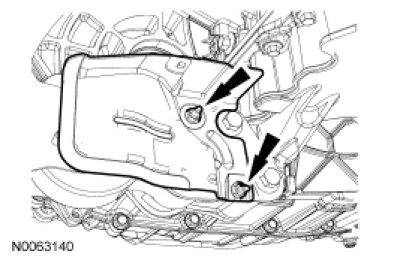
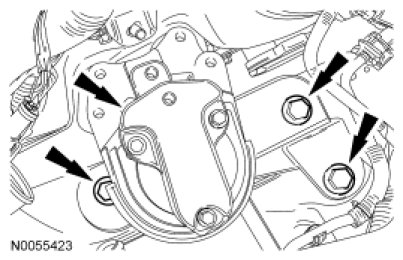
4. Remove the 2 nuts and the roll restrictor heat shield.
5. Loosen the roll restrictor-to-subframe through bolt.
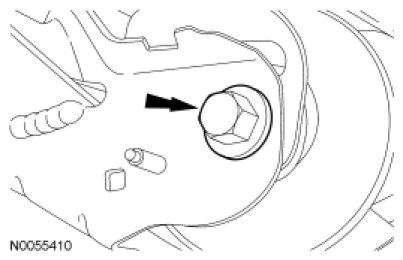
6. Remove the roll restrictor through bolt and the 2 roll restrictor-to-transaxle bracket plate bolts.
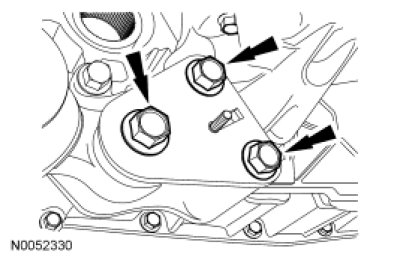
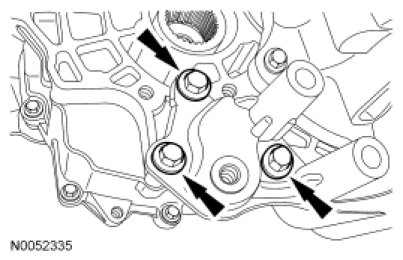
7. Remove the 3 bolts and the transaxle bracket.
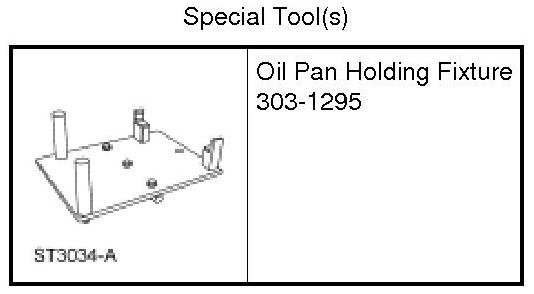
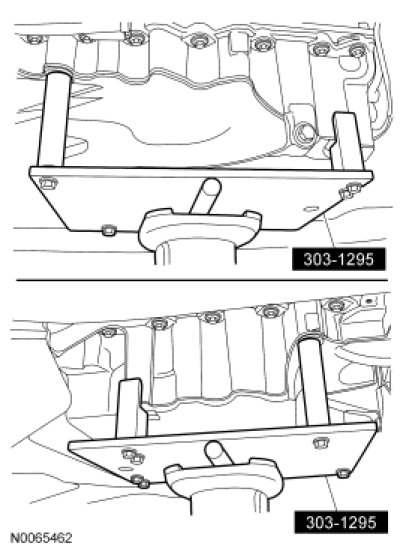
8. NOTICE: The Oil Pan Holding Fixture must be carefully aligned to the mounting bosses on the oil pan. Failure to follow these instructions may result in damage to the oil pan.
Position a floor jack and the Oil Pan Holding Fixture under the oil pan.
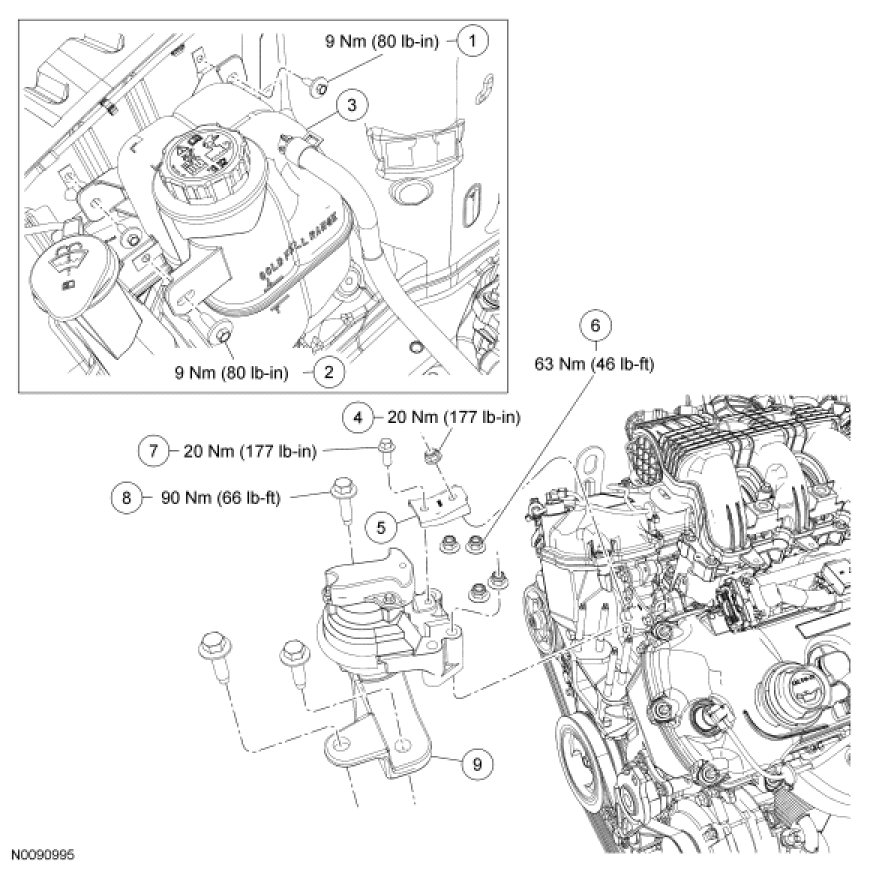
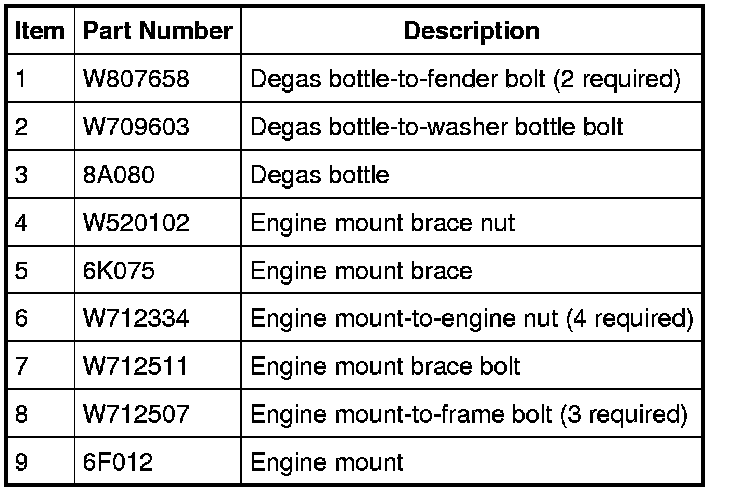
9. Remove the 3 bolts and position the engine coolant degas bottle aside.
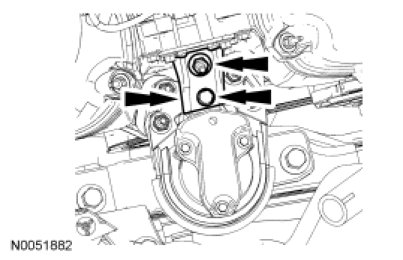
10. Remove the nut, bolt and engine mount brace.
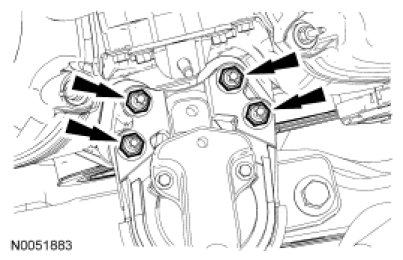
11. Remove the 4 engine mount nuts.
12. Remove the 3 bolts and the engine mount.
Installation
1. Install the engine mount and the 3 bolts.
- Tighten to 90 Nm (66 lb-ft).
2. Install the 4 engine mount nuts.
- Tighten to 63 Nm (46 lb-ft).
3. Install the engine mount brace, nut and bolt.
- Tighten to 20 Nm (177 lb-in).
4. Position the engine coolant degas bottle and install the 3 bolts.
- Tighten to 9 Nm (80 lb-in).
5. Install the transaxle bracket and the 3 bolts.
- Tighten to 90 Nm (66 lb-ft).
6. Install the engine roll restrictor, transaxle bracket and the 3 bolts.
- Tighten to 90 Nm (66 lb-ft).
7. Tighten the roll restrictor-to-subframe through bolt.
- Tighten to 103 Nm (76 lb-ft).
8. Install the roll restrictor heat shield and the 2 nuts.
- Tighten to 11 Nm (97 lb-in).
9. Install the new gasket and position the Y-pipe assembly in place and install the 4 new nuts.
- Tighten to 40 Nm (30 lb-ft).
10. Install the 2 exhaust hangers and tighten the exhaust clamp.
- Tighten to 40 Nm (30 lb-ft).