Crankshaft Rear Seal With Retainer Plate
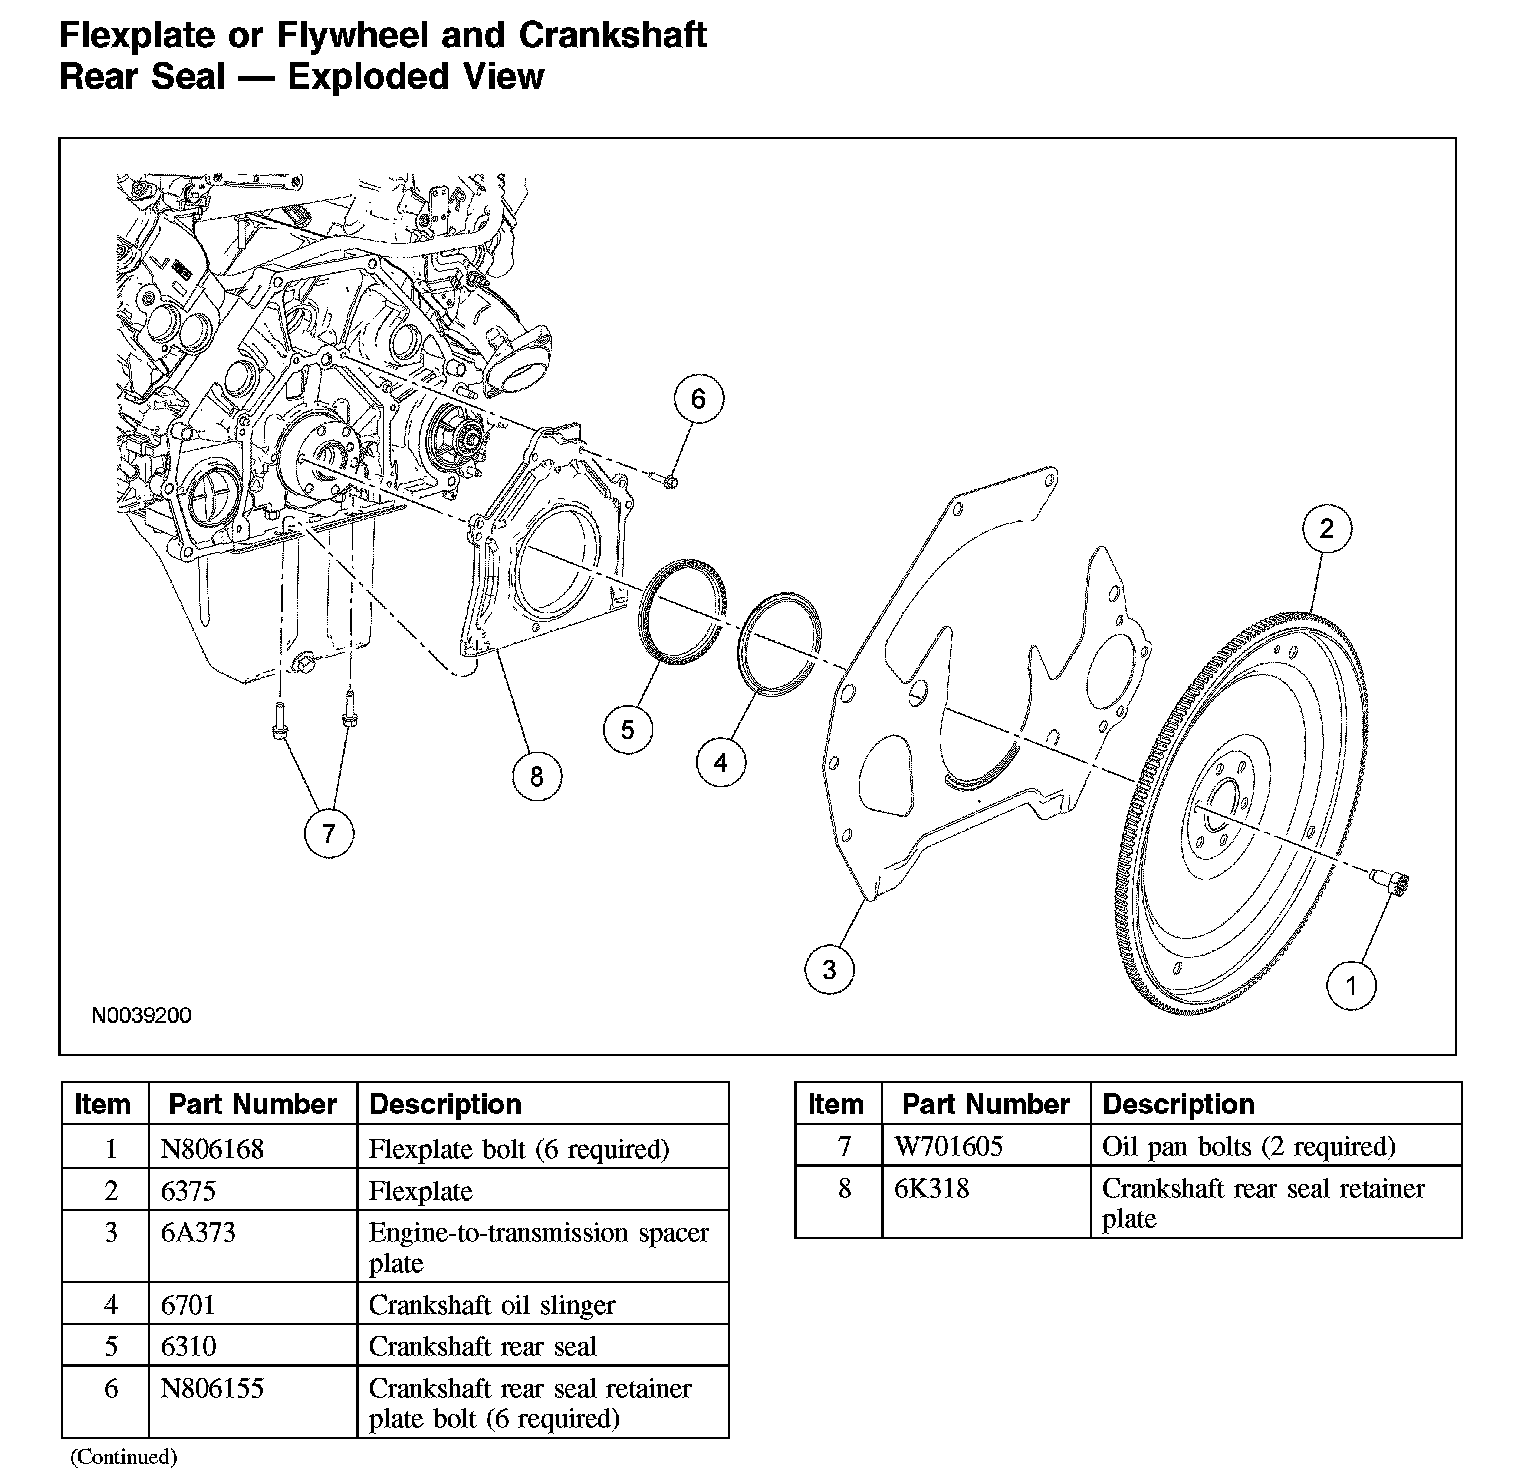
Crankshaft Rear Seal with Retainer PlateFlexplate or Flywheel and Crankshaft Rear Seal - Exploded View:
Removal
1. Remove the flexplate.
2. Remove the engine-to-transmission spacer plate.
3. Remove the oil pan.
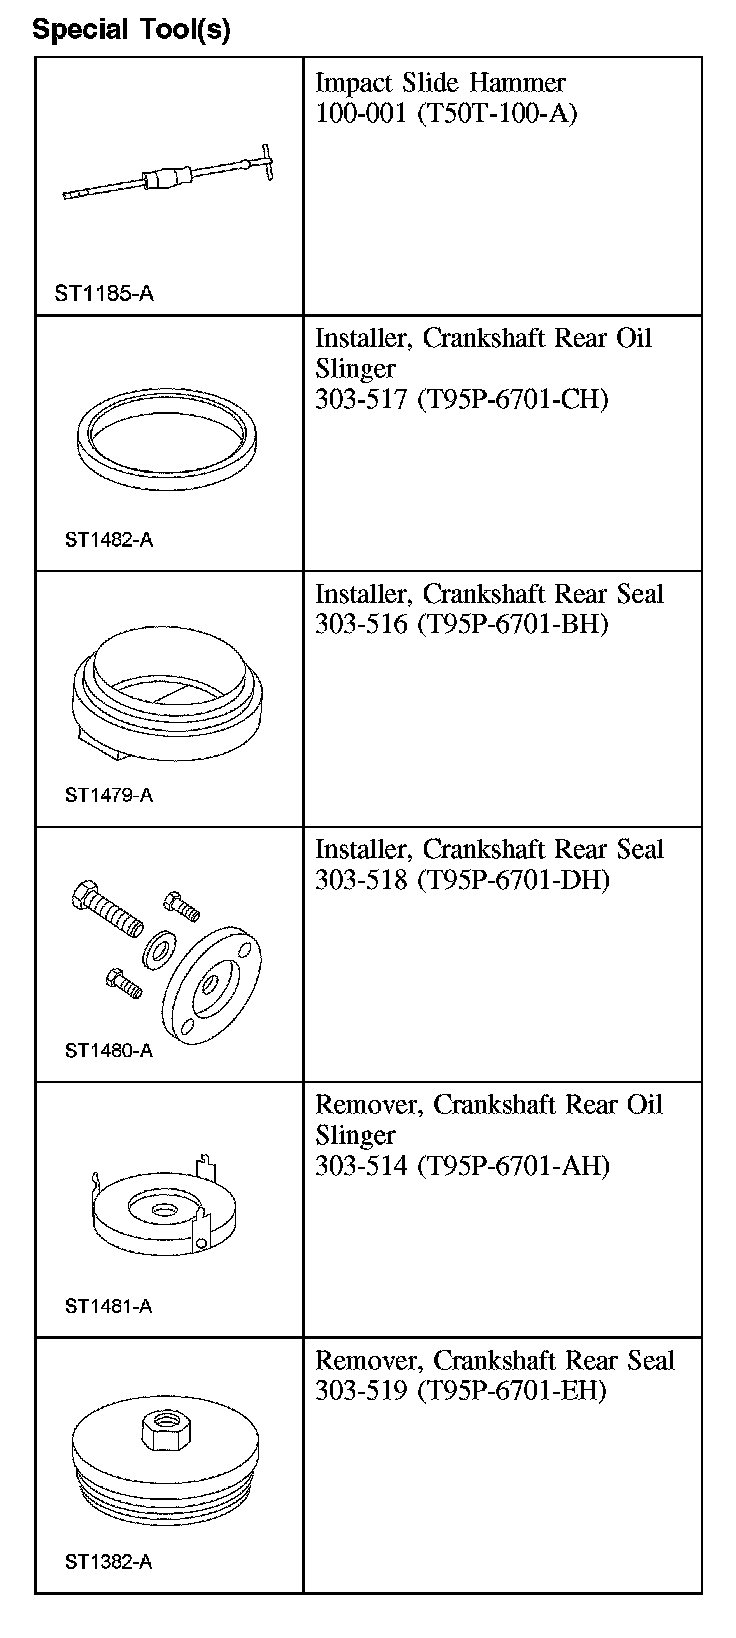
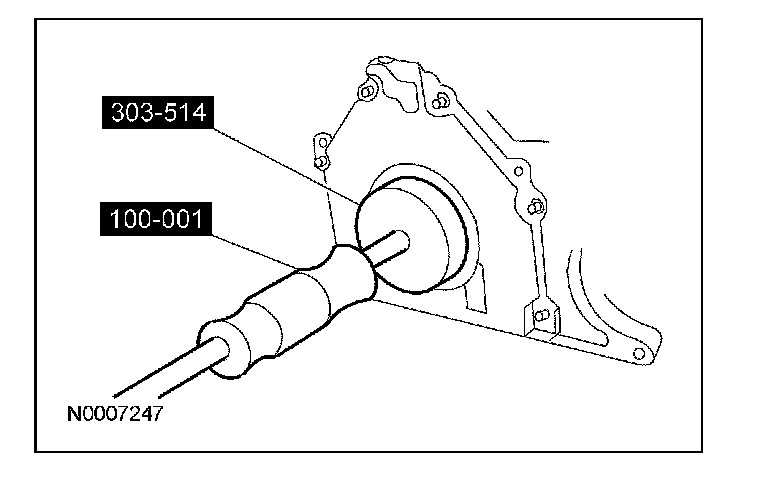
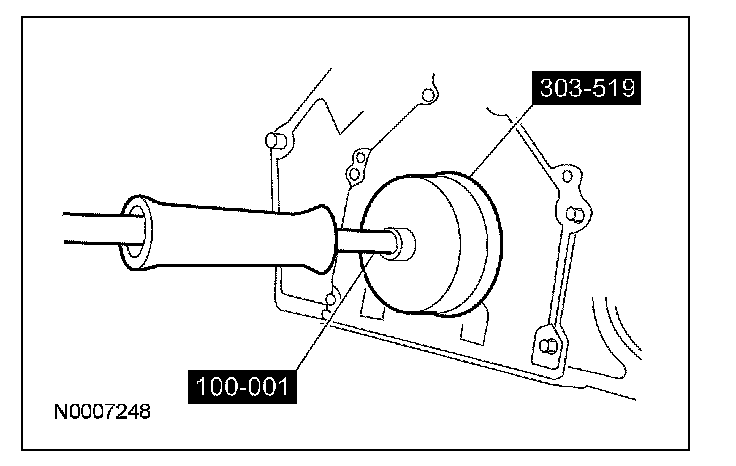
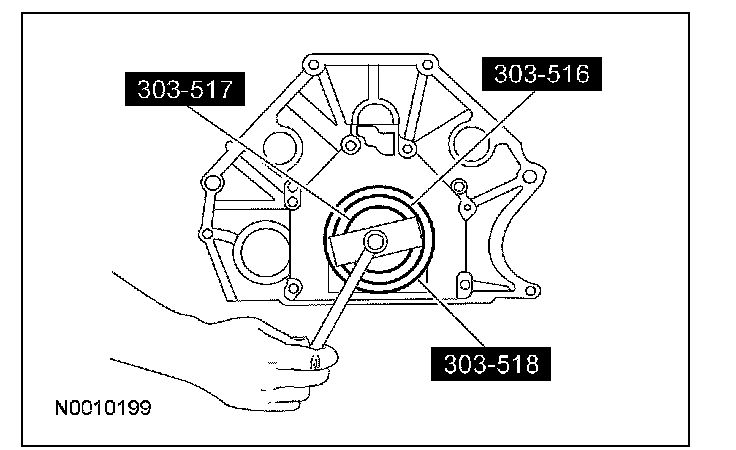
4. Using the special tools, remove the crankshaft oil slinger.
^ Discard the crankshaft oil slinger.
5. Using the special tools, remove the crankshaft rear seal.
^ Discard the crankshaft rear seal.
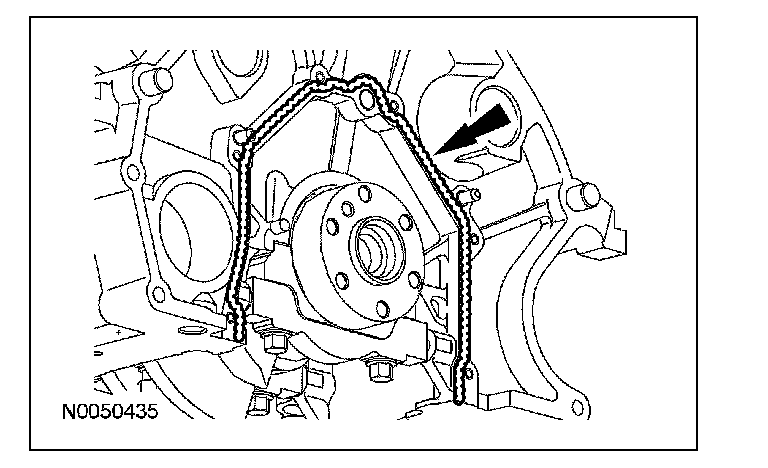
6. Remove the 6 bolts and the crankshaft rear seal retainer plate.
Installation
1. CAUTION: Do not use metal scrapers, wire brushes, power abrasive discs or other abrasive means to clean the sealing surfaces. These tools cause scratches and gouges which make leak paths. Use a plastic scraping tool to remove all traces of old sealant.
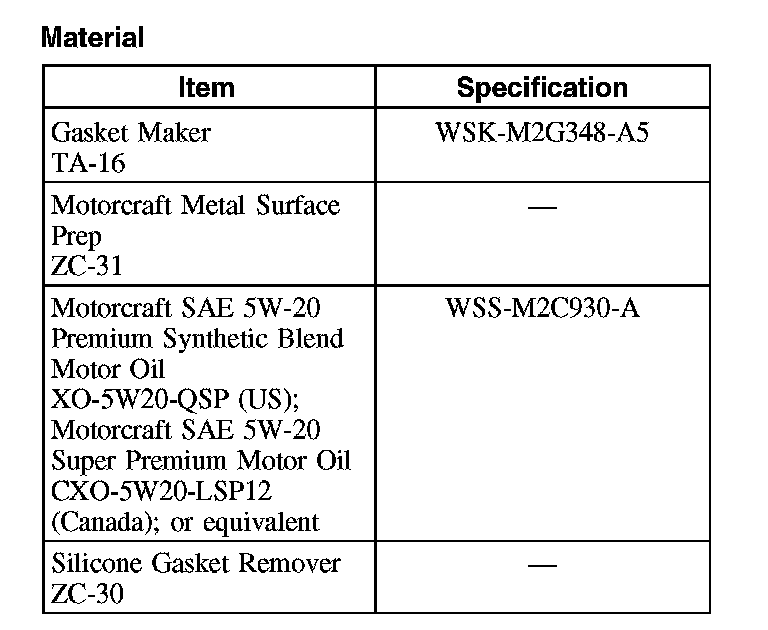
NOTE: Clean the sealing surfaces with silicone gasket remover and metal surface prep. Follow the directions on the packaging. Failure to follow this procedure can cause future oil leakage.
Clean and inspect the mating surfaces.
2. NOTE: The crankshaft rear seal retaining plate does not have a sealant groove. Gasket maker must be applied to the crankshaft rear seal retainer plate mating surface on the engine block.
Apply a bead of gasket maker to the crankshaft rear seal retainer plate mating surface on the engine block.
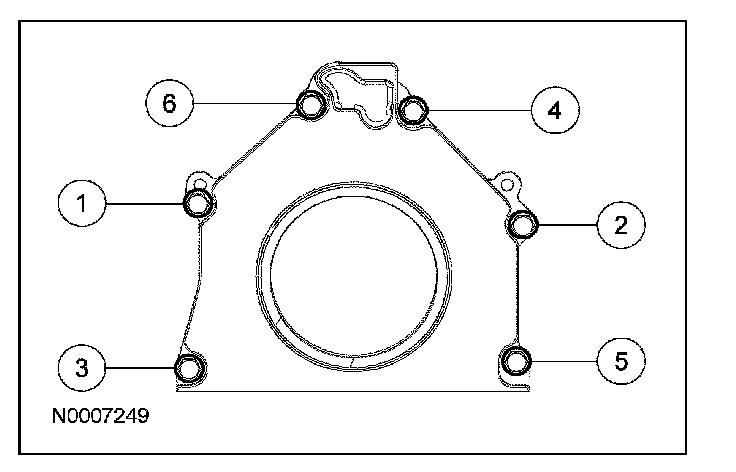
3. Install the crankshaft rear seal retainer plate and the 6 bolts in the sequence shown.
^ Tighten to 10 Nm (89 lb-in).
4. NOTE: Lubricate the inner lip of the crankshaft rear seal with clean engine oil.
Using the special tools, install the crankshaft rear seal.
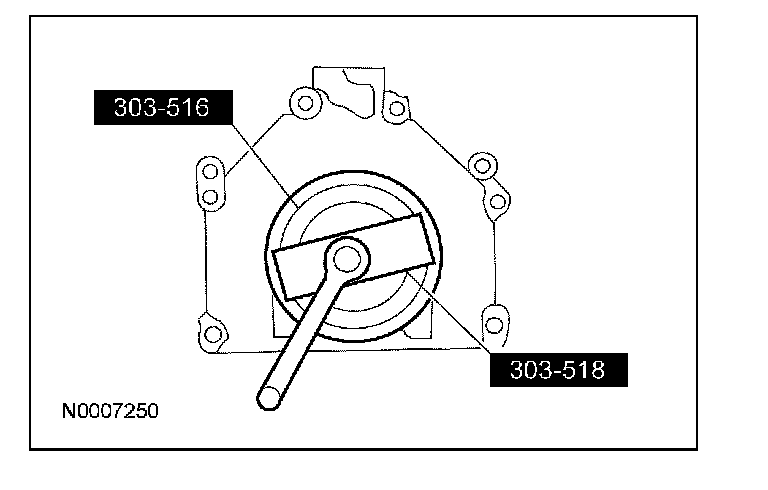
5. Using the special tools, install the crankshaft rear oil slinger.
6. Install the oil pan.
7. Install the engine-to-transmission spacer plate.
8. Install the flexplate.