Steering Gear: Service and Repair
Steering Gear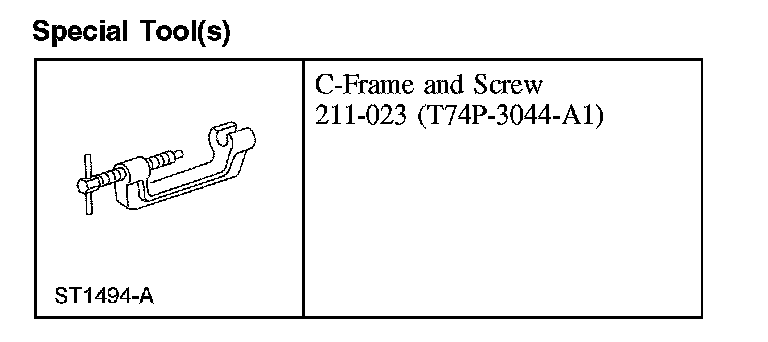
Removal and Installation
All vehicles
CAUTION: While repairing the power steering system, care should be taken to prevent the entry of foreign material or failure of the power steering components may result.
1. CAUTION: Do not allow the steering column to rotate while the steering column shaft is disconnected or damage to the clockspring may result. If there is evidence that the lower shaft has rotated, the clockspring must be removed and recentered.
Hold the steering wheel in the straight-ahead position using a suitable device.
2. Remove the front tires and wheels.
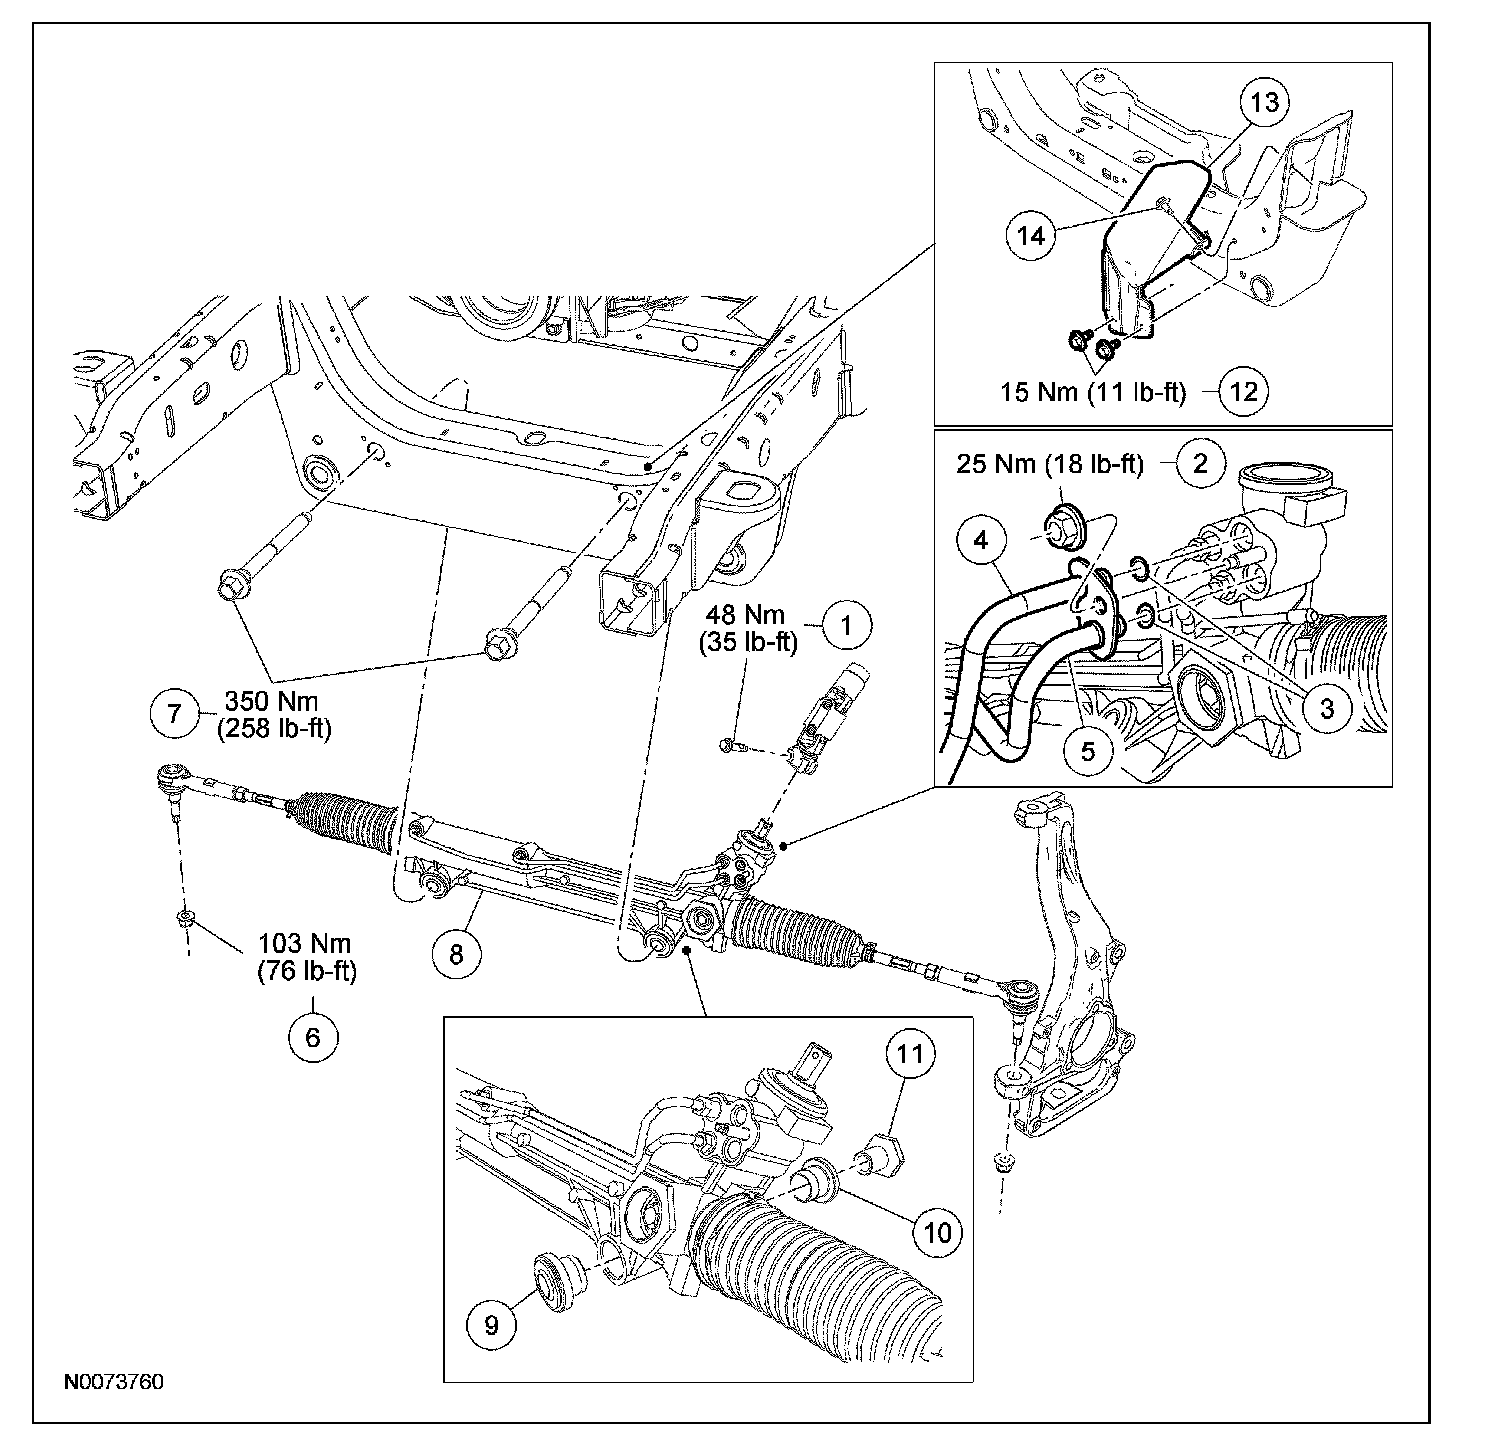
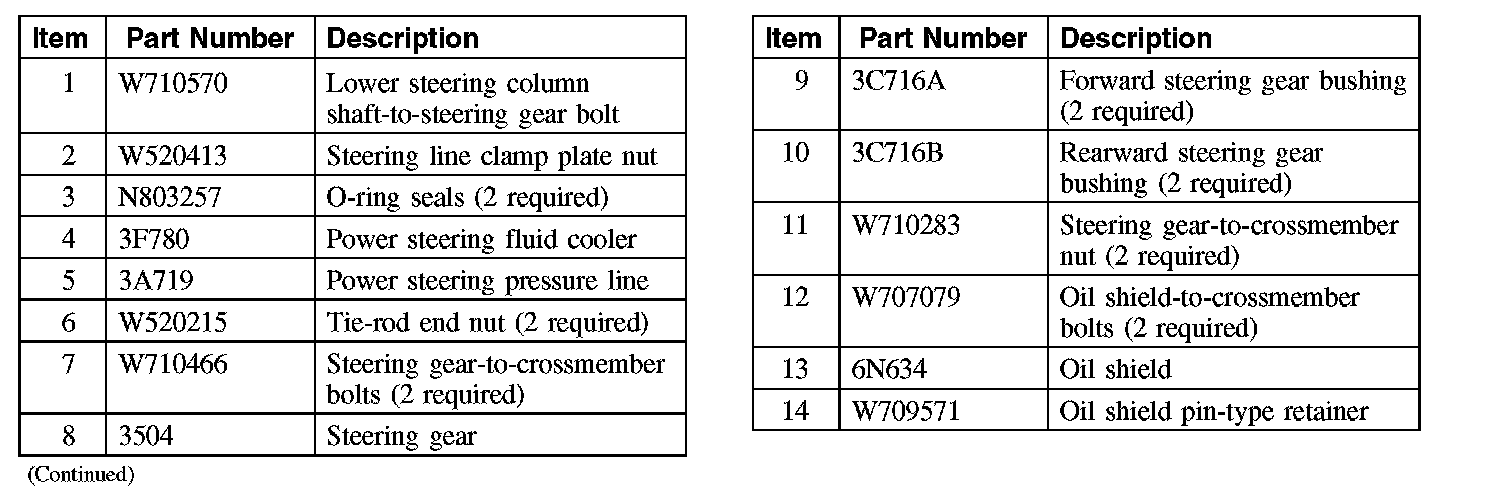
3. If equipped, remove the 2 bolts, pin-type retainer and the oil shield.
^ To install, tighten to 15 Nm (11 lb-ft).
4. NOTE: Install a new lower steering column shaft-to-steering gear bolt.
Remove and discard the lower steering column shaft-to-steering gear bolt.
^ To install, tighten to 48 Nm (35 lb-ft).
5. Disconnect the lower steering column shaft from the steering gear.
6. Remove the steering line clamp plate nut.
^ To install, tighten to 25 Nm (18 lb-ft).
7. Rotate the steering line clamp plate and disconnect the power steering pressure line and fluid cooler.
8. NOTE: New O-rings must be installed whenever the power steering line and fluid cooler are disconnected from the steering gear.
Remove and discard the 2 O-rings.
9. NOTE: New tie-rod end nuts must be installed.
Remove and discard the 2 tie-rod end nuts.
^ To install, tighten to 103 Nm (76 lb-ft).
10. CAUTION: Do not damage the tie-rod end boot when installing the special tool.
Using the special tool, separate the 2 tie-rod ends from the wheel knuckle.
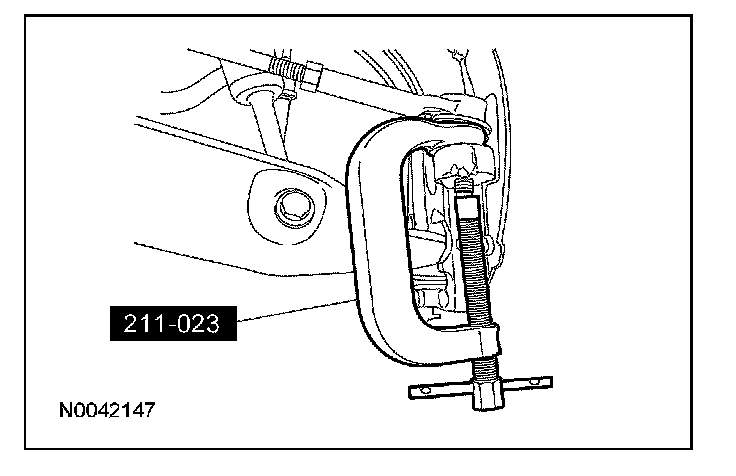
11. Remove the 2 steering gear-to-crossmember nuts and bolts.
^ To install, tighten to 350 Nm (258 lb-ft).
Four wheel drive (4WD) vehicles
NOTE: On four wheel drive (4WD) vehicles, the following steps (LH lower arm only) must be carried out to provide clearance to remove the steering gear.
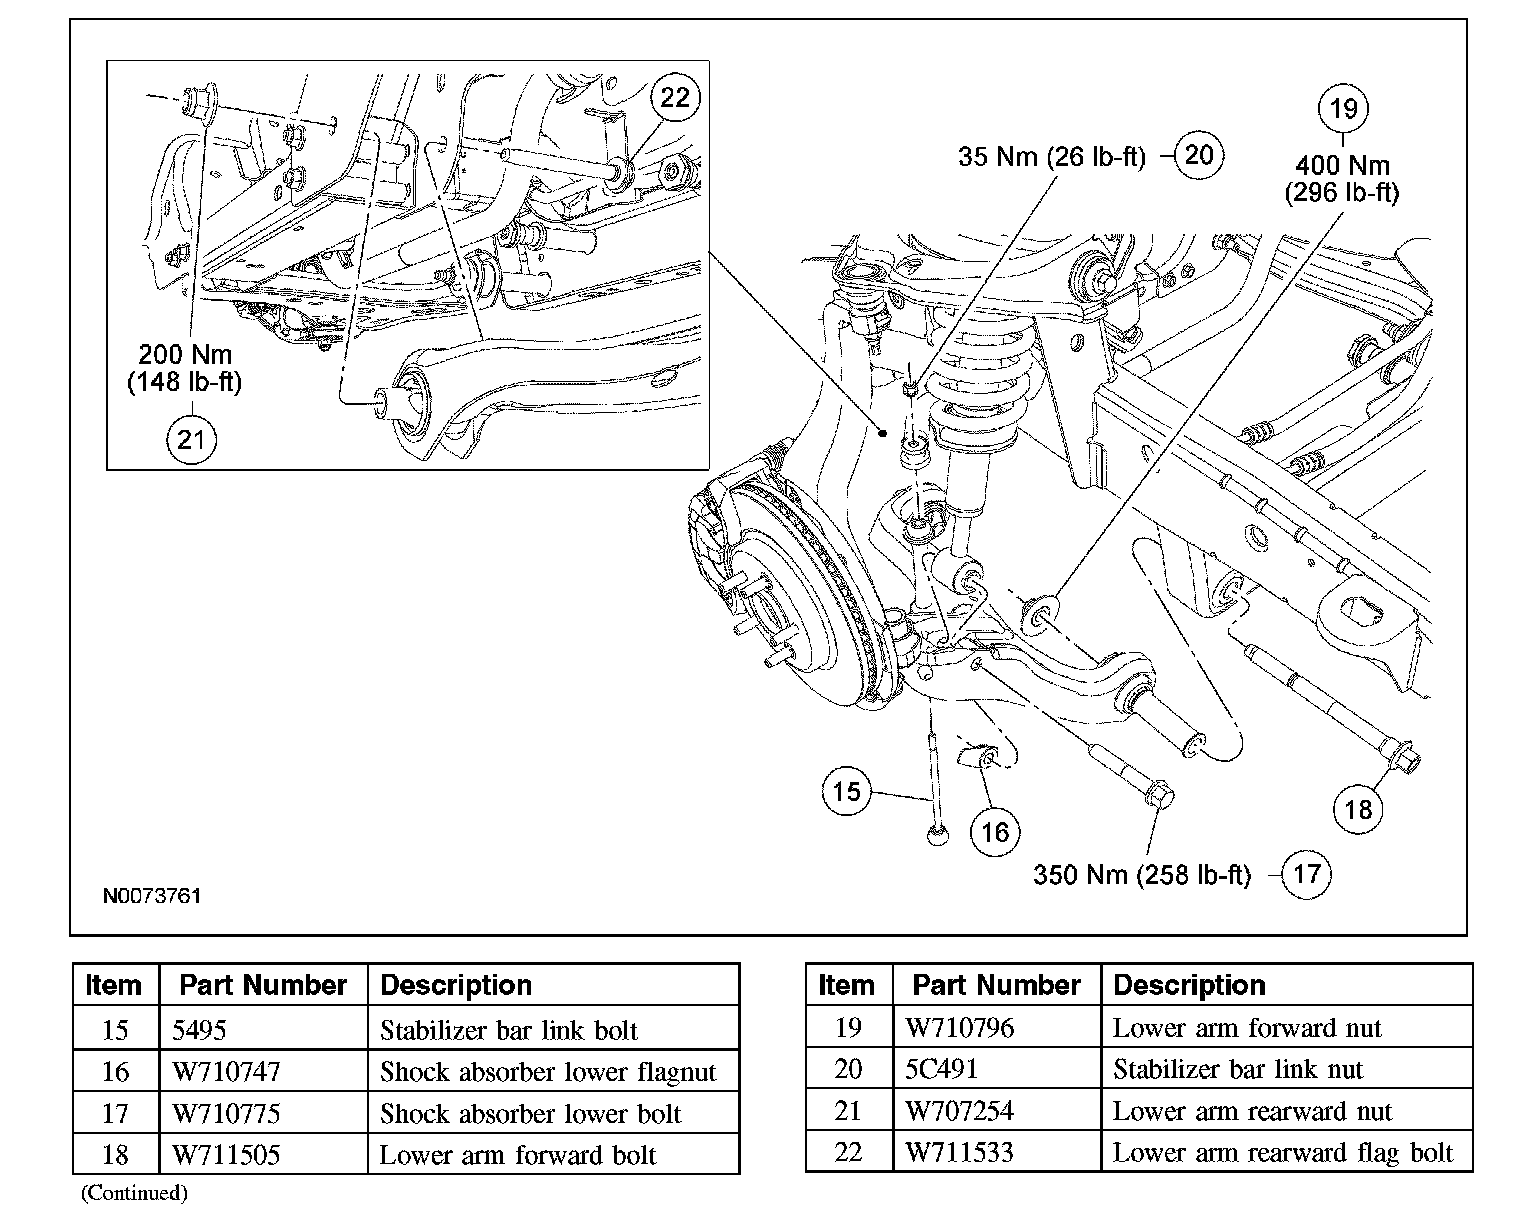
12. Remove the shock absorber lower bolt and flagnut.
^ Discard the flagnut.
^ To install, tighten to 350 Nm (258 lb-ft).
13. CAUTION: Do not tighten the LH lower arm nuts and bolts until the installation procedure is complete and the weight of the vehicle is resting on the wheel and tire assemblies or incorrect clamp load or bushing damage may occur.
NOTE: It is not necessary to disconnect the LH lower ball joint.
Remove and discard the lower arm forward bolt and nut and the lower arm rearward flag bolt and nut.
^ To install the lower arm forward bolt, tighten to 400 Nm (296 lb-ft).
^ To install the lower arm rearward flag bolt and nut, tighten to 200 Nm (148 lb-ft).
14. Remove the stabilizer bar link nut and the link.
^ Discard the stabilizer bar link nut.
^ To install, tighten to 35 Nm (26 lb-ft).
All vehicles
15. Remove the steering gear from the LH side of the vehicle.
16. If a new steering gear is being installed, remove the 4 steering gear bushings and the 2 nuts.
17. CAUTION: On four wheel drive (4WD) vehicles, do not tighten the LH lower arm nuts and bolts until the installation procedure is complete and the weight of the vehicle is resting on the wheel and tire assemblies or incorrect clamp load bushing damage may occur.
To install, reverse the removal procedure.
^ Install 2 new O-ring seals.
^ Fill the power steering system.
^ Check and, if necessary, set the front toe.