Removal & Installation
- If equipped with the high series floor console, apply the parking brake. Remove the floor console finish panel.
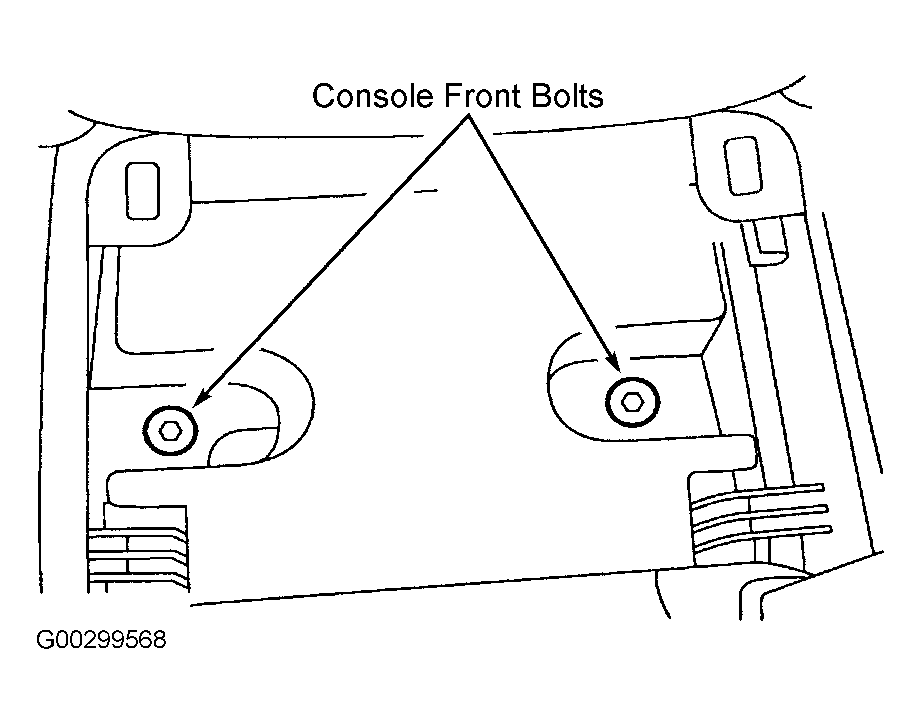
- Remove the floor console front bolts. See Fig 1
.
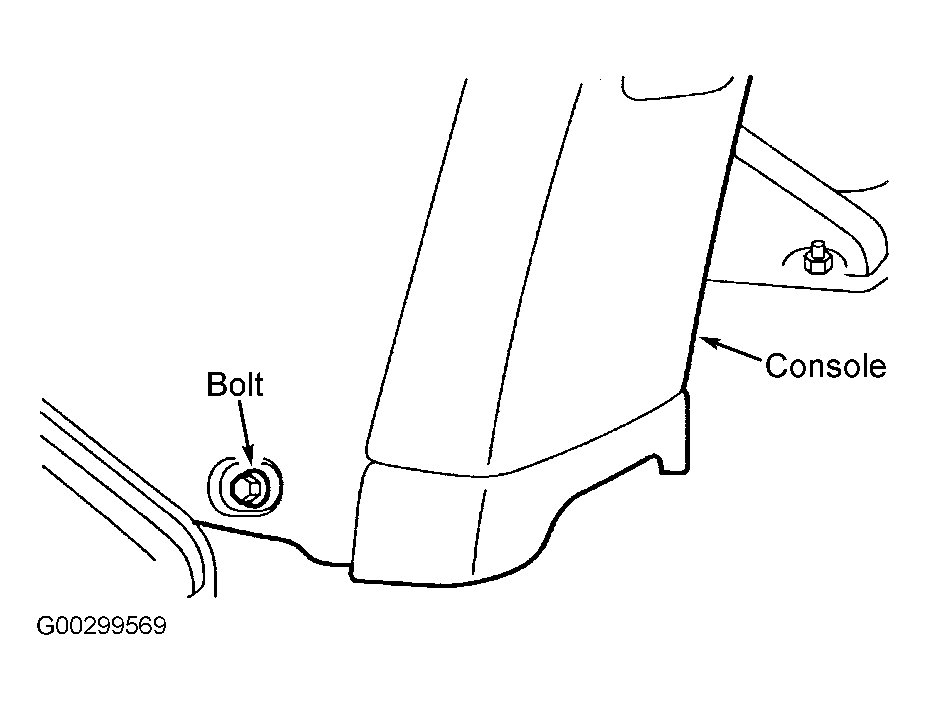
- Remove the two rear bolts. See Fig 2
. Remove the floor console.
- If equipped with the low series floor console, remove the manual transmission shifter knob by turning counterclockwise (if equipped). Remove the floor console front finish panel.
- Apply the parking brake. Remove the floor console rear finish panel.
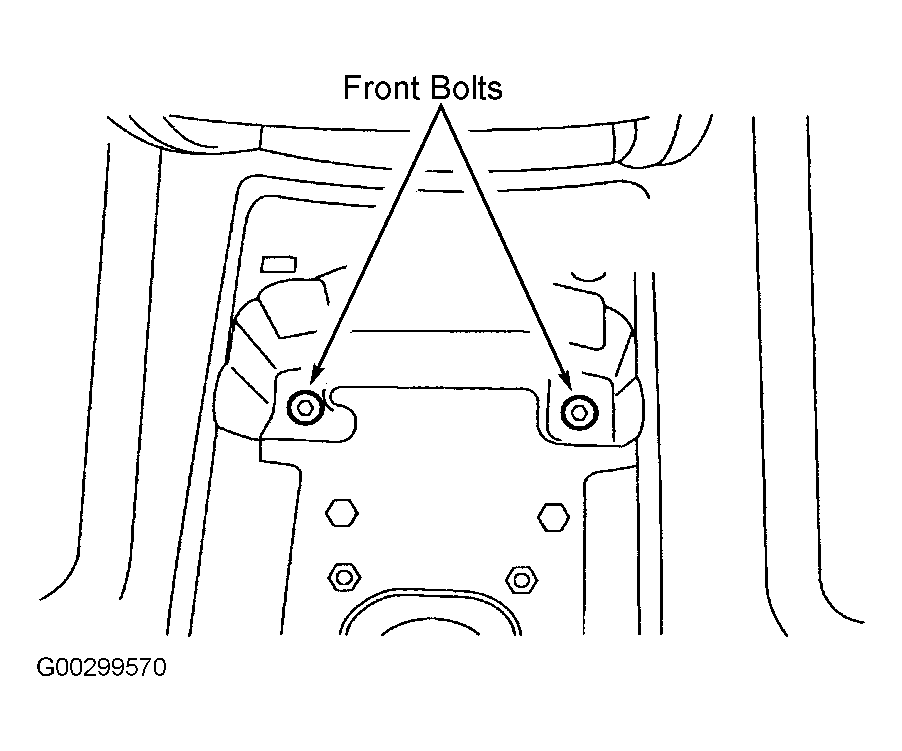
- Remove the floor console front bolts. See Fig 3
.
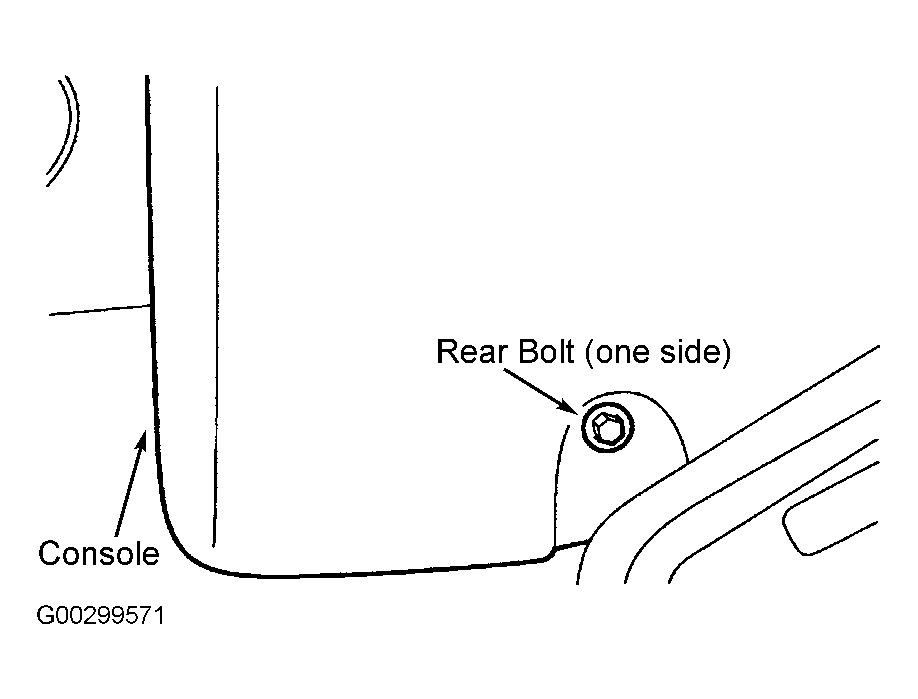
- Remove the rear two bolts and the floor console. See Fig 4
.
- Release the parking brake control.
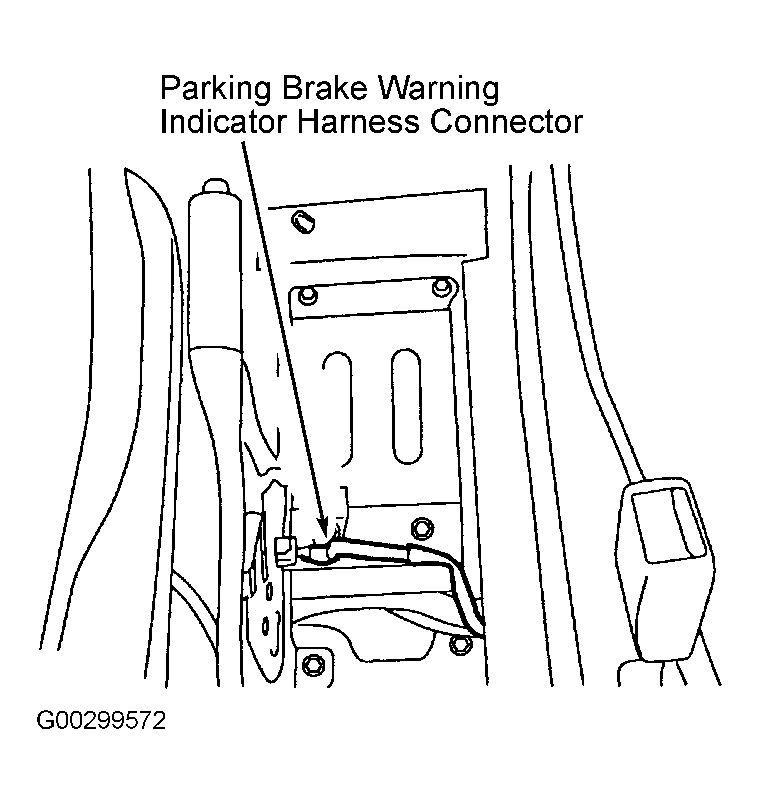
- Disconnect the parking brake warning indicator switch harness connector. See Fig 5
.
- Remove the parking brake adjusting nut. See Figure
.
- Remove the bolts. Remove the parking brake cable.
- To install, reverse the removal procedure. Adjust the parking brake cable. See PARKING BRAKE CABLE
under ADJUSTMENTS.
 Courtesy of FORD MOTOR CO.
 Courtesy of FORD MOTOR CO.
 Courtesy of FORD MOTOR CO.
 Courtesy of FORD MOTOR CO.
 Courtesy of FORD MOTOR CO.