Direct Clutch: Reassembly
- Install inner and outer piston seals. Ensure seal lips face bottom of cylinder. Apply transmission fluid to seals and install clutch piston into Direct Clutch Outer Seal Sizing Tool (T95L-70010-E). If installing new clutch plates, soak in transmission fluid for at least 30 minutes. Ensure coast clutch drum check ball is free in cage. Remove clutch piston from sizing tool and install into direct clutch drum.
- Install piston springs and spring retainer. Compress springs and install retaining snap ring. Carefully remove spring compressor. Install a steel plate and then a friction plate. Alternately install remaining discs in clutch pack. Number of clutch discs varies with engine size. Install same number of discs as removed. See Fig 1
. Install pressure plate and secure pack with retaining snap ring.
- While pushing down on clutch pack, use a feeler gauge to check clearance between retaining snap ring and pressure plate. If clearance is not .051-.079" (1.3-2.0 mm), install correct thickness retaining snap ring.
- Retaining snap rings are available in the following thicknesses: .054" (1.37 mm), .068" (1.73 mm), .082" (2.08 mm) and .096" (2.44 mm). Once correct retaining snap ring is installed, recheck clearance.
- Apply air pressure to hole on back side of clutch assembly. Block opposite hole with finger. Piston must apply under pressure and release when air is removed.
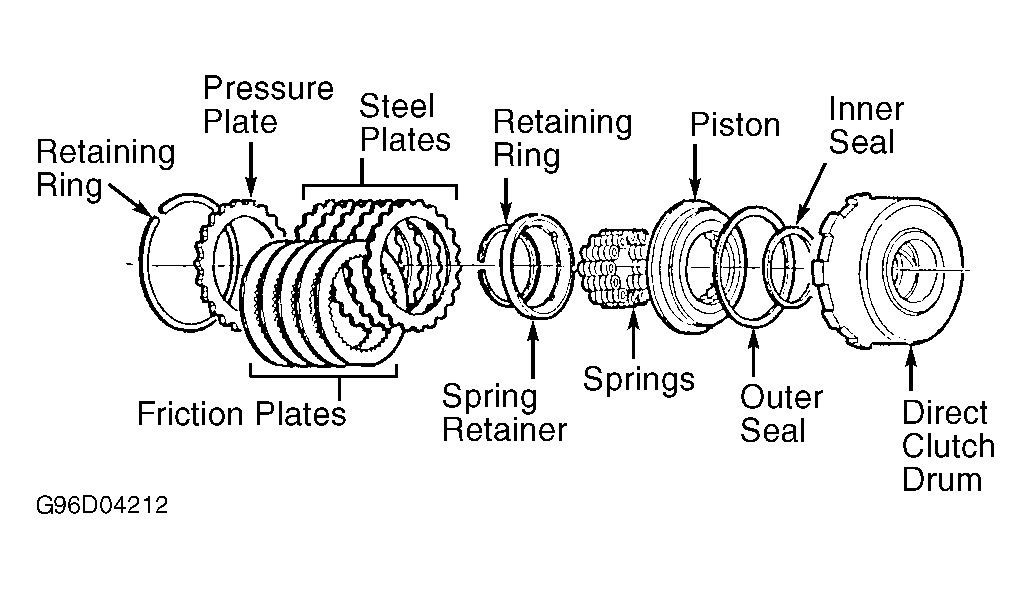 Courtesy of FORD MOTOR CO.