Axle Housing Assembly: Removal
- Raise and support vehicle. Release parking brake. Remove rear wheels and brake drums. From beneath vehicle, pull front cable for parking brake rearward about 2".
- Carefully clamp cable behind crossmember, ensuring cable coating is not damaged. Remove parking brake cables from equalizer. Compress tabs on retainers and pull cables through rear crossmember.
- Place jackstands on frame lift points or under rear bumper support brackets. Place reference mark on drive shaft flanges for reassembly reference. Remove drive shaft. Install plug in transmission extension housing to prevent oil leakage.
- Disconnect rear anti-lock brake sensor electrical connector. Disconnect hydraulic brakelines. Support axle housing with floor jack. Disconnect shock absorbers from lower control arms. Lower axle housing until coil springs are no longer under compression. Remove lower coil spring retainer first, then remove upper retainer. Remove coil springs and spring insulators.
- Raise axle housing to normal load position. Note axle housing-to-lower control arm bolt position for installation reference. Remove lower control arms. Remove upper control arm-to-axle housing bolt.
- Remove upper control arm from axle housing. Mark cam adjuster-to-axle housing bushing position for installation reference. See Fig 1
. Lower axle housing and remove from vehicle.
CAUTION:
Upper control arm bushing is an eccentric-type bushing which, depending on its position, controls drive pinion angle. When removing upper control arm, ALWAYS
mark cam adjuster-to-axle housing bushing position for installation reference. Nominal position (zero degree) of drive pinion angle is with axle housing bushing notch at 6 o'clock position. See Fig 1
.
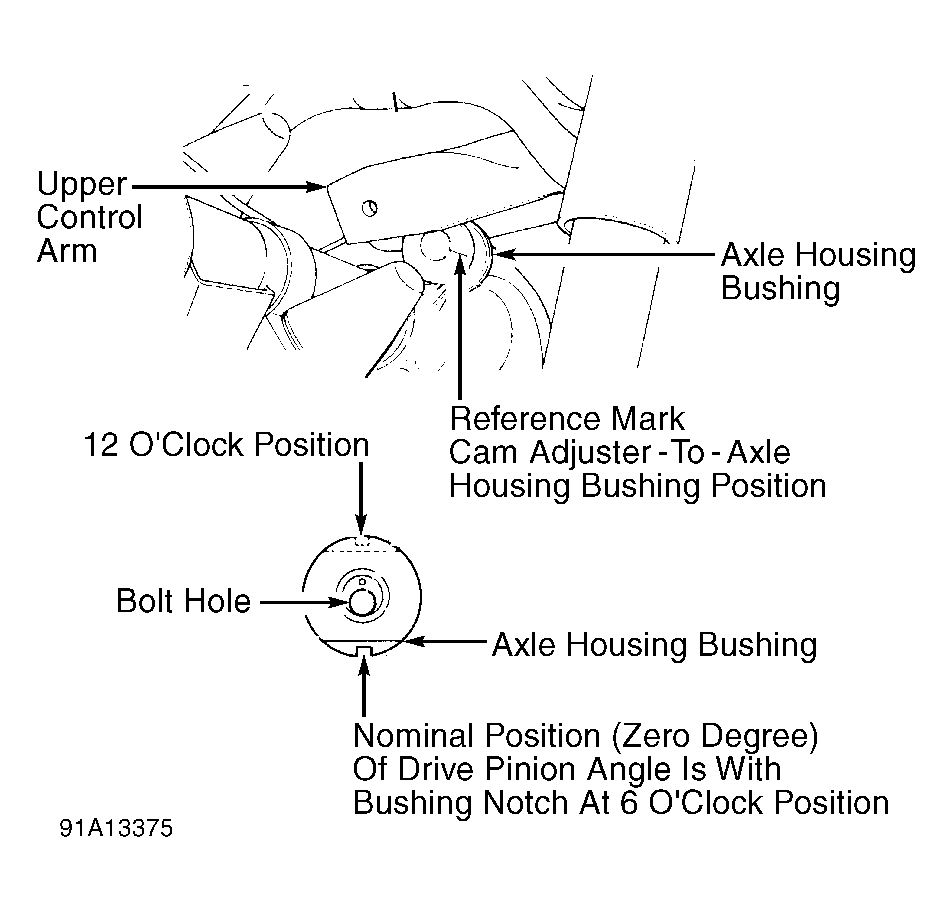 Courtesy of FORD MOTOR CO.