Valve Body: Installation
- Install Valve Body Alignment Pins (T95L-70010-B and T95L-70010-C) into case. See Fig 1
and Fig 2
. Ensure new separator gasket is properly aligned. Install valve body to case, align manual valve with lever pin with manual valve.
- Install 4 bolts at location "A", 2 bolts at location "B" and one bolt at location "C" finger tight, to locate valve body into case. See Fig 1
and Fig 2
. Remove valve body alignment pins. Install remaining bolts finger tight, except filter screen bolt and 3-4 shift solenoid bolts.
- Tighten valve body bolts, starting from center bolts and working to outer edges. See TORQUE SPECIFICATIONS
. Install manual valve detent spring tighten bolt to specification.
- Install low-reverse servo cover, piston, spring and gasket. Tighten bolts in crisscross pattern to specification. Connect solenoid wires. Install wire loom guide and protector.
- Clean filter screen with solvent and install filter screen and "O" rings. Using a new gasket, install gasket and oil pan. Tighten oil pan bolts to specifications. Add 3 Qts. (2.8L) of Mercon ATF and start engine. Add fluid as necessary.
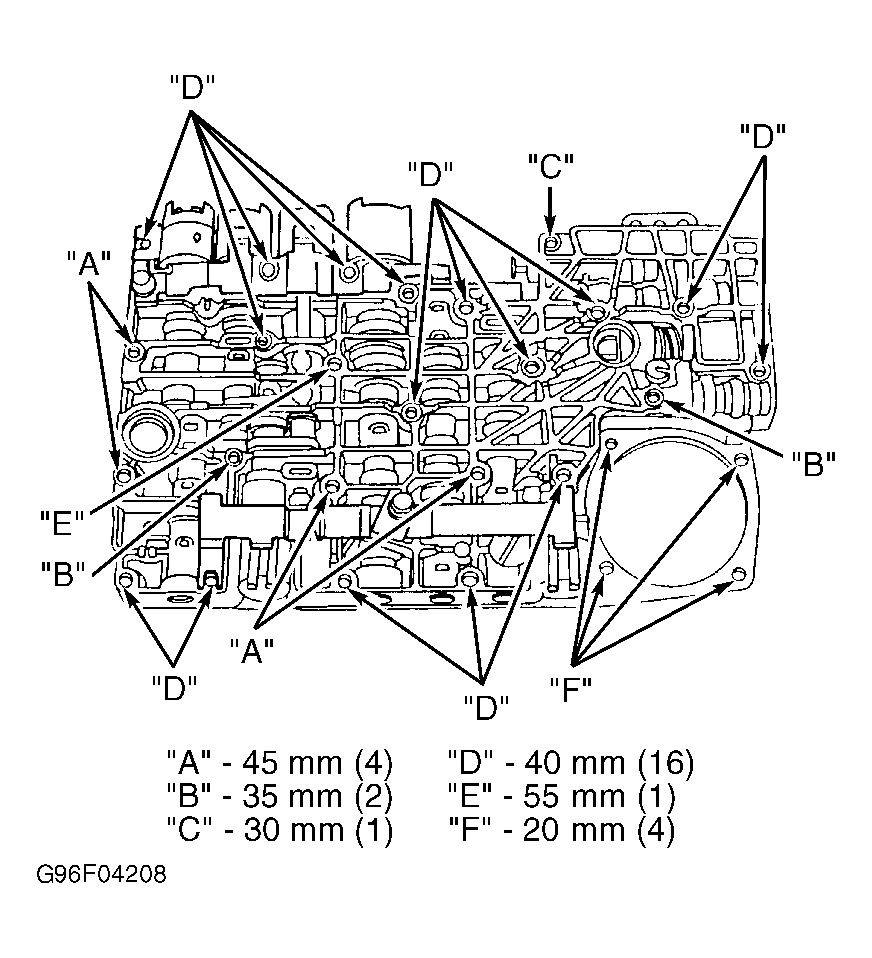 Courtesy of FORD MOTOR CO.
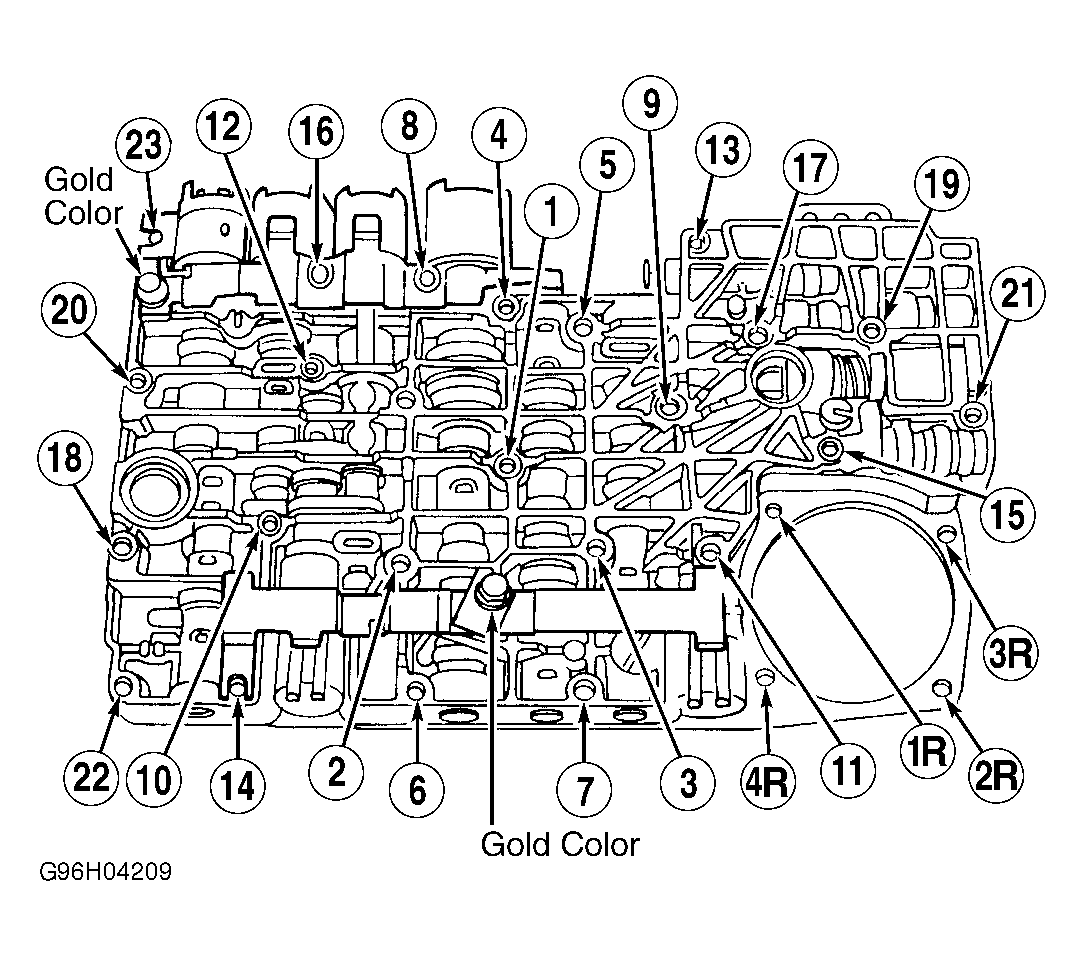 Courtesy of FORD MOTOR CO.