Charge Indicator Light
- The alternator regulator has a circuit that indicates a high or low system voltage condition. The charge indicator light will come on if alternator is not charging or is overcharging. If either of these conditions exists, see appropriate ALTERNATOR article in the ELECTRICAL section. Refer to the following menu:
- Turn ignition on. If charge indicator light does not come on, ensure wiring is not open and indicator bulb is okay. See appropriate chassis wiring diagram in WIRING DIAGRAMS .
- If indicator light still does not come on, unplug connector from regulator. Connect jumper wire from harness connector "I" terminal to negative battery cable. See Fig 1. Turn ignition on. On Aerostar, Explorer or Ranger, if indicator light does not come on, perform voltage regulator "I" circuit tests. See ALTERNATOR article in the ELECTRICAL section. Refer to the following menu:
- On Bronco, Pickup or Van, if indicator light does not come on, check 500-ohm resistor across indicator light. Replace as necessary. On Aerostar, Explorer or Ranger, if indicator light comes on when jumper is connected between "I" terminal and negative battery cable, remove jumper wire and reattach regulator connector.
- Connect DVOM negative lead to negative battery post. Connect positive lead to voltage regulator terminal "A" screw at alternator. Battery voltage should exist.
- If battery voltage does not exist, repair circuit "A" wiring. If battery voltage exists, clean and tighten ground connections of alternator and regulator. Turn ignition on. If indicator light still does not come on, replace regulator.
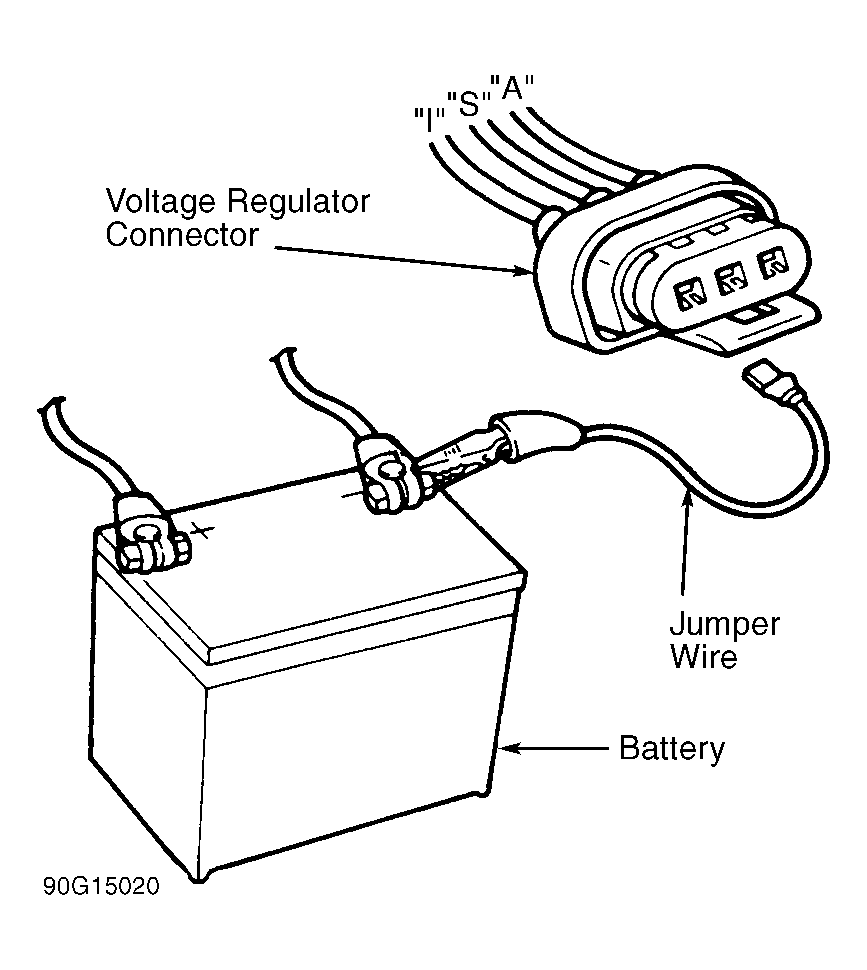 Courtesy of FORD MOTOR CO.