Adjusting Clutch Pack Preload
- Disassemble clutch packs, noting order of disassembly for reassembly reference. DO NOT
clean clutch plate friction surfaces with solvent; wipe with clean shop towel only. Inspect clutch plates. Replace plates if they are uneven or extremely worn. Reassemble side gear and clutch pack assembly without shim.
- Install Differential Clutch Gauge Base (T84P-4946-A
for 7 1/2" ring gear; T87P-4946-A
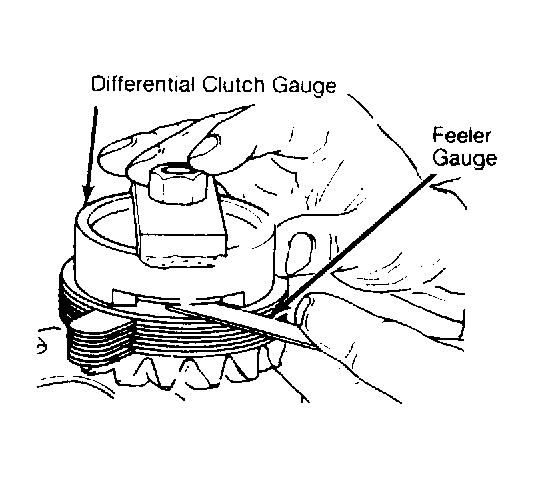
for 8 3/4" ring gear) in vise. With side gear facing down, slide assembly onto base without shim. Install Differential Clutch Gauge Disc (part of T84P-4946-A
for 7 1/2" ring gear; T80P-4946-A
for 8 3/4" ring gear) on top of assembly without shim. See Fig 2
.
- Install nut on threaded end of gauge base. Tighten nut to 60 INCH lbs. (6.7 N.m). Using feeler gauge, select thickest blade that will enter between clutch gauge and clutch pack. This reading will be thickness of new shim for that clutch pack. Repeat procedure for opposite clutch pack.
 Courtesy of FORD MOTOR CO.
 Courtesy of FORD MOTOR CO.