Installation (Semi-Floating)
- Lubricate bearing with rear axle lubricant and install bearing with a driver. Install oil seal. If seal becomes cocked during installation, remove seal and replace with a new one.
- Carefully insert axle in housing to avoid damaging oil seal. Install "C" locks, and push shafts outward to seat locks in counterbore of differential side gears.
- Replace pinion gears and thrust washers (if removed). Turn gear assembly to align pinion gear and thrust washer bores with pinion shaft holes on case. Install pinion shaft. Apply Loctite to lock bolt and tighten to specification. See TORQUE SPECIFICATIONS
table.
- Clean gasket mating surfaces and apply 1/8 - 3/16" wide bead of silicone sealant on axle housing cover. Install housing cover. Tighten cover bolts to specification in a crisscross pattern. See TORQUE SPECIFICATIONS
table. Fill differential until fluid level is approximately 1/4" below bottom of filler plug hole.
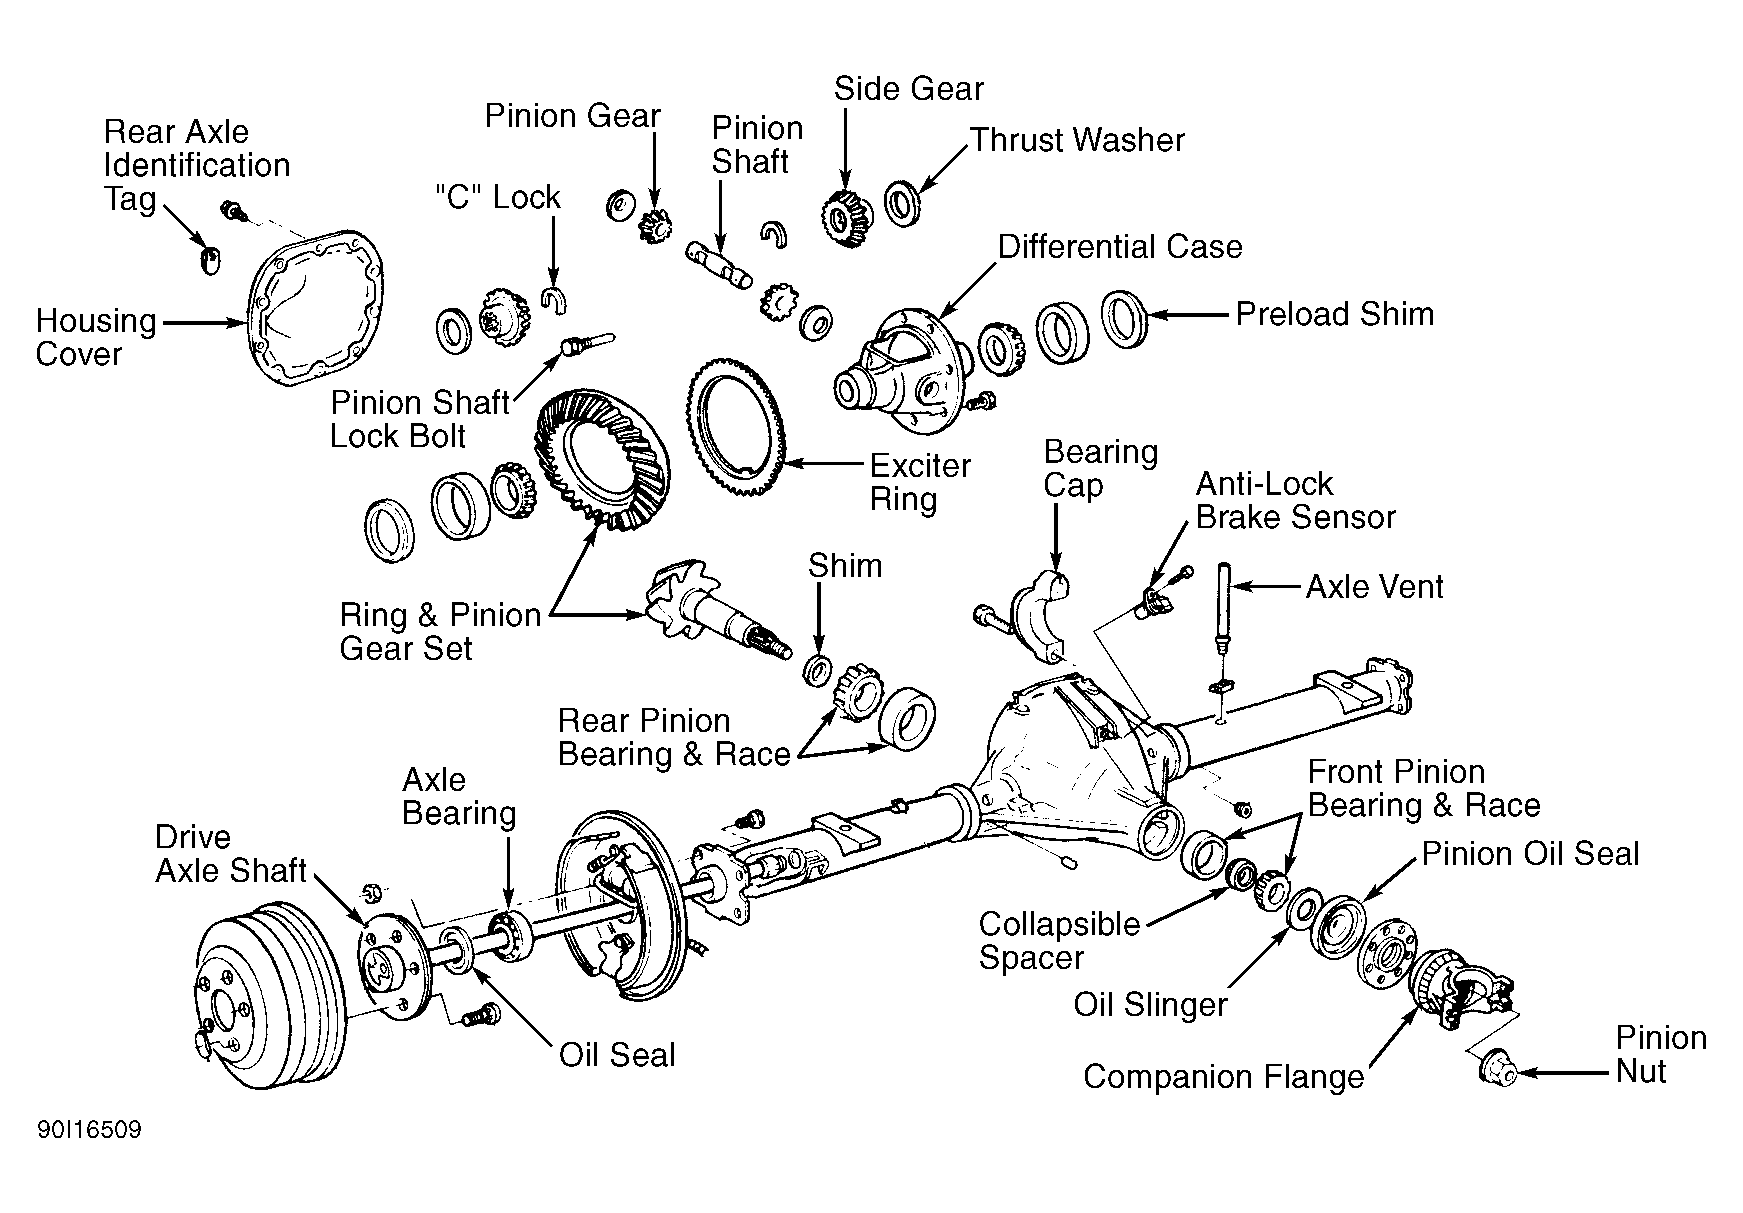 Courtesy of FORD MOTOR CO.