Cylinder Head: Installation
- Use 2 old cylinder head bolts and cut the head off, to use as guide pins. Slot top of old bolts for screwdriver access. Install fabricated guide pins in bolt hole Nos. 7 and 10. See Fig 1. Install head gasket. Ensure marked side of gasket is in proper position.
- Install cylinder head. Install cylinder head bolts until snug. Remove 2 guide pins and install 2 cylinder head bolts. Tighten cylinder head bolts in 2 steps and sequence. See Fig 1.
- Align crankshaft sprocket timing mark with camshaft sprocket timing mark (TDC on compression stroke). Install push rods, rocker arms and fulcrums on No. 1 intake and exhaust, No. 2 intake and No. 3 exhaust. See Fig 2.
- Tighten rocker arm bolts to specifications. Completely collapse lifter by applying pressure on push rod before rotating engine.
- Rotate crankshaft 180 degrees. Install push rods, rocker arms and fulcrums on No. 2 exhaust, No. 3 intake and No. 4 intake and exhaust. Tighten rocker arm bolts to specifications. Completely collapse lifters and rotate crankshaft 180 degrees.
- To complete installation, reverse removal procedure. Tighten all bolts and nuts to specifications. Change oil and filter. Fill fluid levels. Start engine and check for leakage.
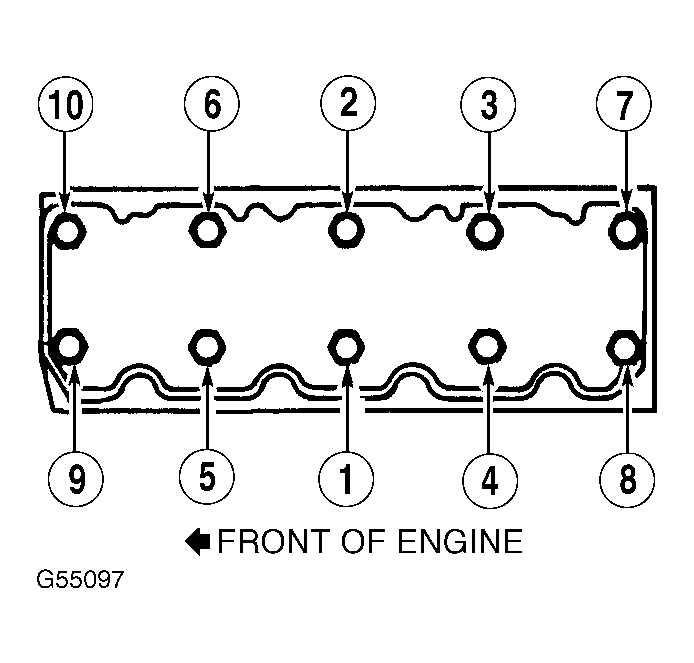 Courtesy of FORD MOTOR CO.
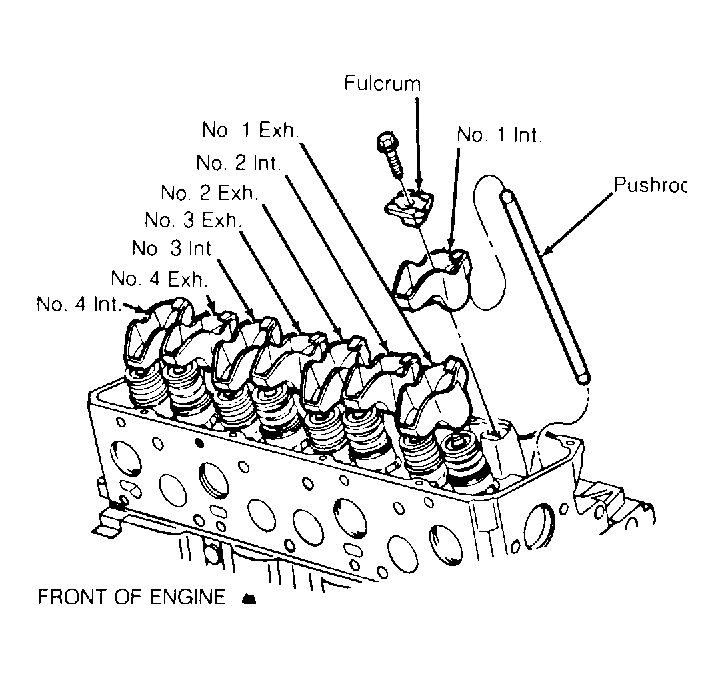 Courtesy of FORD MOTOR CO.