Aft of Axle Fuel Tank
E150-E350 Aft Of Axle Fuel System Installation - Except 7.5L Engine With Hot Fuel Handling:

E150-E350 Midship Fuel System Installation - Except 7.5L Engine With Hot Fuel Handling:
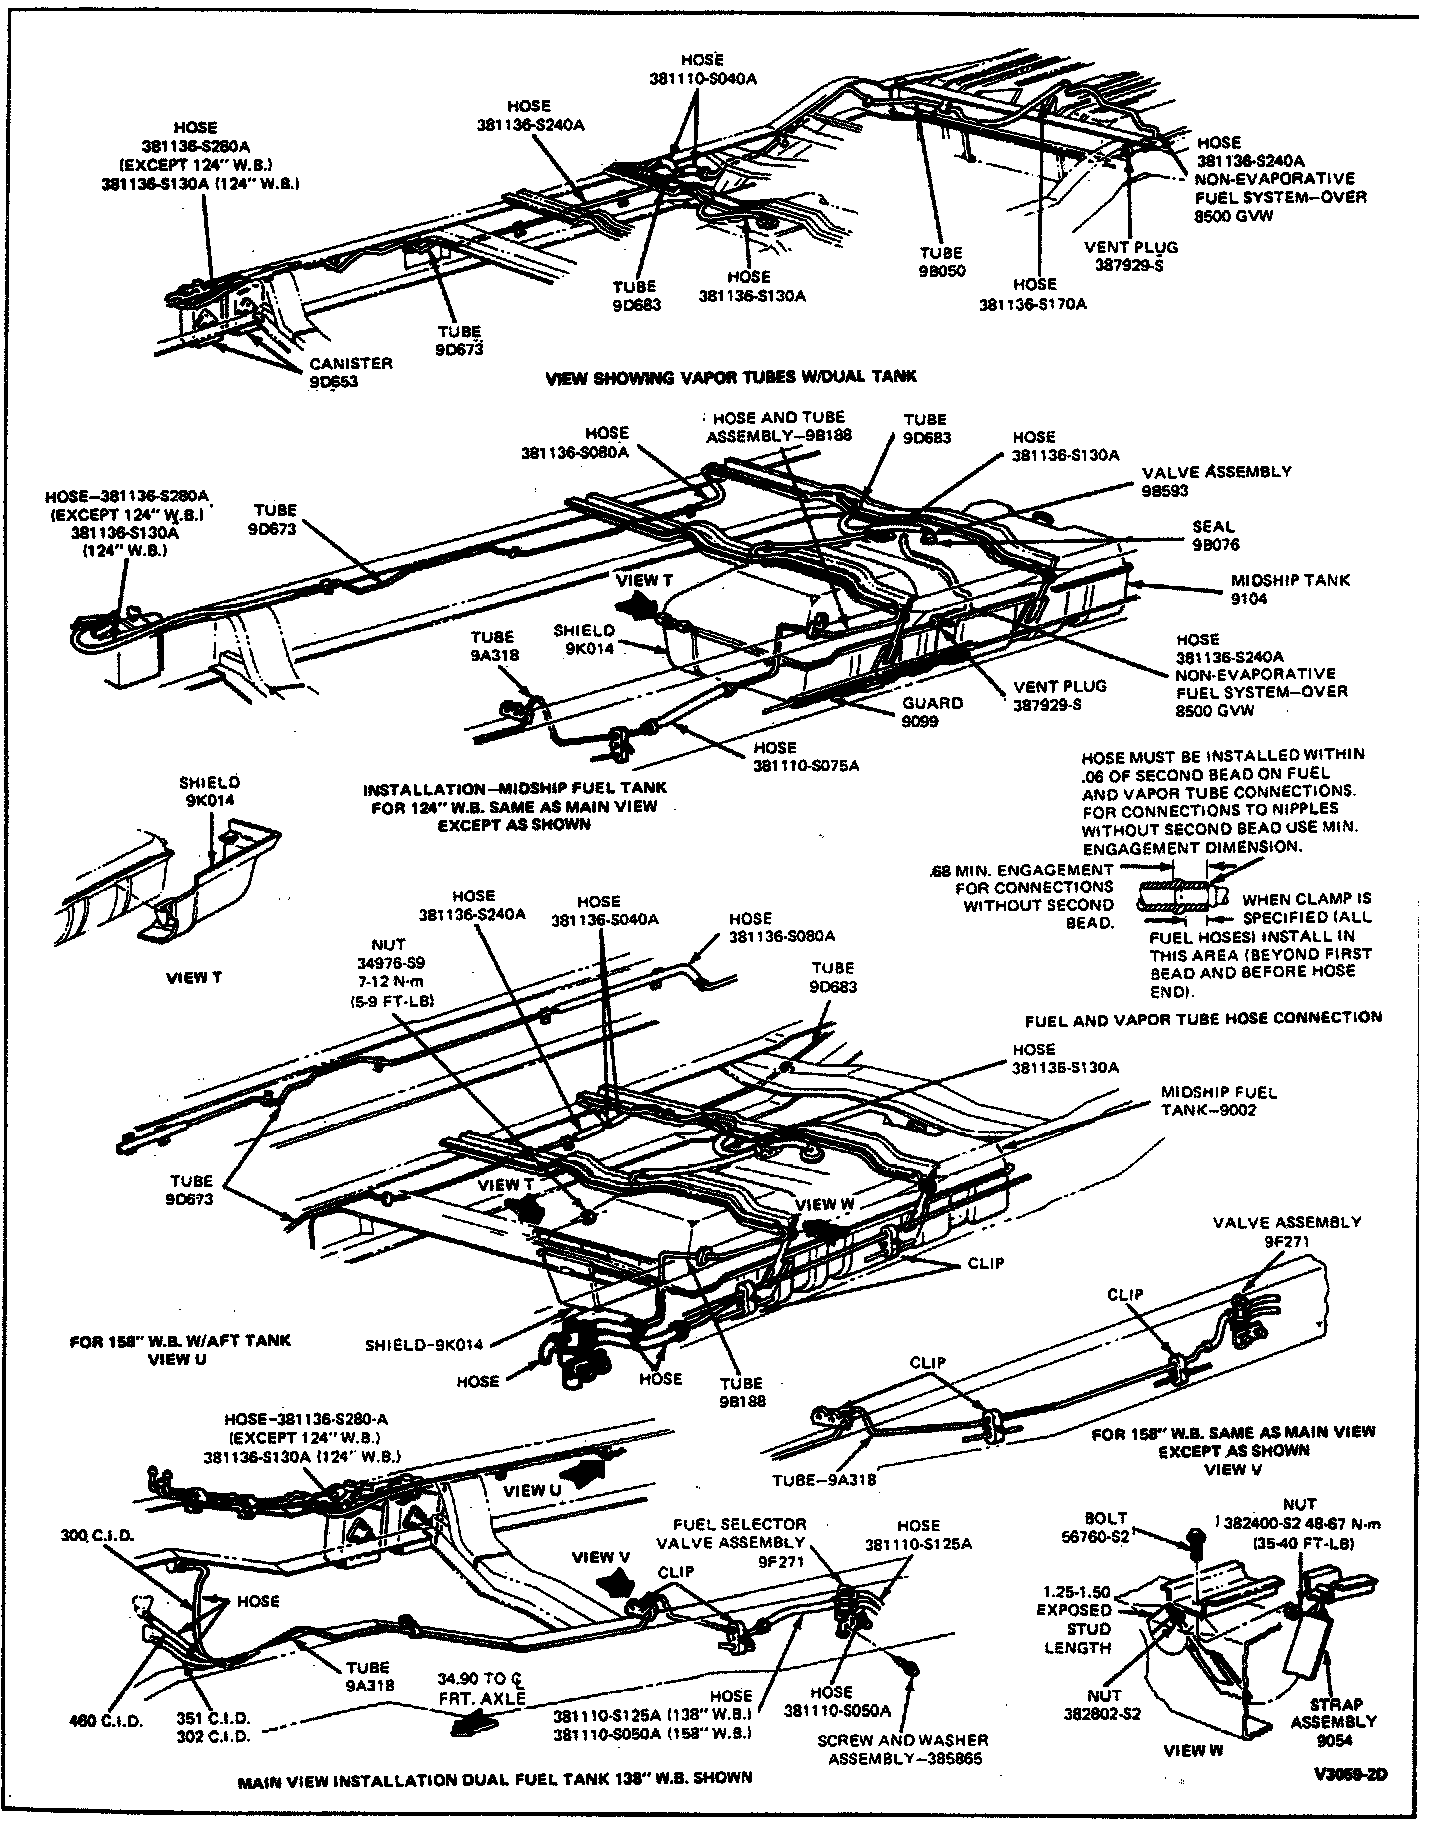
E250-E350 Aft Of Axle Fuel System Installation - With Hot Fuel Handling:
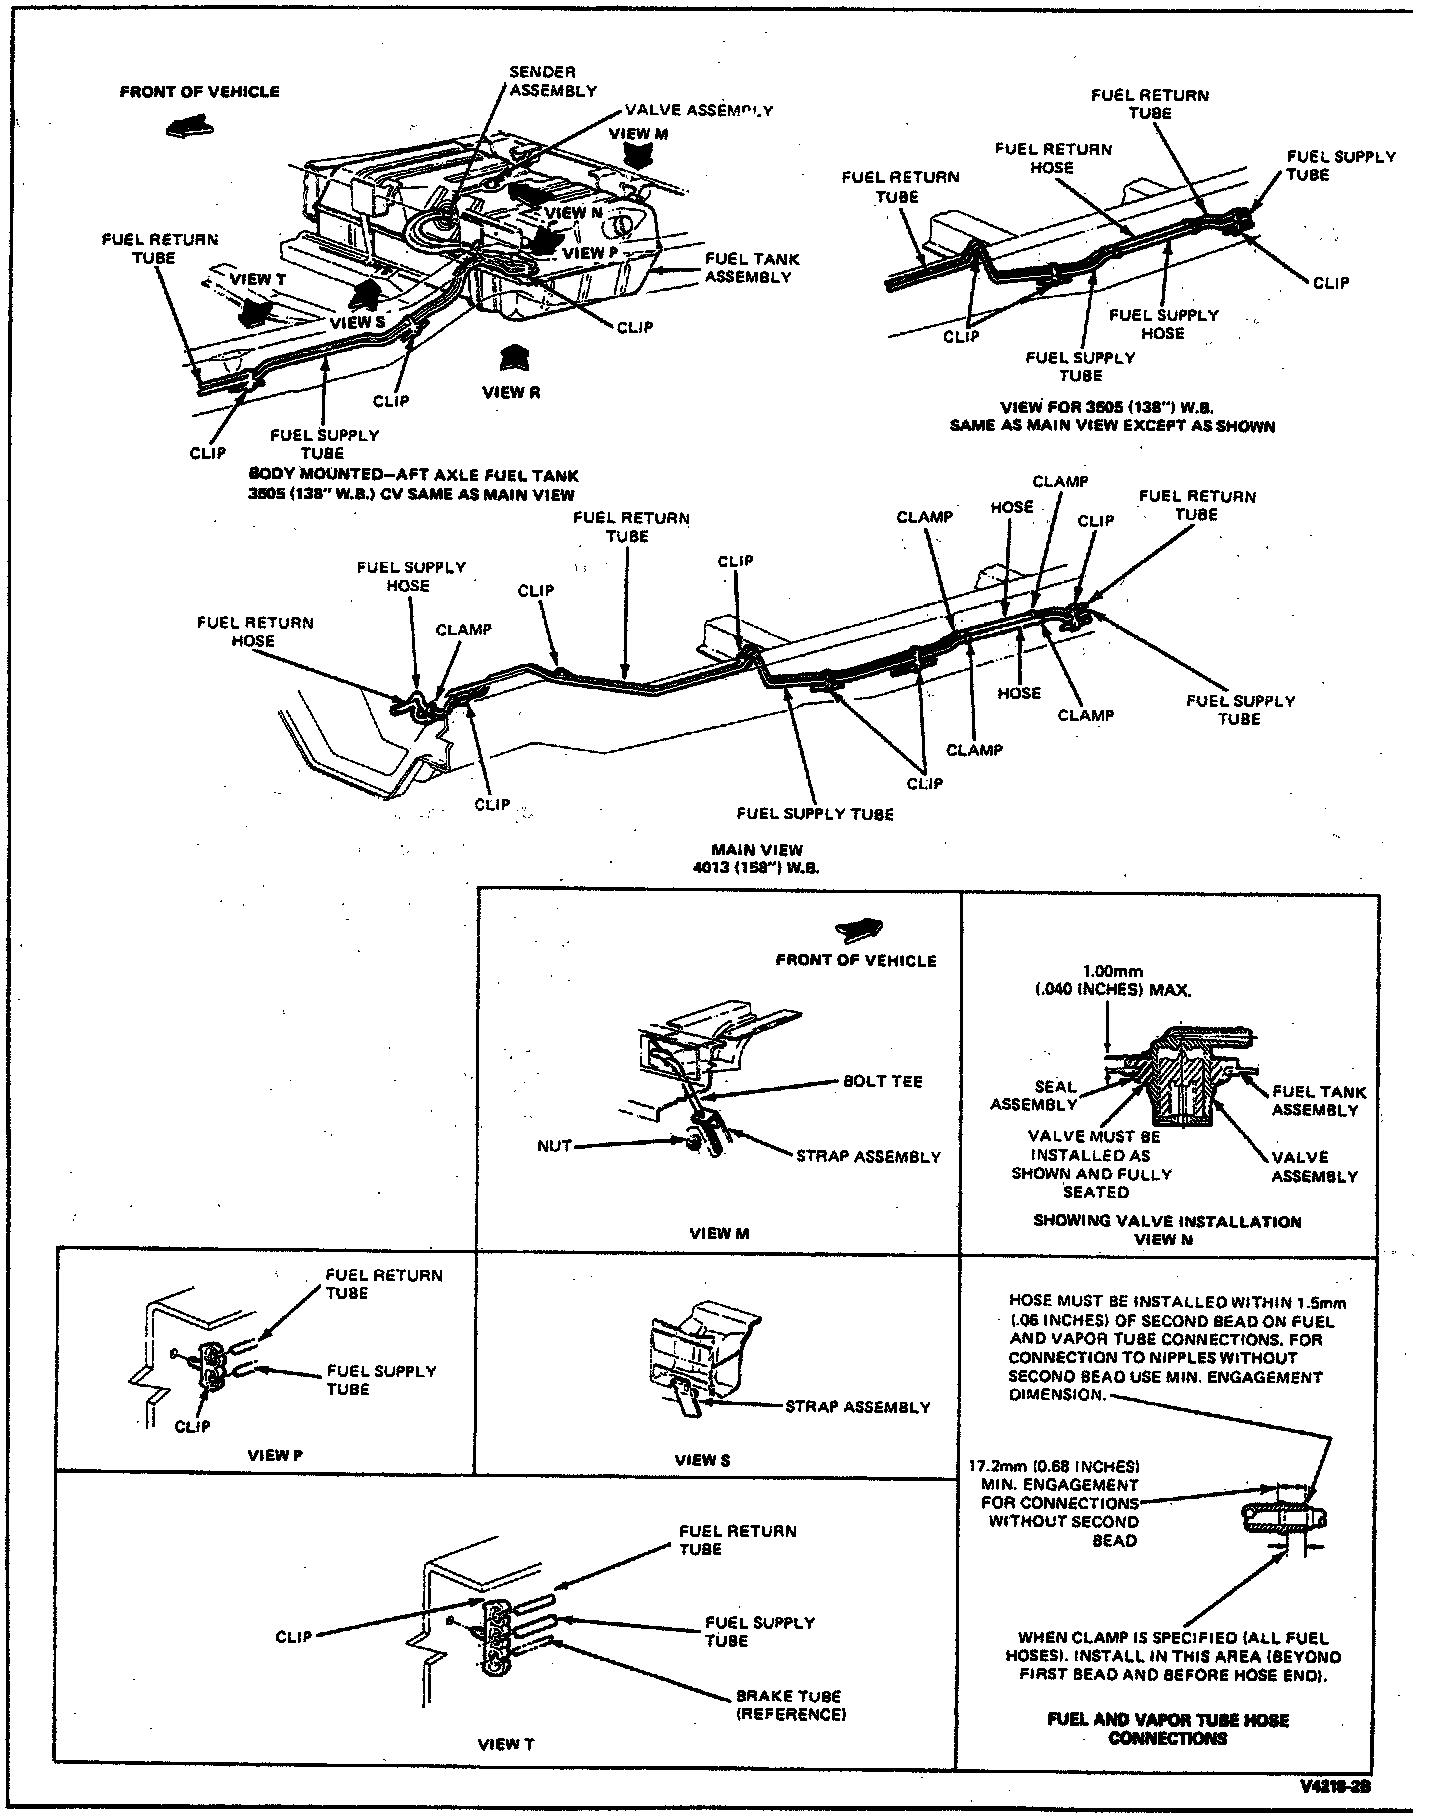
E150-E350 Aft Of Axle Fuel System Installation - Except 7.5L Engine With Hot Fuel Handling:
Removal
1. Insert a siphon through the fuel filler pipe assembly and drain the fuel into a suitable container.
2. Raise the rear of the vehicle.
3. To avoid electrical sparking at the tank, disconnect the ground cable on the vehicle battery. Then disconnect the fuel gauge sending unit wire at the fuel tank.
4. Loosen the clamps on the fuel filler hose and vent hose at the tank neck. Disconnect the hoses from the tank.
5. Loosen the fuel line hose clamp and disconnect the fuel line hose from the fuel gauge sending unit.
6. Support the tank in position. Remove the nuts and bolts that attach the tank supports to the frame. Disengage the straps from the front tank support and the rear crossmember and lower the tank enough to gain access to the vapor valve. (All vehicles with evaporative emission systems will be equipped with vapor emission valves).
7. Disconnect the vapor hose from the vapor control valve.
8. Lower the fuel tank and remove it from underneath the vehicle.
9. If the fuel gauge sending unit is to be removed from the unit, turn the unit retaining ring counterclockwise and remove the sending unit, retaining ring and gasket.
10. If the vapor control valve is to be removed, pull it out of the grommet located in the top of the tank, and remove the grommet.
Installation
1. If the fuel gauge sending unit was removed, scrape away all the old gasket material from the unit mounting surfaces on the fuel tank. Using a new gasket, position the fuel gauge sending unit to the fuel tank and secure with the retaining ring.
2. If the vapor valve was removed, install the grommet in the tank opening and pressfit the valve into place.
3. If the insulation pads were worn or damaged, remove the material and install new pads.
4. Attach the mounting straps to the rear crossmember. Raise the tank high enough to connect the vapor hose to the vapor valve.
5. Position the tank assembly against the top straps and install the support and attaching bolts and nuts. Tighten the nuts to 41-56 Nm (30-42 ft-lbs).
6. Connect the fuel filler hose to the filler neck at the tank. Tighten the hose clamps to 3-4 Nm (25-35 in-lbs).
7. Connect the vehicle battery ground cable removed in Step 3 of the removal procedure. Connect the fuel gauge sending unit wire.
8. Fill the tank and check all connections for leaks.