Carrier, Instrument Panel: Removal: Removal
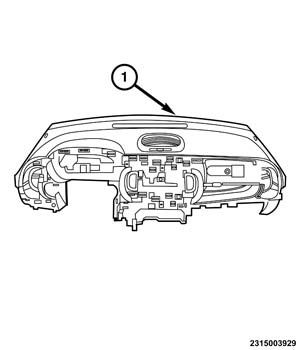 Courtesy of CHRYSLER GROUP, LLC
- Remove the instrument panel (1). Refer to PANEL, INSTRUMENT, REMOVAL .
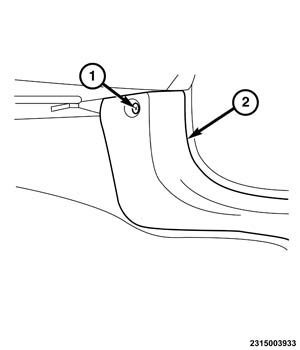 Courtesy of CHRYSLER GROUP, LLC
- Remove the fastener (1) and position the passenger side cowl/scuff trim panel (2) aside.
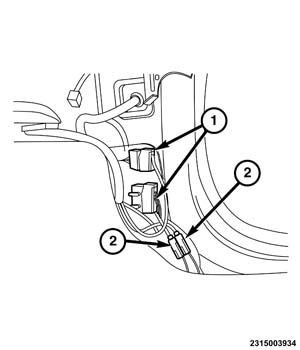 Courtesy of CHRYSLER GROUP, LLC
- Disconnect body harness wiring connectors (1).
- Disconnect the coaxial cable connections (2).
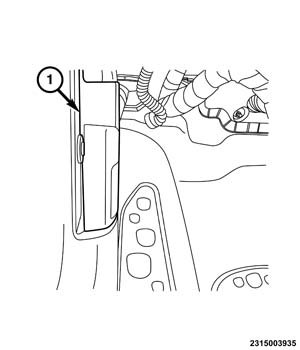 Courtesy of CHRYSLER GROUP, LLC
- With the use of a trim stick (special tool #C-4755, Trim Stick) or equivalent, remove the hood release handle (1).
 Courtesy of CHRYSLER GROUP, LLC
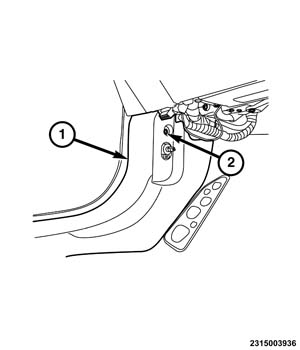
- Remove the fastener (2) and position the driver side cowl/scuff trim panel (1) aside.
 Courtesy of CHRYSLER GROUP, LLC
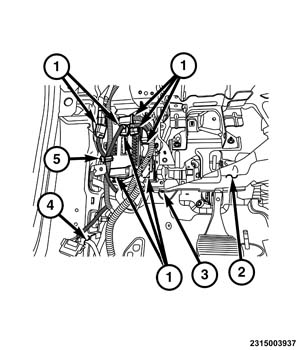
- Disconnect the wiring connectors (1).
- Remove the fasteners and disconnect the ground strap (4).
- Release the wiring harness from the routing clip (5).
- Remove the fastener (3) from the driver side floor air duct (2).
- Remove the driver side floor air duct (2).
 Courtesy of CHRYSLER GROUP, LLC
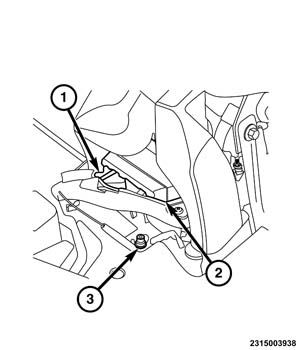
- Disconnect the wiring connector (1) from the air bag module (2).
- Remove the fastener (3) from the ground wiring.
 Courtesy of CHRYSLER GROUP, LLC
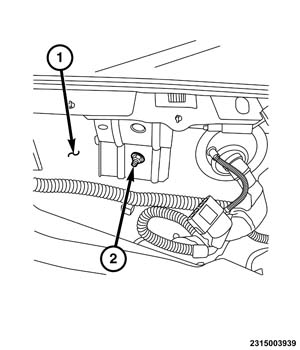
- Remove the cowl panel cover. Refer to COVER, COWL PANEL, REMOVAL .
- Remove the wiper assembly. Refer to LINKAGE, WIPER ARM, REMOVAL
.
- Remove the instrument panel carrier fastener (2) from the lower plenum (1).
 Courtesy of CHRYSLER GROUP, LLC
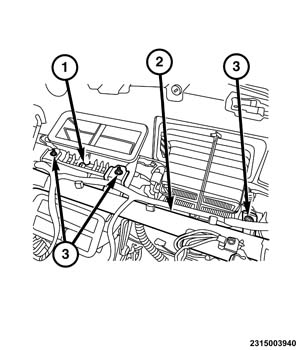
- Remove the upper fasteners (3) securing the HVAC housing (1) to the instrument panel carrier (2).
 Courtesy of CHRYSLER GROUP, LLC
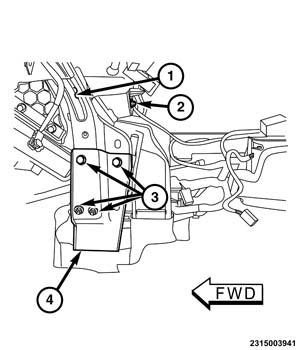
- Remove the lower fastener (2) securing the HVAC housing to the instrument panel carrier (1).
- Remove the fasteners (3) from the bracket (4), securing the instrument panel carrier (1) to the floor tunnel.
 Courtesy of CHRYSLER GROUP, LLC
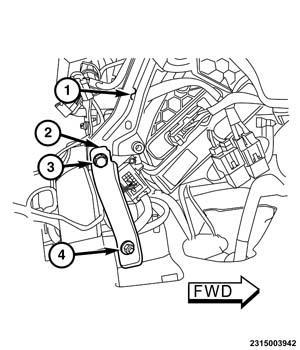
- Remove the fasteners (3 and 4) from the bracket (2), securing the instrument panel carrier (1) to the floor tunnel.
 Courtesy of CHRYSLER GROUP, LLC
- Remove the right and left front doors. Refer to DOOR, REMOVAL .
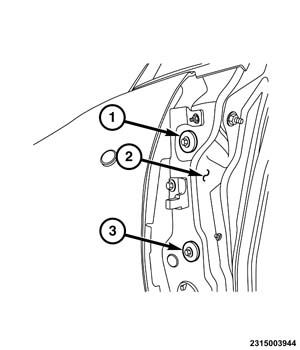
- With the help of an assistant, one person on each side of the vehicle, remove the fasteners (1) from the door hinge pillar area (2) while supporting the instrument panel carrier.
 Courtesy of CHRYSLER GROUP, LLC
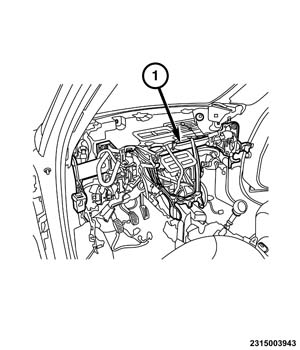
- Remove the instrument panel carrier (1) from the vehicle.