With Automatic Transmission
WITH AUTOMATIC TRANSMISSION
Special Tools:
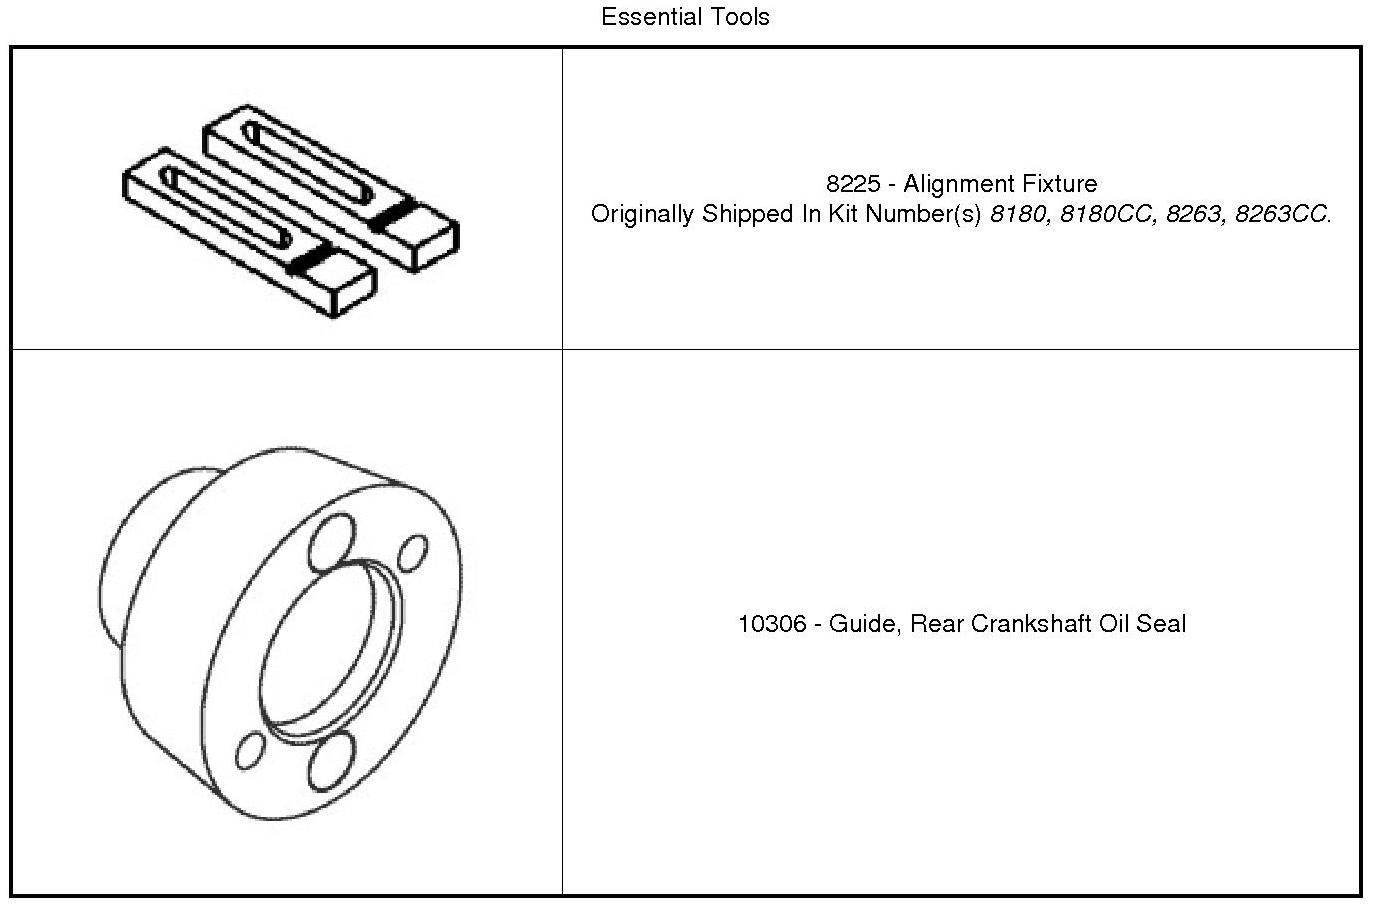
CAUTION: Whenever the crankshaft is replaced, the rear crankshaft oil seal must also be replaced. Failure to do so may result in engine fluid leakage.
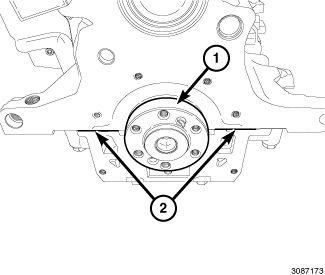
1. Inspect the crankshaft to make sure there are no nicks or burrs on the seal surface (1).
2. Clean the seal retainer, cylinder block and bedplate mating surfaces with isopropyl alcohol in preparation for sealant application.
CAUTION: Engine assembly requires the use of a unique sealant that is compatible with engine oil. Using a sealant other than Mopar(R) Engine RTV GEN II may result in engine fluid leakage.
CAUTION: Following the application of Mopar(R) Engine RTV GEN II to the gasket surfaces, the components must be assembled within 10 minutes and the attaching fasteners must be tightened to specification within the next 10 minutes. Prolonged exposure to the air prior to assembly may result in engine fluid leakage.
3. Apply a 2 to 3 mm wide bead of Mopar(R) Engine RTV GEN II sealant (1) to the two cylinder block to bedplate T-joints as shown.
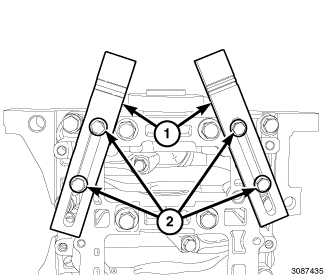
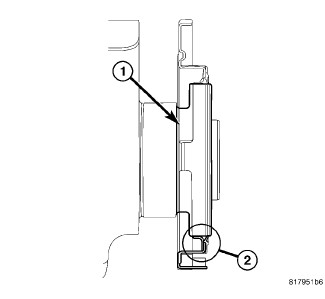
4. Attach (8225) (1) to the oil pan mounting flange using the oil pan bolts (2). Tighten the bolts to 9 Nm (80 in. lbs.).
NOTE: Make sure that the "2.7L" stamped on the alignment fixture is facing the cylinder block (flat side of tools against oil pan mounting flange).
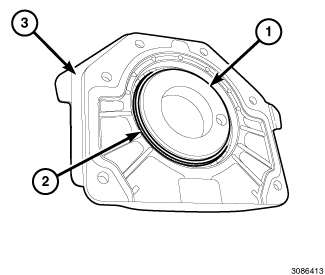
NOTE: It is not necessary to lubricate the seal or the crankshaft when installing the seal retainer. Residual oil following installation can be mistaken for seal leakage.
5. Carefully install the (10306) (1) into the rear seal retainer (3).
NOTE: Make sure that the garter spring (2) is intact around the inside of the oil seal lip.
6. Carefully position the seal retainer and seal installer on the crankshaft and push firmly into place on the engine block (during this step, the seal installer will be pushed from the oil seal as a result of installing the seal retainer).
7. Verify that the seal lip (2) on the retainer is uniformly curled inward toward the engine on the crankshaft (1).
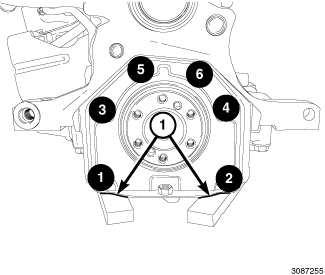
8. Allow the seal retainer to center itself on the crankshaft and position the seal retainer so that the distance between the seal retainer flange and the alignment fixture is equal on both sides (1).
NOTE: Do not force the seal retainer flange down against the alignment fixture.
9. While maintaining this alignment, install the six seal retainer bolts. Tighten the six bolts in two steps following the sequence shown:
- Step 1: All to 5 Nm (44 in. lbs.).
- Step 2: All to 9 Nm (80 in. lbs.).

10. Install the oil pan, transmission adapter plate (1), flexplate and starter Engine Oil Pan - Installation.

11. Install the transmission onto the engine AW60T Automatic Transaxle - Installation.
12. Install the engine and transmission in the vehicle Engine - Installation.
13. If removed, install the oil filter and fill the engine crankcase with the proper oil to the correct level Service and Repair.
14. Fill the cooling system Service and Repair.
15. Evacuate and charge the refrigerant system Refrigerant System Charge.
16. Start and run the engine until it reaches normal operating temperature. Check cooling system for correct fluid level Service and Repair.
17. Check the transmission for correct fluid level Procedures.