Rear Suspension Assembly (Colt Vista 4WD): Installation
- Install new clip on inner end of drive axle. Coat seal lip with grease before installing drive axle. Carefully install drive axle to prevent damaging oil seal.
- To complete installation, reverse removal procedure. Tighten bolts to specification. See appropriate TORQUE SPECIFICATIONS table at end of article. Tighten inner arm-to-crossmember bolt and outer arm bushing retaining bolts to specification with vehicle at normal operating height and no load.
- Bleed brake system. Adjust parking brake. Check vehicle height and wheel alignment. Refer to the appropriate article in the WHEEL ALIGNMENT section. If a difference exists between left and right body heights, torsion bar may be improperly positioned.
- Support inner arm with a jack. Remove inner and outer arm bolts. Check position of outer arm. See Fig 1. Distance should be 4.00-4.11" (101.5-104.5 mm). If distance is incorrect, reposition torsion bar.
- To determine proper torsion bar position, construct a torsion bar plate. See Fig 2. Drill holes at proper location. Bend plate at a 90-degree angle, 3.94" (100.0 mm) from left edge.
- Mark lines on plate at proper distance measured from top of plate. See Fig 2. Install plate using rear insulator bolt hole of crossmember bracket. See Fig 1.
- Torsion bar position is correct when marking lines on plate are at center of bolt hole for toe-in adjustment. See Fig 1.
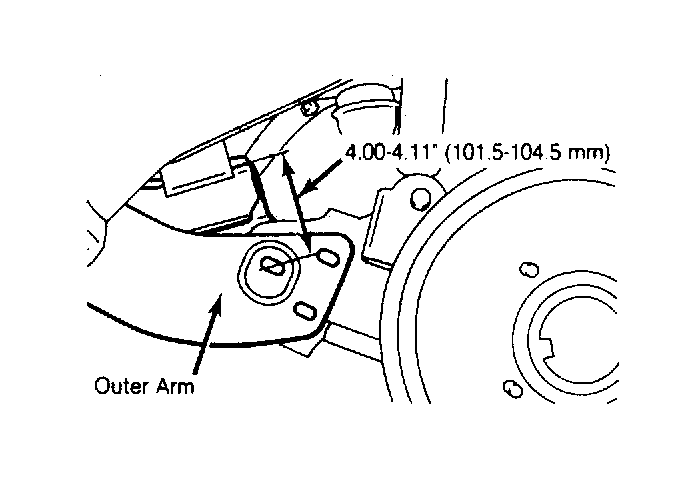 Courtesy of CHRYSLER MOTORS.
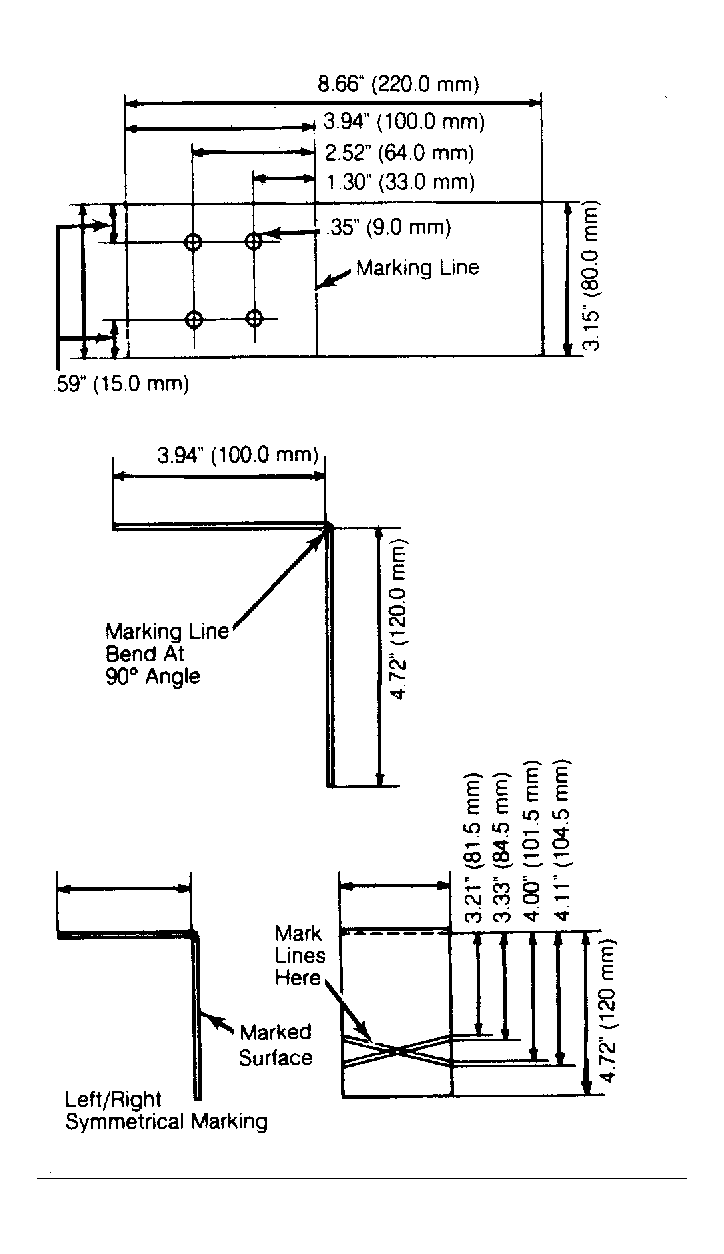 Courtesy of CHRYSLER MOTORS.
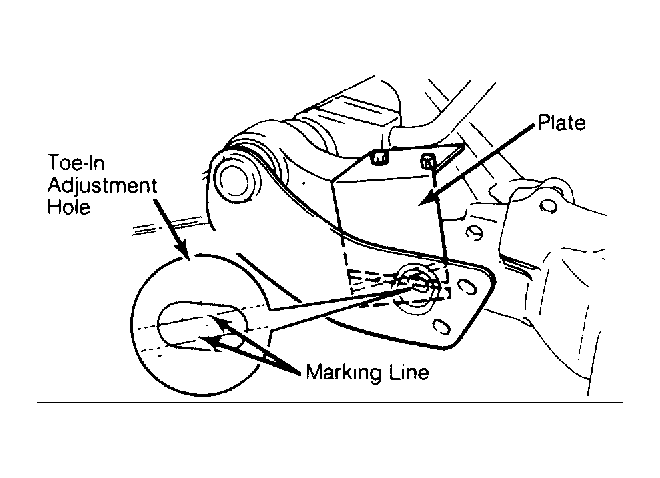 Courtesy of CHRYSLER MOTORS.