Carburetor Float: Adjustments
Fig. 3 Float level measurement:
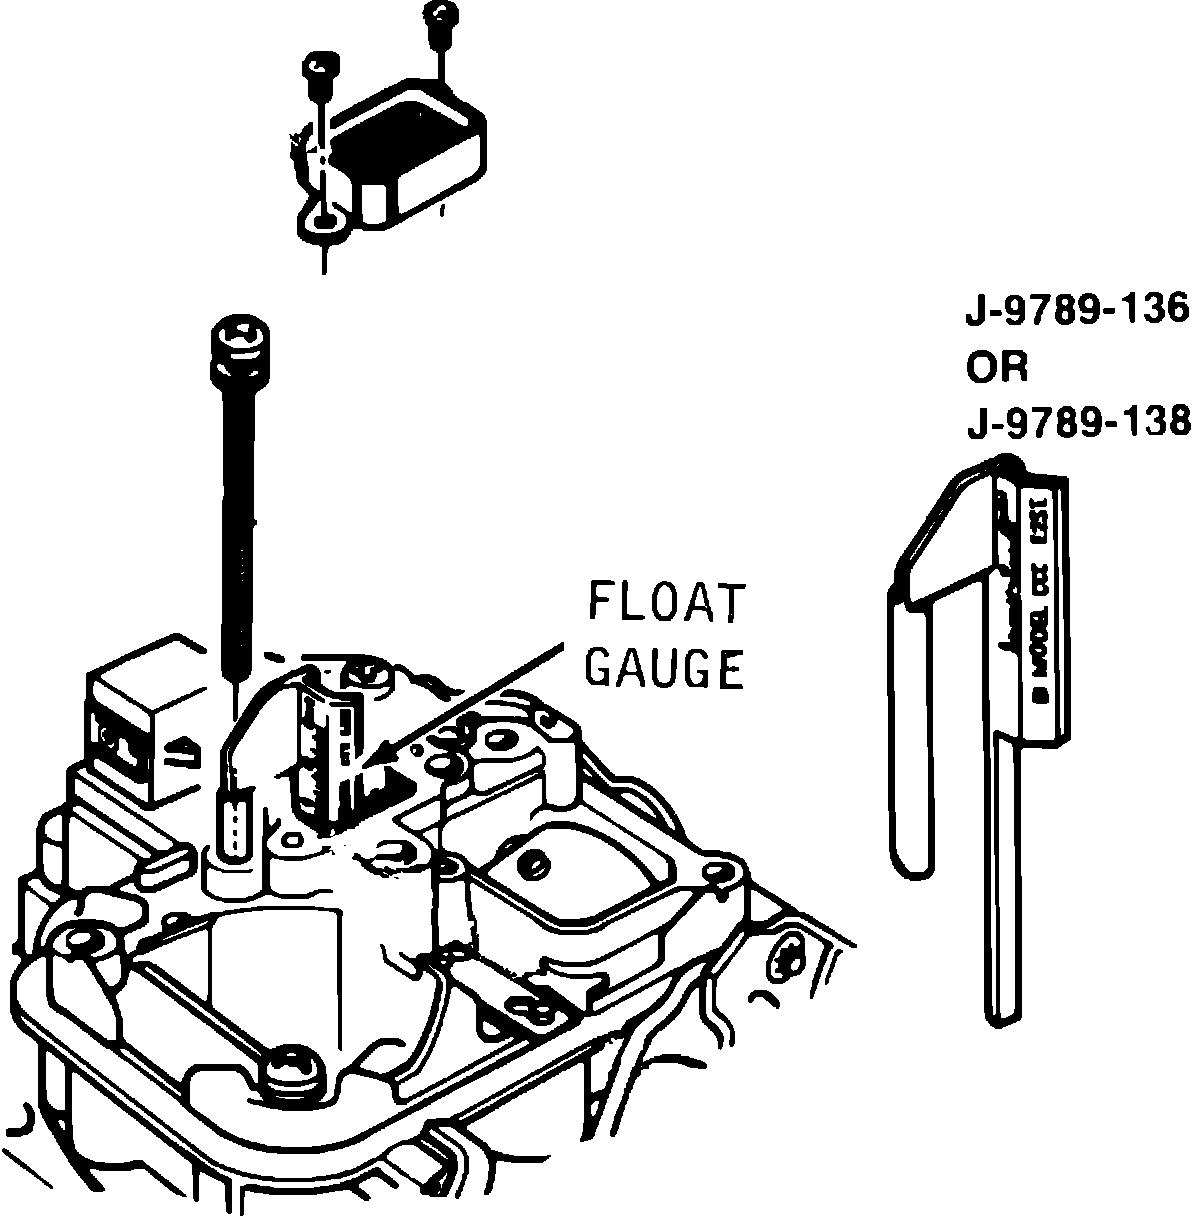
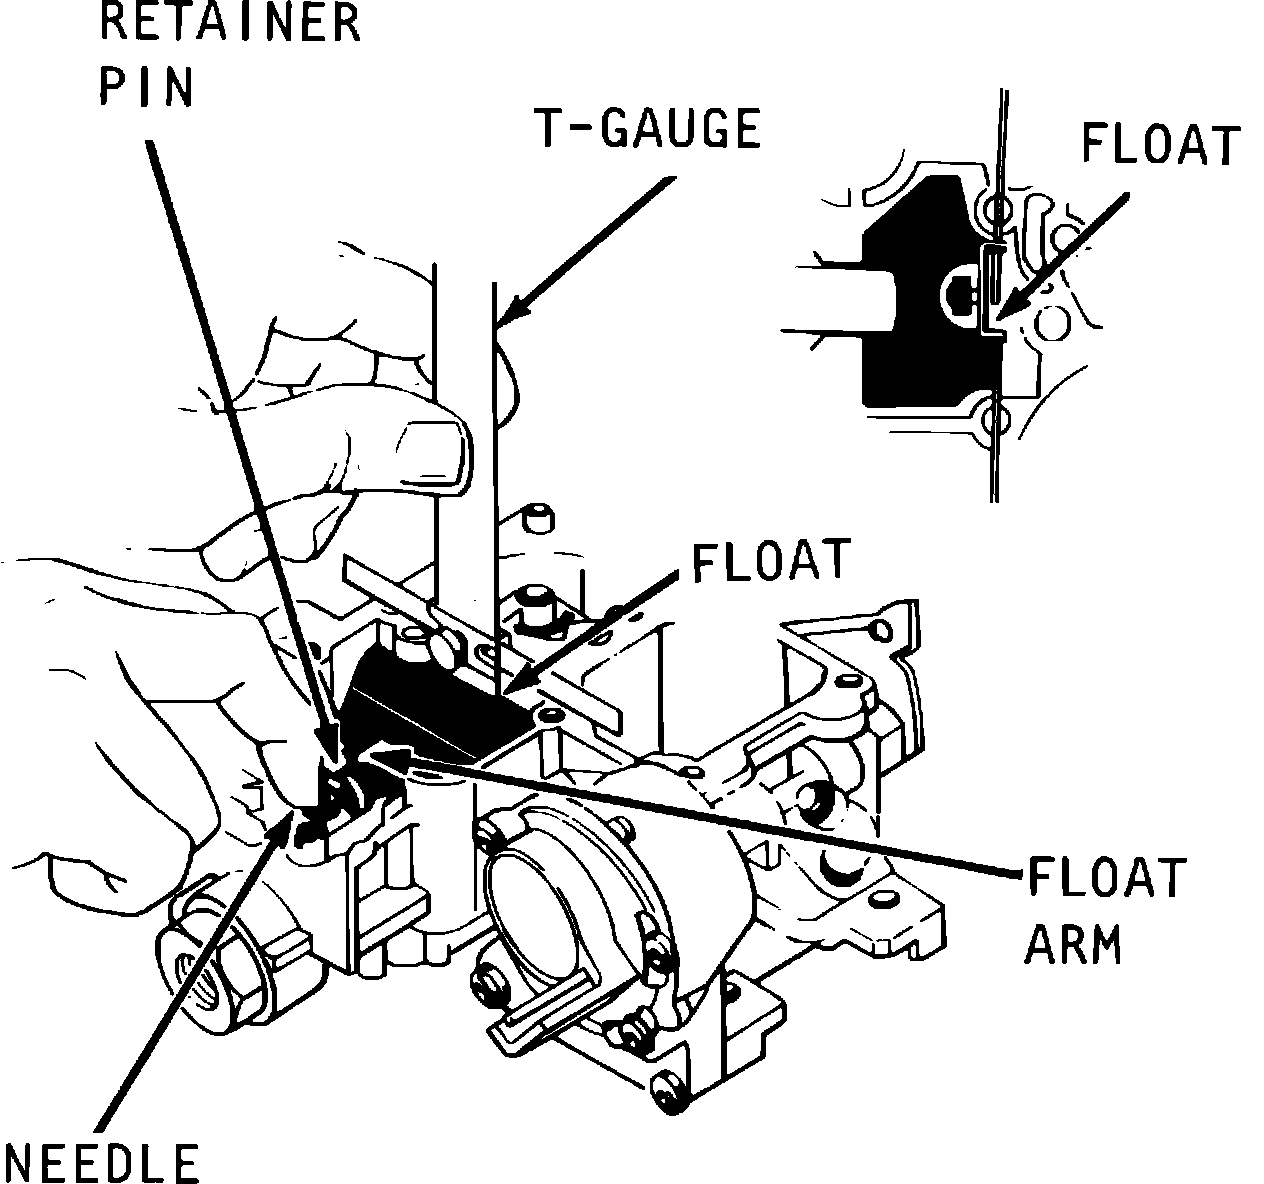
Fig. 4 Float level adjustment:
1. Remove vent stack attaching screws, then remove vent stack from air horn.
2. Remove air horn screw located adjacent to vent stack.
3. With engine idling and choke completely open, insert float gauge into air horn screw hole and vent hole, Fig. 3. Allow gauge to rest freely on float. Use white float gauge No. J-9789-136 for E2SE carburetors and blue float gauge No. J-9789-138 for 2SE carburetors.
4. With gauge at eye level, note mark that aligns with top of casting in vent hole. Float level should be within .06 inch of the specified setting.
5. Remove float gauge from carburetor.
6. If float setting is satisfactory, reinstall air horn screw, vent stack and attaching screws.
7. If float setting is not within limits, proceed as follows:
a. Remove air horn and gasket from carburetor.
b. While holding retainer pin in place, push float downward until it is lightly contacting needle.
c. Using a suitable "T" gauge, measure distance from a point 3/16 inch from end of float at toe to float bowl top surface, Fig. 4.
d. If distance is not within limits, remove float and bend float arm as necessary.
e. After completing adjustment, reinstall float and check float alignment.
f. Reinstall air horn and with a new gasket.