- Raise and support vehicle. Refer to STANDARD PROCEDURE
.
 Courtesy of CHRYSLER LLC
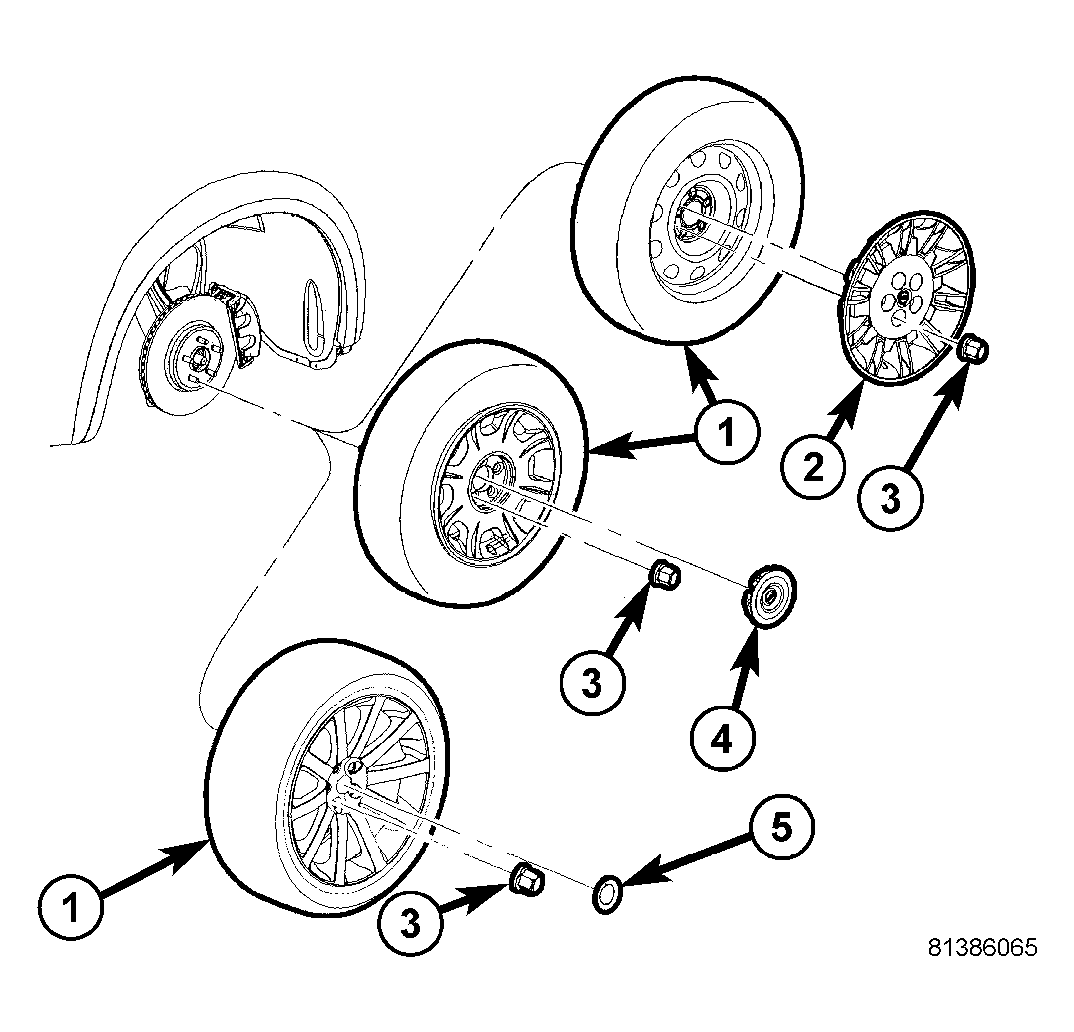
- On both sides of vehicle, remove wheel mounting nuts (3), then rear tire and wheel assembly (1).
 Courtesy of CHRYSLER LLC
WARNING:
Before opening fuel system, review all Warnings and Cautions.
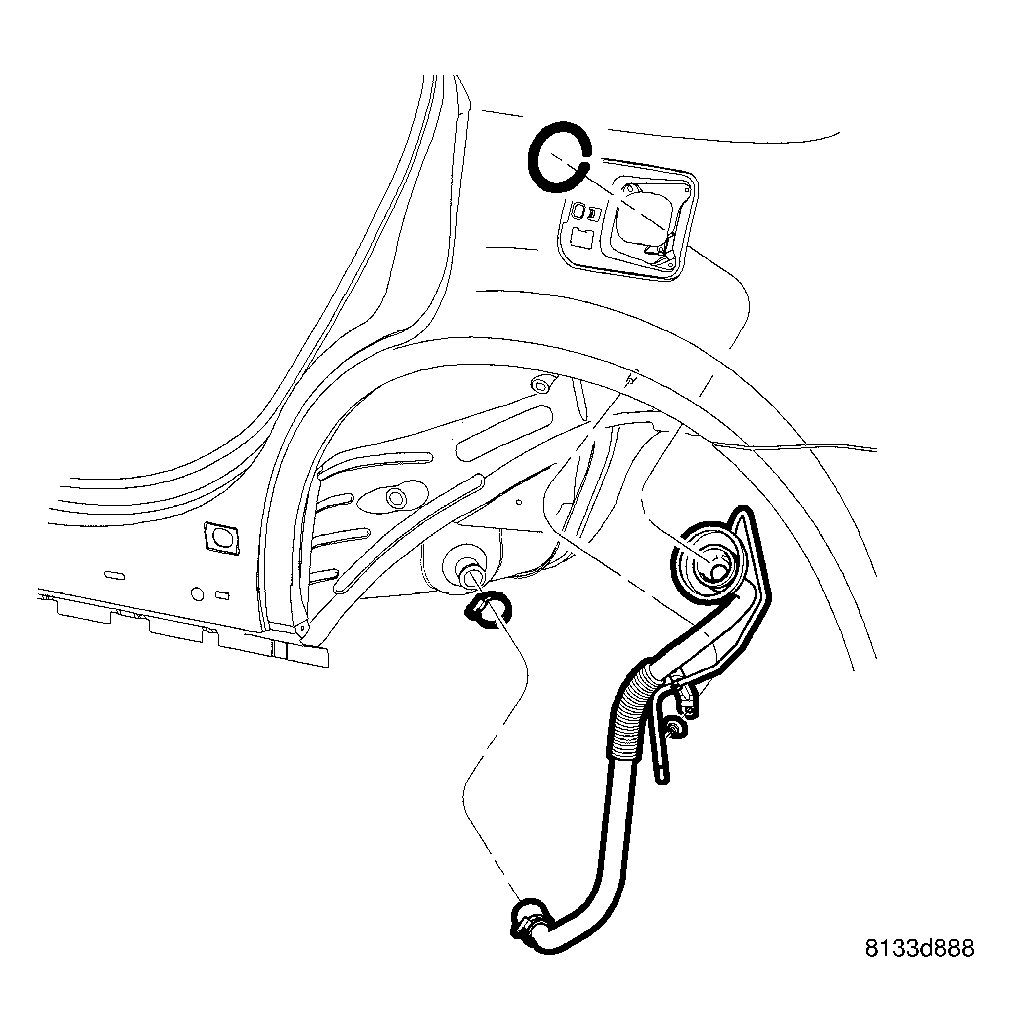
- Remove fuel filler tube. Refer to REMOVAL
.
- Position an extra pair of jack stands under and support forward end of engine cradle to help stabilize vehicle during rear suspension removal/installation.
- Perform following if vehicle is equipped with dual-exhaust.
- Position under-hoist utility jack or stand several inches below exhaust at muffler.
- Disconnect exhaust isolators at muffler and resonators hangers.
- Lower exhaust down to rest upon top of jack or stand placed below muffler.
 Courtesy of CHRYSLER LLC
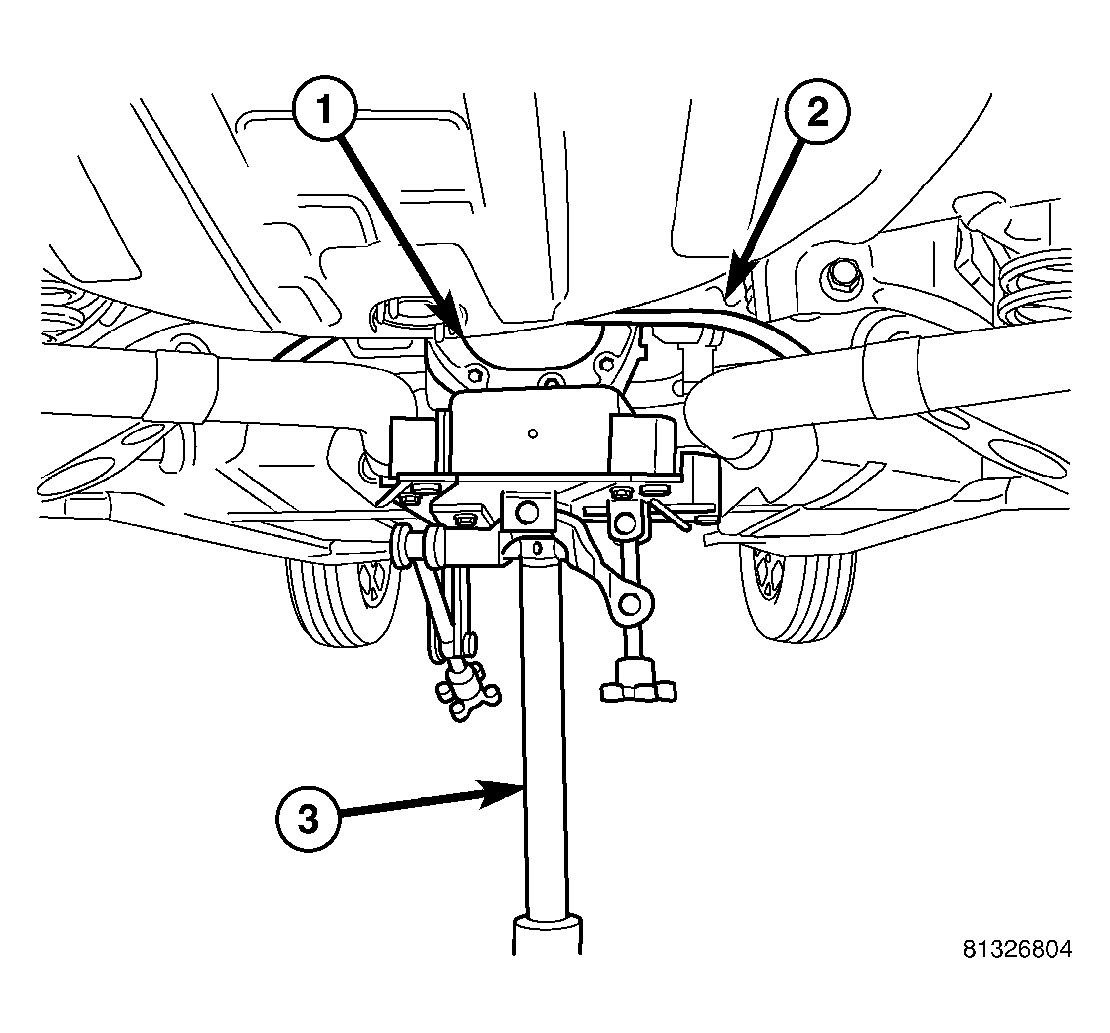
- Position under-hoist utility jack or transmission jack (3) under center of rear axle differential (1). Raise jack head to contact differential and secure in place.
 Courtesy of CHRYSLER LLC
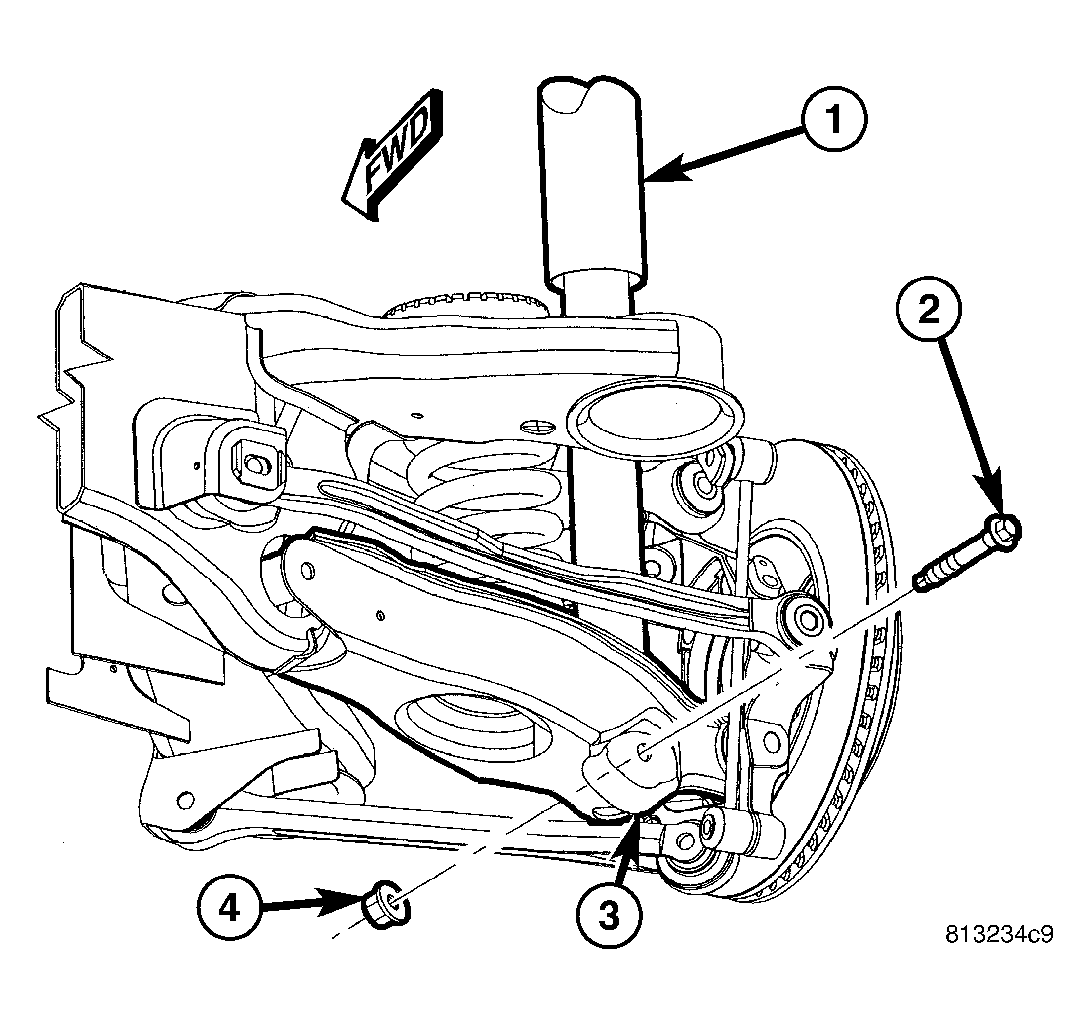
- Remove shock absorber (1) lower mounting bolt (2) and nut (4).
 Courtesy of CHRYSLER LLC
CAUTION:
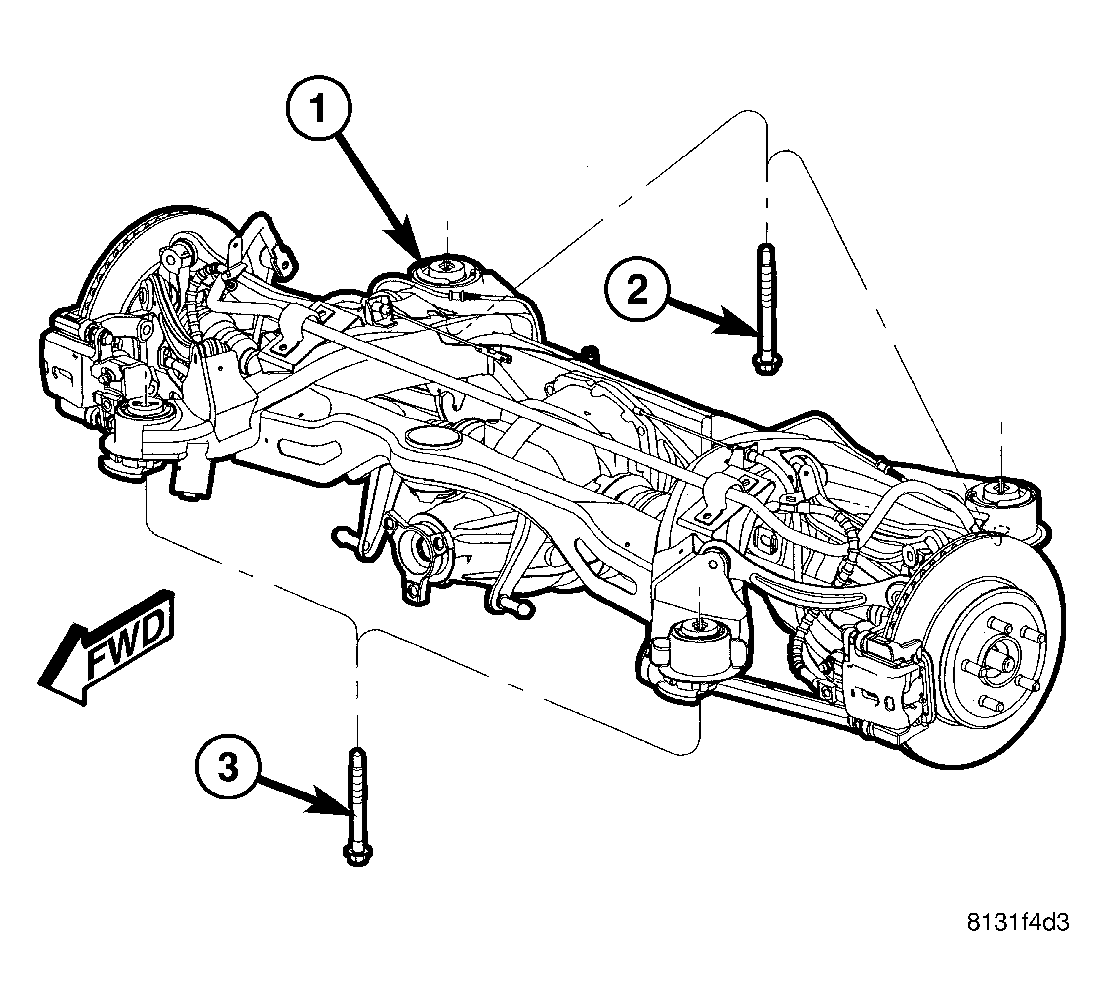
When removing crossmember mounting bolts (2 and 3) it is important NOT to loosen or remove crossmember mounting bolts on opposite side of vehicle. Doing so will require rear wheel alignment following reinstallation to ensure proper thrust angle.
- Remove both front and rear crossmember mounting bolts (2 and 3) on repair-side of vehicle. If equipped with AWD, be sure to not to misplace spacers between crossmember mounts and body.
CAUTION:
To avoid damaging other components of vehicle, do not lower crossmember (1) any further than necessary to remove shock absorber.
- Slowly
lower jack allowing repair-side of crossmember to drop. Do not lower jack at a fast rate.
Lower jack just enough to allow toe link mounting bolt at crossmember.
 Courtesy of CHRYSLER LLC
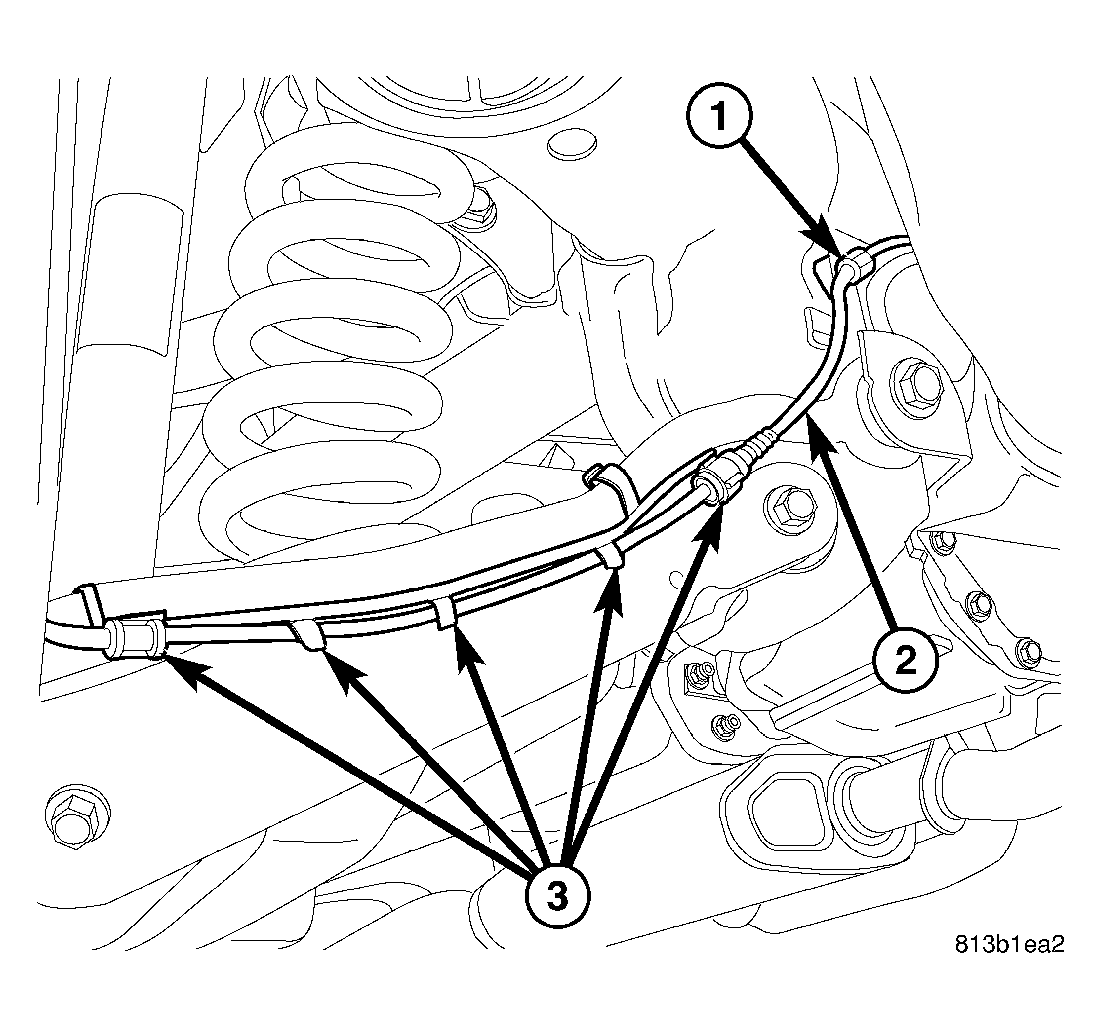
- If equipped, remove wheel speed sensor cable (2) from toe link.
 Courtesy of CHRYSLER LLC
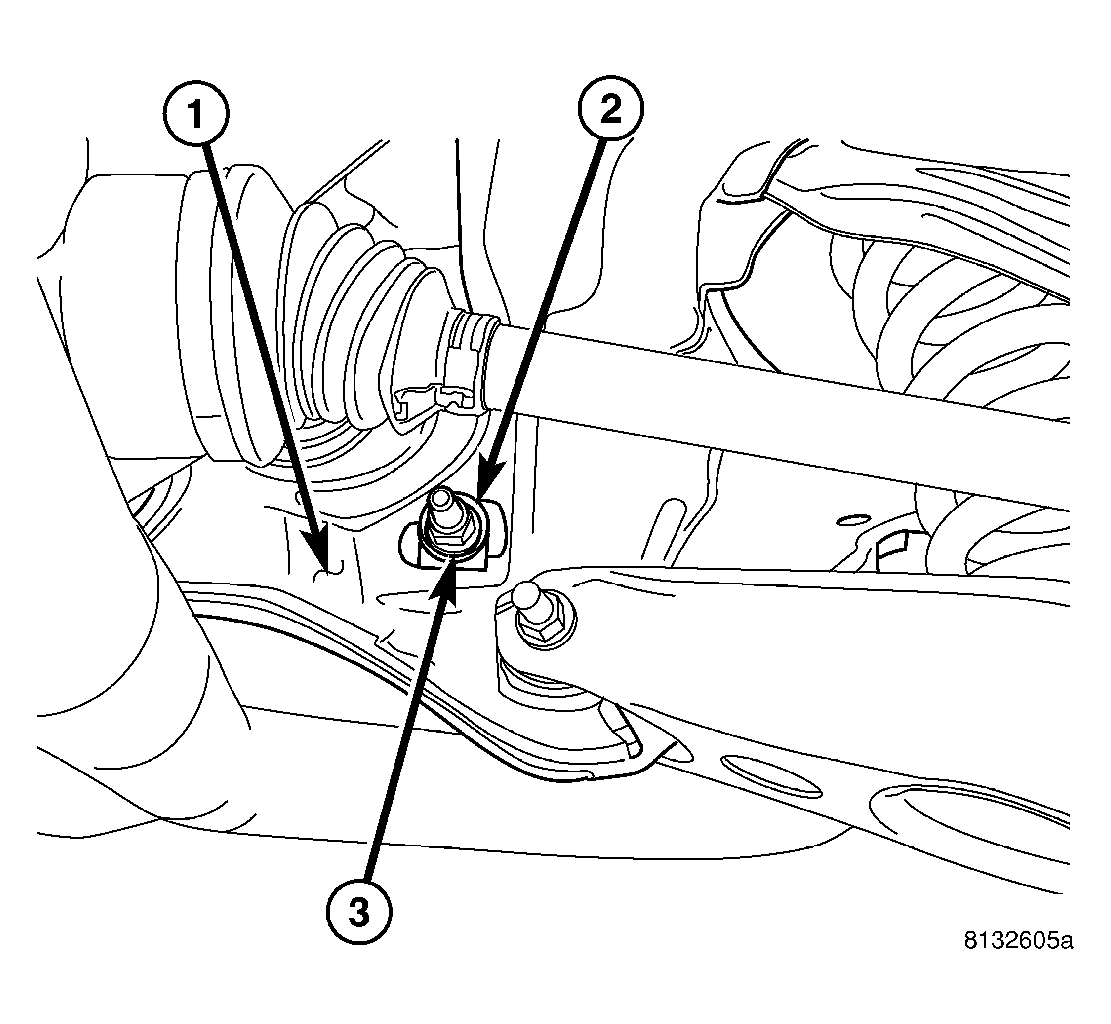
- While holding toe adjustment cam bolt from rotating, remove nut (3) securing toe link at crossmember (1).
 Courtesy of CHRYSLER LLC
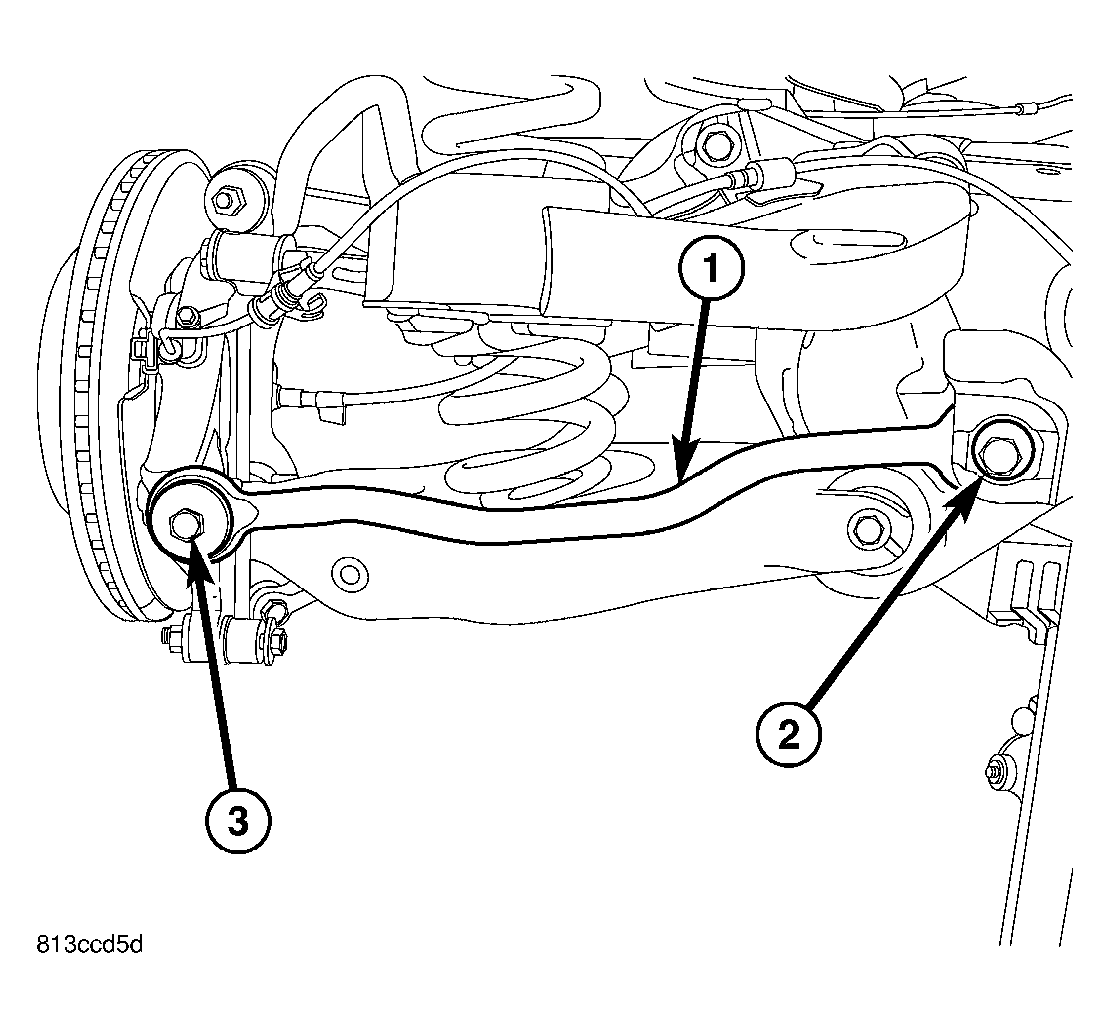
- Slide cam bolt (2) rearward out of crossmember and link (1).
- Remove mounting bolt (3) and nut at knuckle.
- Remove toe link (1).